• Skip to primary navigation
  • Skip to main content
  • Skip to primary sidebar

A cook named Rebecca

  • Home
  • Favorite Cookbooks
  • Recipes
  • Travel
You are here: Home / Home

Best Fried Chicken

July 23, 2021 by Becky Spoon

Please follow and like us:
onpost_follow
fb-share-icon
Tweet
Jump to Recipe
Best Fried Chicken
Best Fried Chicken

This “Best Fried Chicken” lives up to it’s name! Not only is the batter well seasoned, but the chicken itself is loaded with flavor! This well seasoned chicken is because of two brining’s. One is a water brine loaded with spices and the second brine is with buttermilk, also loaded with spices.

Best Fried Chicken

“Full of Flavor” Best Fried Chicken

Fried Chicken is something my mother always made on Sundays; well, didn’t matter when, she made amazing fried chicken. I’m posting this recipe on Friday for your Sunday lunch because it takes a little time with brining and soaking and you still have plenty of time.

The first brine is water, kosher salt, sugar, onion powder, garlic powder, black pepper and bay leaves. The second brine, or soak is with buttermilk, salt, pepper, garlic powder, smoked paprika and hot sauce. After all this the chicken is dredged in flour that has been seasoned with salt, pepper, onion powder, garlic powder, and more smoked paprika.

“Full of Flavor” Best Fried Chicken

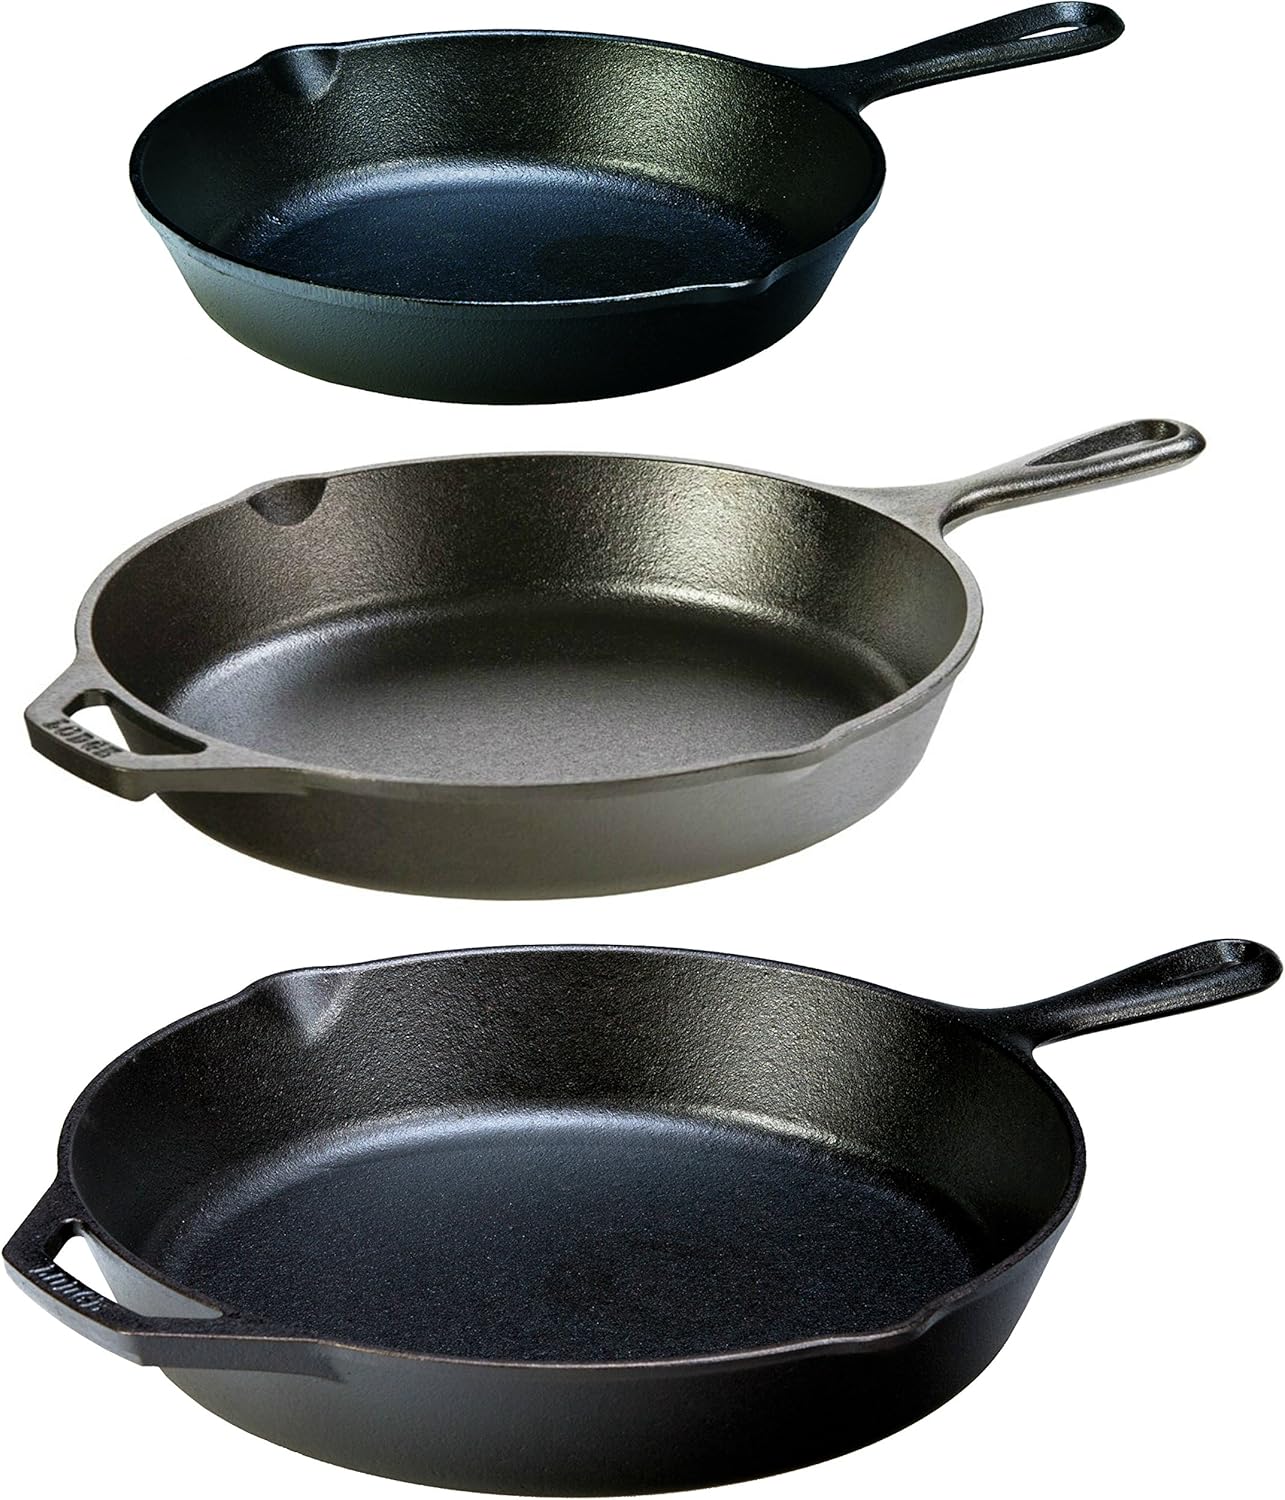
What’s the best oil to use? I used peanut oil, but you can use vegetable oil, corn oil or canola oil. I fry my chicken in a large iron skillet or a Dutch oven that is also cast iron. These are great cast iron skillets: https://affiliate-program.amazon.com/home#:~:text=https%3A//amzn.to/3kQZntS.

I love all of these sizes and use them all!

“Full of Flavor” Best Fried Chicken

Best Fried Chicken

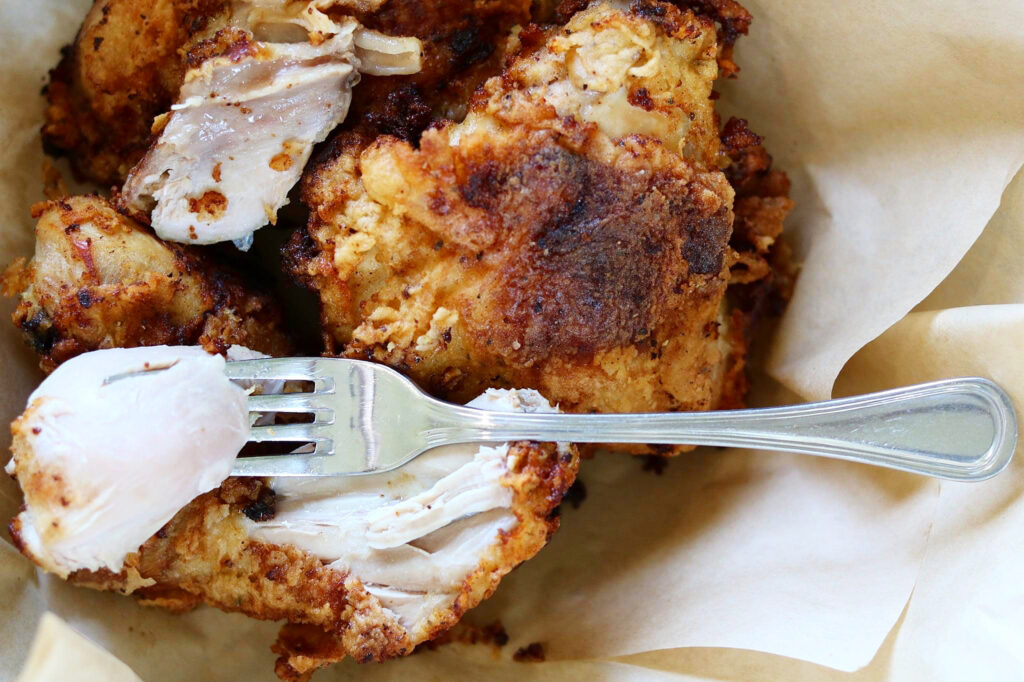
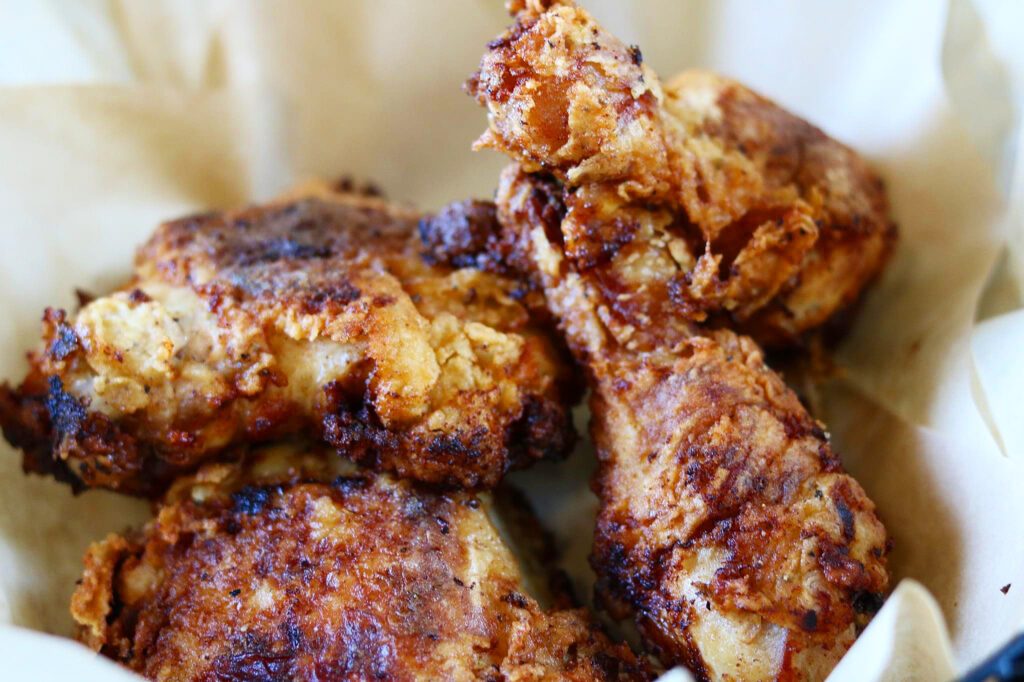
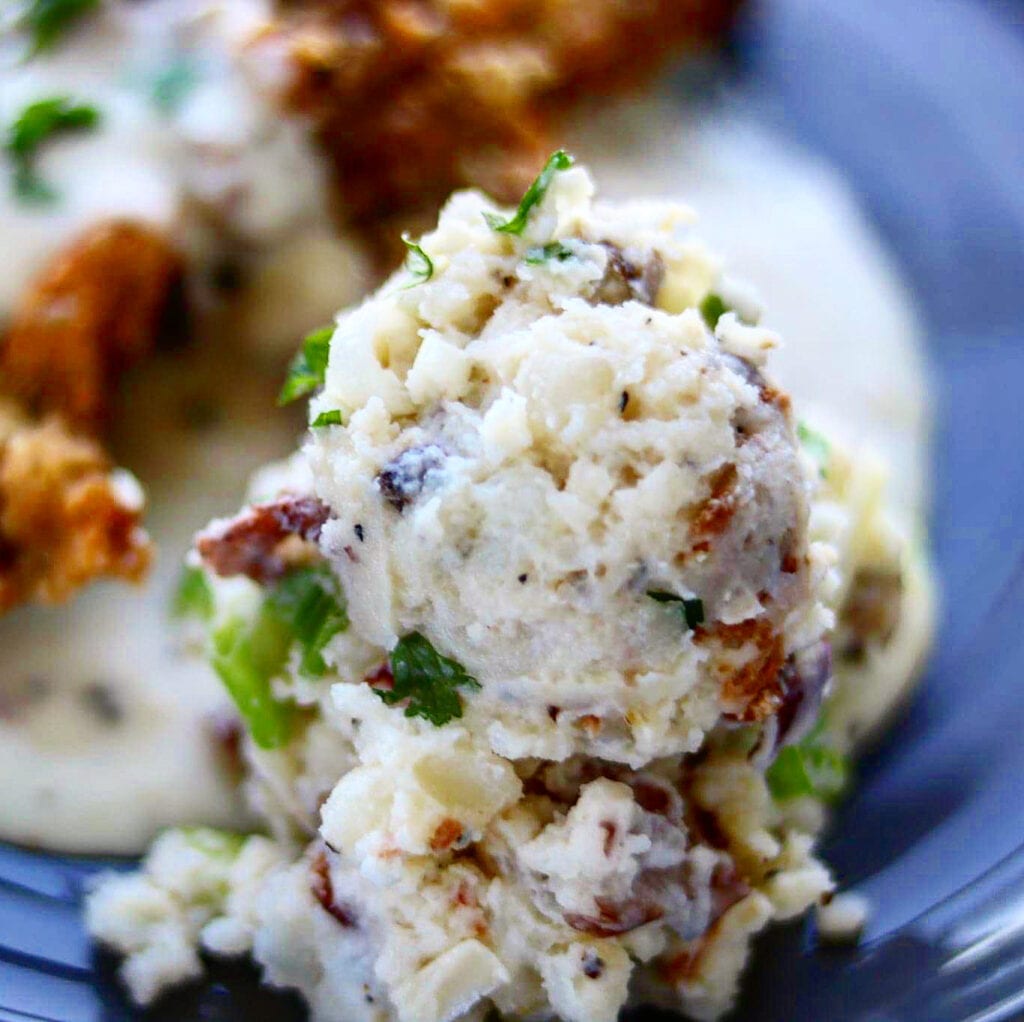
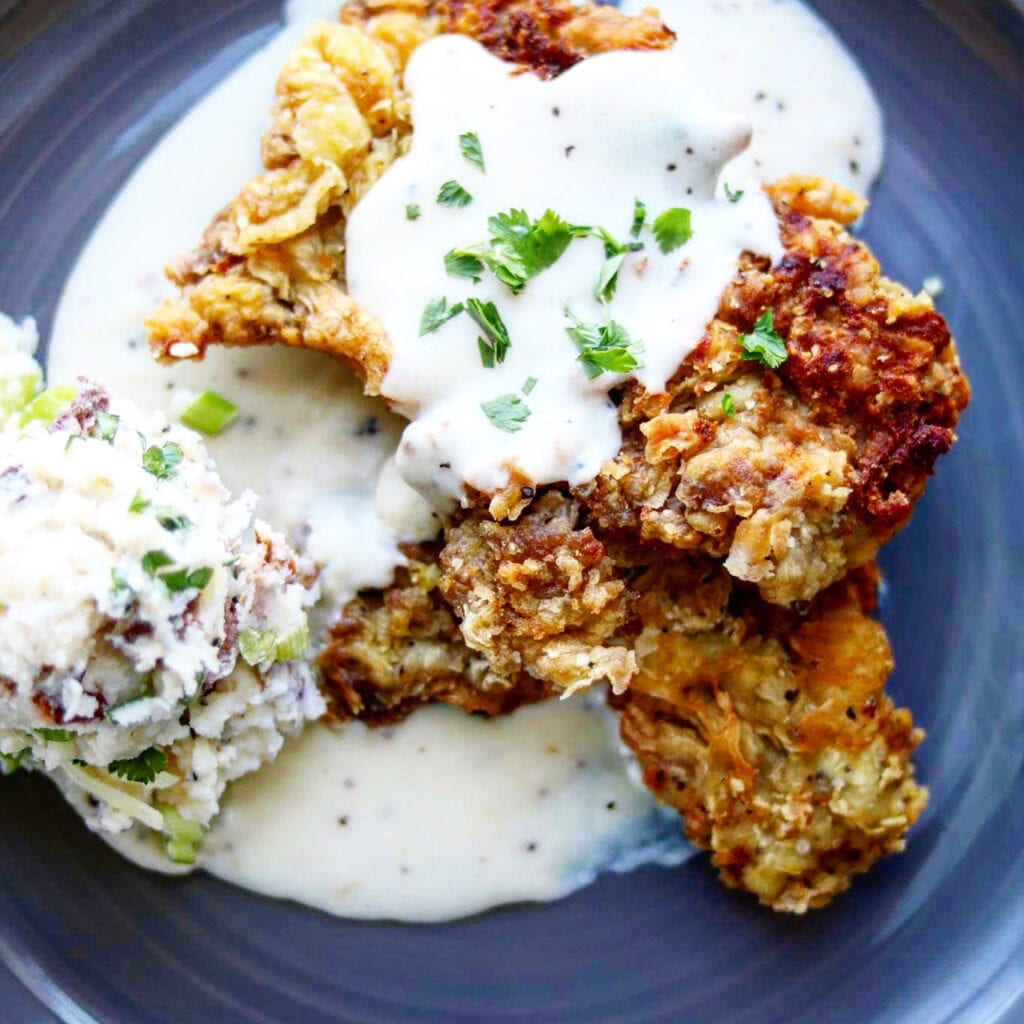
Just look how juicy and delicious this chicken looks! I’m dying to make it again by just looking at these photos! I served this with chunky mashed potatoes. I just boiled Idaho potatoes, drained them, put them back into the pan with the heat still on and allowed the water to evaporate. Then I added butter, salt and pepper, and milk if needed. I made cream gravy which is kind of a must for fried chicken in the South. To serve, I piled the potatoes on a plate, topped with the chicken and some gravy, then sliced some green onions to scatter around. So delicious! This is another potato dish I love that would be perfect with this chicken: delicious smashed potatoes.

Smashed Potatoes
Smashed Potatoes

These garlic Green Beans would be a great addition: Perfect Green Beans with Garlic and Lemon in Browned Butter

Here is another wonderful recipe…and the recipe for the creamed gravy: the best – chicken fried pork steak with cream gravy.

Chicken Fried Pork Steak with Cream Gravy

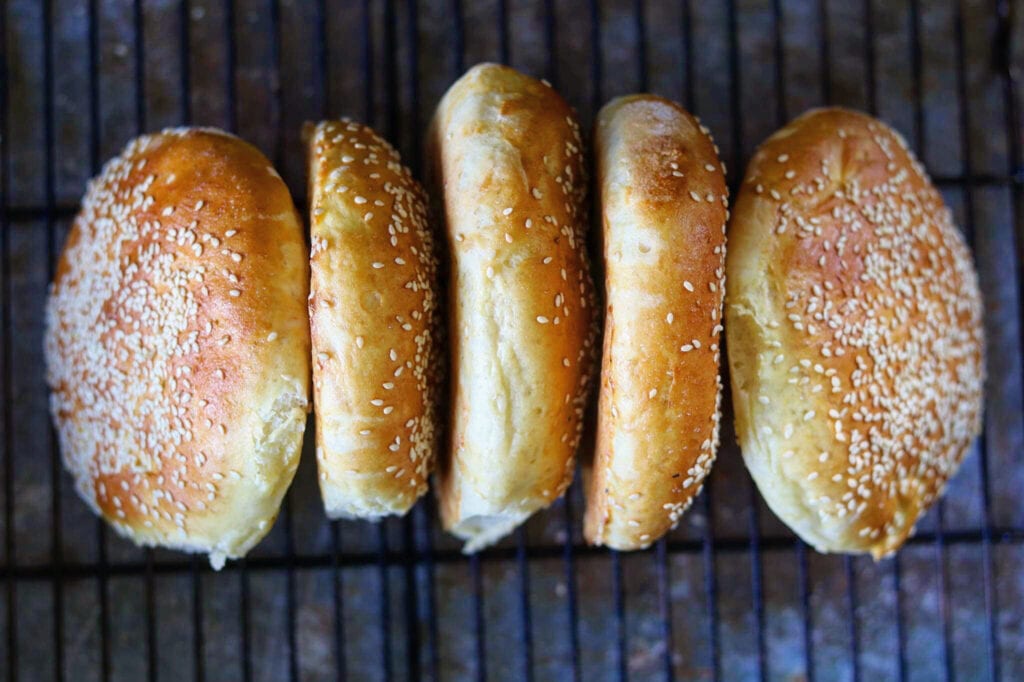
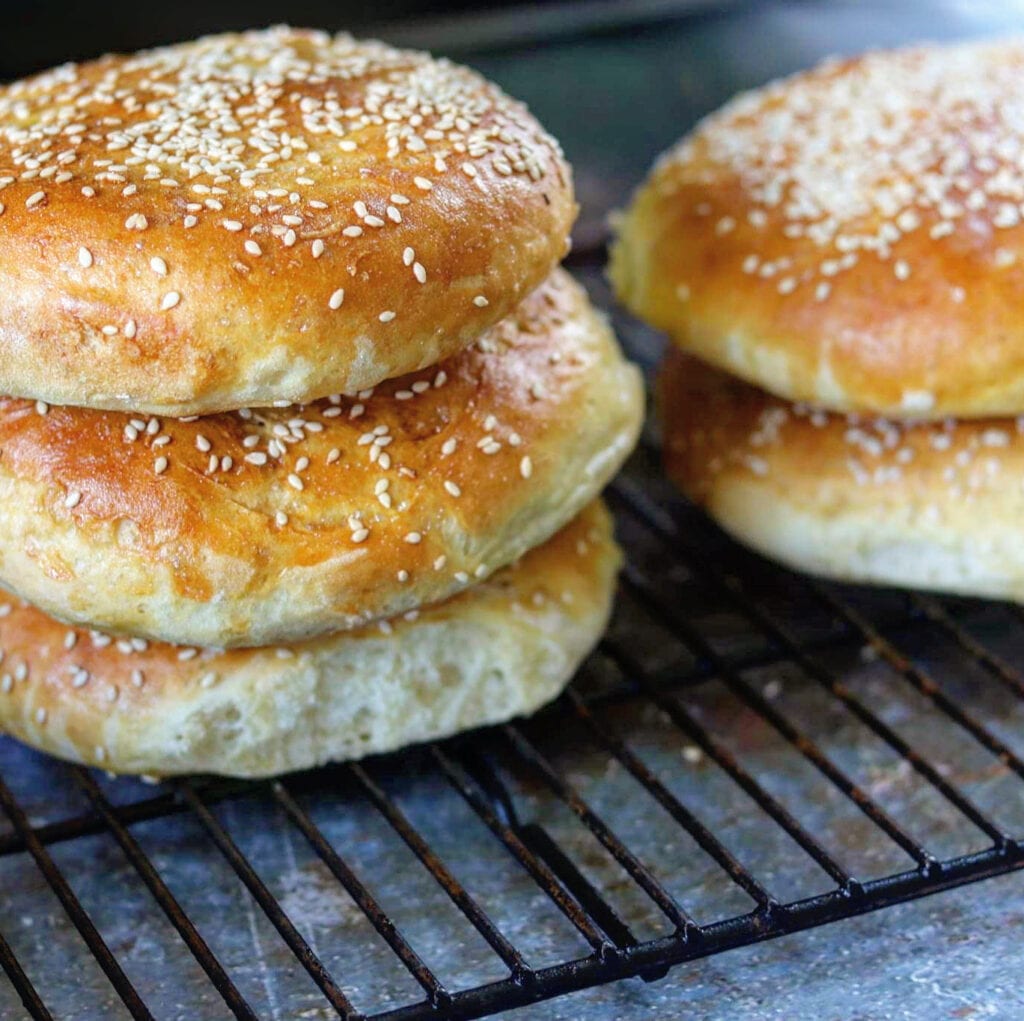
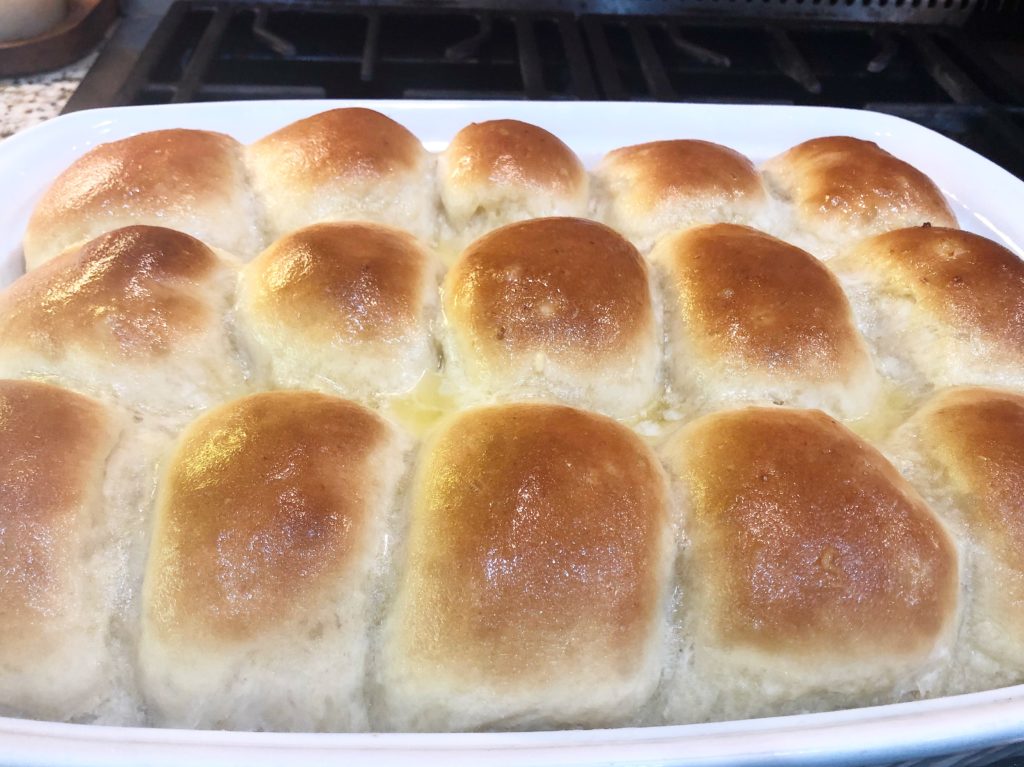
and, don’t forget the bread for sopping up the delicious gravy! These rolls are delicious!My Best Dinner Rolls Yet!

Dinner Rolls
My Best Dinner Rolls Yet!

Here’s the recipe for this delicious fried chicken! Enjoy!

Best Fried Chicken

Best Fried Chicken

I wish you could taste this "Best Fried Chicken". Not only is the batter well seasoned, but the chicken itself is loaded with flavor! This well seasoned chicken is because of two brining's. One is a water brine loaded with spices and the second brine is with buttermilk, also loaded with spices.
Print Recipe Pin Recipe
Course dinner, Lunch, Main Course
Cuisine American

Ingredients
  

For the Brine

  • 3 quarts cold water
  • 1/3 cup kosher salt
  • 1/4 cup granulated sugar
  • 1 tbsp onion powder
  • 2 tsps black pepper
  • 2-3 bay leaves

Buttermilk Brine

  • 1 quart buttermilk
  • 1 tsp kosher salt
  • 1 tsp black pepper
  • 1 tsp garlic powder
  • 1/2 tsp smoked paprika
  • 1 tsp hot sauce

For the seasoned Flour

  • 3 cups all purpose flour
  • 1 tsp kosher salt
  • 1 tbp onion powder
  • 1 tbsp garlic powder
  • 1 tsp smoked paprika
  • 1 tsp freshly ground pepper

The Chicken

  • 8-10 pieces chicken (breast, thighs, legs)
  • 1 quart oil for frying

Instructions
 

  • In a large stockpot, add 2 quarts water. Add the salt, sugar, onion powder, garlic powder, pepper, and bay leaves. Allow the mixture to come up to a rolling boil. Reduce the heat and simmer for about 10 minutes. 
  • Remove the pot from the heat and pour in remaining 1 quart of water. Transfer the brine into the refrigerator to cool down completely. Once the brine is chilled, place the chicken pieces into a large bowl or container and proceed with the next step.
  • Pour the brine over the chicken pieces and make sure all of the chicken pieces are fully covered. Transfer the container to the refrigerator and brine the chicken for at least 6 hours. Remove the chicken from the brine and discard the liquid.
  • In a large bowl, combine the buttermilk, salt, pepper, garlic powder, paprika, and hot sauce together. Add chicken pieces into the buttermilk mixture. Make sure all pieces are in the mixture. Transfer the bowl to the refrigerator for at least 6 hours.
  • After soaking in the buttermilk mixture, place the chicken pieces into a colander or other vessel to drain the chicken and then discard the buttermilk soak.

Frying the Chicken

  • Heat a 10-inch or larger cast-iron skillet (or a heavy bottomed pot such as a dutch oven), over medium-high heat and pour in the oil. Allow the oil to reach a temperature of 350°F (using a deep fry thermometer will help to know when you achieve optimal frying time!). 
  • While the oil is heating, prepare the seasoned flour dredge. In a large shallow bowl combine the flour, salt, onion powder, garlic powder, paprika, and black pepper.
  • Dredge each piece of chicken in the seasoned flour, making sure to fully coat the chicken on all sides. Shake off any excess flour. Transfer the chicken to a baking sheet. Repeat this process until all of the chicken pieces are dredged.
  • Once the oil has reached 350°F add a few pieces of chicken- making sure to not crowd the pan. Fry the chicken until an internal temperature reaches 160-165 and is golden brown.
  • Transfer the fried chicken to a wire rack to drain and repeat the process until all of the chicken is fried. Serve with our favorite side dishes and enjoy!
Keyword buttermilk brined, buttermilk fried chicken, chicken, fried chicken, southern fried chicken
  • Click to share on Pinterest (Opens in new window) Pinterest
  • Click to share on Facebook (Opens in new window) Facebook
  • Click to email a link to a friend (Opens in new window) Email
  • Click to print (Opens in new window) Print
  • Click to share on X (Opens in new window) X
  • Click to share on Tumblr (Opens in new window) Tumblr
  • More
  • Click to share on Reddit (Opens in new window) Reddit

Filed Under: Poultry Tagged With: best fried chicken, chicken, fried chicken, southern fried chicken

this – simple bolognese over pappardelle

September 24, 2020 by Becky Spoon

Simple Bolognese over Pappardelle
Please follow and like us:
onpost_follow
fb-share-icon
Tweet
Simple Bolognese over Pappardelle

This simple Bolognese over pappardelle is just that – simple and easy. When you think about Bolognese you think about a long process of hours of cooking. Don’t get me wrong, that is a beautiful Bolognese and it is what I always make, but you know, during hectic times, short cuts really matter.

Simple Bolognese over Pappardelle

The other great thing about a Bolognese is that you can cook a big batch and freeze. Move it to the refrigerator the day of to thaw. When you are ready to serve, cook your pasta, add a salad and a piece of garlic bread and you have a meal done. Don’t want a side dish? Cook your pasta, combine with your Bolognese and you’re done. The good thing is that this is delicious and kids love Spaghetti and a meat sauce.

Simple Bolognese over Pappardelle

simple bolognese over pappardelle

What makes this sauce so simple is that you use a jar of your favorite store-bought marinara! Yes! You don’t have to buy an expensive jar of marinara! Honestly, I’ve tried many and I’d say they are all pretty good.

I like to use a large pasta with a meat sauce and pappardelle is one of my favorites. I live rural and can’t find it at local stores, I have to go to a larger major store, but I ordered it on line for years. https://amzn.to/3hYxMBH.

I love these big noodles!! They are perfect with the hearty meat sauce.

Simple Bolognese over Pappardelle

this – simple Bolognese over pappardelle

I always have leftovers, so lasagna is always a plan or try these stuffed shells: https://the2spoons.com/wow-stuffed-shells-with-bolognese/

Stuffed Shells with Bolognese

Those look delicious!

Here’s the recipe for this simple recipe! Let me know what you think!

Simple Bolognese over Pappardelle

Simple Bolognese over Pappardelle

Print Recipe Pin Recipe
Servings 6 servings

Ingredients
  

  • 2 tbsp olive oil
  • 2 tbsp butter
  • 1 cup grated carrots
  • 1 cup celery, finely chopped
  • 2 lbs ground beef (80/20)
  • 1 25 oz jar of store bought marinara
  • 1/2 cup heavy cream
  • salt and pepper to taste
  • couple of pinches of red pepper flakes (optional)
  • 1 lb pappardelle or other wide pasta noodle
  • Parmesan cheese for serving
  • fresh basil or Italian parsley for serving

Instructions
 

  • Add the olive oil and butter to a large saucepan. Add the carrots, celery and onions and sauté until the vegetables are tender. Add the ground beef and cook until browned, breaking up the meat.
  • Add the jar of marinara along with salt and pepper to taste along with the red pepper flakes if adding and cook until the sauce has thickened, about 30 minutes. Add the heavy cream.
  • Cook your pasta according to package directions. I don't drain, I add my pasta to a separate separate skillet or large pan that I have added some of the sauce, adding more sauce along with a little of the pasta water, until all of your pasta is completely coated. Cook for just a minute or so, adding more pasta water if needed until the pasta has combined with the sauce. Serve immediately with parmesan cheese and fresh herbs like Italian parsley or basil. Enjoy!
  • Click to share on Pinterest (Opens in new window) Pinterest
  • Click to share on Facebook (Opens in new window) Facebook
  • Click to email a link to a friend (Opens in new window) Email
  • Click to print (Opens in new window) Print
  • Click to share on X (Opens in new window) X
  • Click to share on Tumblr (Opens in new window) Tumblr
  • More
  • Click to share on Reddit (Opens in new window) Reddit

Filed Under: Pasta Tagged With: bolognese, easy bolognese

delicious shakshuka or eggs in tomatoes.

September 24, 2020 by Becky Spoon

Shakshuka with Feta
Please follow and like us:
onpost_follow
fb-share-icon
Tweet
Shakshuka with Feta
Shakshuka with Feta

Have you had Shakshuka before? If not, you have to make it! This dish is so easy, yet soooo delicious.

What is Shakshuka? Shakshouka (Arabic: شكشوكة‎, also spelled shakshuka or chakchouka) is a dish of eggs poached in a sauce of tomatoes, olive oil, peppers, onion and garlic, and commonly spiced with cumin, paprika, cayenne pepper, and nutmeg. The dish has existed in Mediterranean cultures for centuries. There you go! I see many variations of the recipe! One thing I did was add Harissa paste, which I love, love! It adds a little heat and lots of spice to the dish. This is the Harissa I buy: https://amzn.to/302WXNe

Here’s a link from Food and Wine that gives some other uses for Harissa https://www.foodandwine.com/lifestyle/9-ways-use-harissa.

1. Burgers. Mix harissa paste into the burger meat itself or blend it into ketchup or mayo for a zingy condiment.

2. Roasted vegetables. Harissa’s heat is especially good with sweet vegetables like squash, carrots and fennel; toss the chopped vegetables with the paste before roasting.

3. Salad dressing. Add a spicy kick to salad by whisking harissa into a lemony dressing. It’s delicious tossed with raw julienned carrots.

4. Rub. The spice paste becomes an instant rub for luxe cuts of meat like a crown roast of pork or a leg of lamb or more humble chicken legs.

5. Hummus. Mix it into store-bought hummus or make your own, like this one with carrots.

6. Yogurt. Whisk harissa into yogurt to make a hot-and-cold sauce for grilled meats, like lamb chops.

7. Pasta. Southern Italy is not so far from North Africa, so using it in pasta dishes isn’t a huge stretch. Try it in a basic tomato sauce or with roasted broccoli rabe.

8. Chicken wings. Any spicy condiment always ends up on a chicken wingand harissa is no exception. Try these sticky wings made with harissa honey.

9. Eggs. More complex than Tabasco and even everyone’s beloved Sriracha, harissa is insanely delicious on a breakfast sandwich.

Shakshuka with Feta
Shakshuka with Feta

and of course, Shakshuka.

delicious shakshuka or eggs in tomatoes.

Shakshuka with Feta
Shakshuka with Feta

This dish came together so fast! I didn’t have any, but a delicious flat bread would work so well with this, or even just a piece of toast or a tortilla!

To make this I sautéed onions, garlic and peppers, added some smoky paprika, fresh tomatoes and the harissa! I used fresh tomatoes, but you can use a good canned tomato too like San Marzano. I then made a couple of nest in the sauce and added some eggs, allowed them to cook and had a delicious breakfast! I dotted it with some feta cheese too. If I had Haloumi cheese I would have used that.

Need another breakfast dish ? Try this cream cheese and salmon toast! https://the2spoons.com/toast-with-cream-cheese-and-salmon/

Toast with Cream Cheese and Salmon

Here’s the recipe for the Shashuka! Enjoy!

Shakshuka with Feta

Shakshuka with Feta

Print Recipe Pin Recipe
Course Breakfast, brunch
Cuisine African
Servings 2 servings

Ingredients
  

  • 2 tbsp extra virgin olive oil
  • 1/2 white onion, sliced
  • 1/2 red or green bell pepper, or a combination
  • 2 cloves garlic, chopped
  • 5-6 roma tomatoes, diced or 14 1/2 oz can tomatoes
  • 1 tsp smoked paprika
  • 1 tsp harissa
  • 2-4 eggs

Instructions
 

  • Add oil to a non stick skillet. Add the onions, peppers and garlic and cook until the onions are translucent. Stir in the smoked paprika and harissa and toast, stirring to prevent burning.
  • Add the tomatoes , lower the heat to medium low and cover the pan. Continue to cook tomatoes about 10-15 minutes , stirring occasionally.
  • When ; your tomatoes have broken down and a nice sauce has formed, create a nest or in the sauce. Crack eggs into each next, or hole.
  • Cover your pan with a lid and cook until the whites have set and are cooked through, yet your yolks are still runny. Doneness of your eggs are a personal preference. When done, garnish with fresh parley or cilantro.
Keyword breakfast, brunch, eggs, feta, fresh tomato sauce, harissa, peppers, shakshuka

  • Click to share on Pinterest (Opens in new window) Pinterest
  • Click to share on Facebook (Opens in new window) Facebook
  • Click to email a link to a friend (Opens in new window) Email
  • Click to print (Opens in new window) Print
  • Click to share on X (Opens in new window) X
  • Click to share on Tumblr (Opens in new window) Tumblr
  • More
  • Click to share on Reddit (Opens in new window) Reddit

Filed Under: Breakfast/Brunch Tagged With: shakshuka

love these double-pork carnitas on homemade corn tortillas.

September 22, 2020 by Becky Spoon

Double-Pork Carnitas
Please follow and like us:
onpost_follow
fb-share-icon
Tweet
Double-Pork Carnitas

These Double-Pork Carnitas are perfect for your Taco Tuesday! Double Pork, yes! These carnitas have a combination of boneless pork shoulder (Boston Butt) and pork belly. Yes pork belly. If you haven’t tried pork belly you must! I get my pork belly from the specialty meat market at my local HEB. Ask your meat department how you can get it because it is delicious.

I also made homemade tortillas to go with these. Of course you do not have to make homemade, but they sure make a huge difference. They were delicious. I’m still trying to perfect the art of tortilla making, because there is a a process. here’s a video I watched. https://www.youtube.com/watch?v=HzKuWBDDLPg.

If you don’t have a tortilla press, here’s the one I purchased. It just makes it so much easier and you can get a good consistency. This is the press I have: https://amzn.to/32SV8EH.

love these double-pork carnitas on homemade corn tortillas.

Double Pork Carnitas

I started the carnitas by cutting the pork shoulder into 1 1/2 inch pieces and cutting the pork belly into 1 inch pieces then adding them to a pot with the stock and salt and pepper. Bring this to a boil, then reduce the heat and simmer for about 2 hours.

Double-Pork Carnitas

Then I transfer the pork in batches along with some pan juices to a non-stick skillet and cook over high heat until the liquid evaporates and the pork begins to fry in its rendered fat.

I serve these with chopped white onion, lime wedges, dried oregano, cilantro, shredded cabbage and sometimes I serve with green pica de gallo!

Or, with my homemade salsa! I’ll share those recipes when I post them! But, until then these are perfect with chopped onions, cilantro, limes, and your favorite red or green salsa!

Heres my carne asada tacos, since were talking tacos! https://the2spoons.com/simple-favorite-red-chile-marinated-carne-asada-tacos/

Here’s the recipe for the carnitas! Enjoy!

Double-Pork Carnitas

Double-pork Carnitas

Print Recipe Pin Recipe
Course dinner, Lunch, Main Course
Cuisine Mexican

Ingredients
  

  • 3 Lbs Boneless pork shoulder (Boston butt) cut into 1 1/2 inch pieces
  • 1 Lb Pork belly cut into 1 inch pieces
  • 1 Cup Chicken stock or low sodium broth
  • 1 Tbsp Kosher salt
  • 1 Tsp Freshly ground pepper
  • warm tortillas, chopped white onion, limes, avocados, chopped cilantro, favorite salsa, chopped cabbage for serving

Instructions
 

  • Place pork shoulder, pork belly, stock, salt, and pepper in a large heavy pot; cover and bring to a boil over medium-low. Reduce heat and simmer until pork is tender and shreds easily, about 2 hours. Uncover; cook 10 minutes to reduce liquid (but not completely). Remove from heat.
    Transfer half of pork and pan juices to a large skillet, preferably nonstick, and cook over high until liquid evaporates and pork begins to fry in its rendered fat. Fry, stirring occasionally and pressing on pork with spoon to break up, until browned and just beginning to crisp, 10–15 minutes. Most of the pieces should be bite-size with some smaller shredded and super-crisp bits in the mix. Using a slotted spoon, transfer to a paper towel–lined baking sheet. Cover with foil to keep warm and moist. Repeat with remaining pork.
    Serve carnitas with tortillas, onion, limes, avocado, herbs, and cabbage.
    Do Ahead: Pork can be braised (do not fry) 3 days ahead. Cover and chill.
Keyword carnitas, double pork, double pork carnitas, pork belly, pork butt, pork shoulder, taco tuesday, tacos
  • Click to share on Pinterest (Opens in new window) Pinterest
  • Click to share on Facebook (Opens in new window) Facebook
  • Click to email a link to a friend (Opens in new window) Email
  • Click to print (Opens in new window) Print
  • Click to share on X (Opens in new window) X
  • Click to share on Tumblr (Opens in new window) Tumblr
  • More
  • Click to share on Reddit (Opens in new window) Reddit

Filed Under: Poultry Tagged With: carnita tacos, pork belly, pork shoulder

the best – potato hamburger buns.

September 17, 2020 by Becky Spoon

Homemade Potato Hamburger Buns
Please follow and like us:
onpost_follow
fb-share-icon
Tweet
Homemade Potato Hamburger Buns

These potato hamburger buns turned out perfect. I was afraid they’d be heavy, but they were light as a feather. The mashed potatoes used in these buns are what make them so light, yet so soft.

The other day I wanted to make Hatch Green Chile Cheeseburgers (I’ll give you that recipe later); anyway, I didn’t have any buns! I didn’t want to go to the store so I made these instead. Was I glad? They were the perfect bun for a cheeseburger.

Homemade Potato Hamburger Buns

Just look how beautiful these buns are! Love the sesame seeds on top too. As you can see they are not all perfectly the same size, but I tried! But gosh, they’re homemade so there will be imperfections! That’s ok!! The way they taste and work for your sandwich or burger is what counts.

I have a bun pan, but I have it packed away. So instead, I used these rings that I use for a lot of different things. https://amzn.to/3iyIy2G

I didn’t cook them in these rings, but I added the portioned dough to them, pressing down to remove air bubbles, then placed it on a parchment lined sheet pan for a final rise.

the best – potato hamburger buns.

Here is another recipe on the bog for potato rolls which are pretty similar: https://the2spoons.com/my-best-dinner-rolls-yet/

Dinner Rolls
My Best Dinner Rolls Yet!

Here’s the recipe for these great hamburger buns!! You’ve got to try these.

Homemade Potato Hamburger Buns

Potato Bun Recipe

Print Recipe Pin Recipe

Ingredients
  

  • 1/2 lb russet potatoes, peeled and cut into 1-inch pieces (about one large baking potato or 2 medium)
  • 2 tbsp unsalted butter
  • 2 1/4 cups bread flour
  • 1 tbsp sugar
  • 1 tbsp instant yeast
  • 1 cup water you cooked the potatoes in
  • 1 tsp salt
  • 2 large eggs, beaten
  • sesame seeds, optional

Instructions
 

  • Cover the potatoes with water in a medium saucepan, bring to a boil over high heat, then reduce the heat to medium-low; simmer until the potatoes are cooked through, about 8-10 minutes. Transfer 1 cup of the potato water to a bowl then drain the potatoes and return them to the hot saucepan. Over low heat, cook the potatoes while shaking to remove the surface moisture, about 1 minute.
  • Process the potatoes with a food mill or ricer (or mash well with a masher – they should be very smooth) into the saucepan. Measure out 1 cup of potatoes, add to a medium bowl and mix in the butter until melted. Set aside.
  • In the bowl of a stand mixer, combine the sugar, yeast, and the potato water. Allow the mixture to become frothy. If it doesn't your yeast is not good and start over. With the machine running and using the dough hook add the potatoes, salt and one egg. After combined start adding the flour, a little at a time, until the dough is soft but still a little sticky. Knead the dough for 8-10 minutes.
    Remove the dough and shape into a ball. Lightly grease the mixer bowl and return the dough to the bowl, coating it lightly in the oil. Cover tightly with plastic wrap and let the dough rise in a warm spot until almost doubled in volume, about 30-40 minutes. Very warm kitchens will require less time.
    Turn the dough out onto a lightly floured surface, pat it into an 8-inch square, and cut the square into 9 equal pieces; separate the pieces and cover them loosely with plastic wrap to prevent a skin from forming on the top. Working with one at a time, roll the dough rounds into a tight balls and return them to the work surface under the plastic wrap; allow them to rest for 15 minutes.
    Line two large baking sheets with parchment paper. Firmly press each dough round into a 3 ½-inch disk, pushing out large pockets of air from the dough. Line the disks up on the baking sheets and cover loosely with plastic wrap. Allow the dough to proof at room temperature until almost doubled in size, another 30-40 minutes. While the dough proofs, preheat the oven to 425° F with the racks in the two center positions of the oven.
    In a small bowl, mix the remaining egg with a tablespoon of water. Lightly brush the tops of the dough rounds with the egg wash and sprinkle with sesame seeds, if using.
    Bake for 15-18 minutes, rotating pans halfway through the time from top to bottom and front to back, until the buns are a deep golden brown. Transfer the pans to wire racks to cool for 5 minutes then transfer the buns to the racks to cool completely before slicing.
    adapted from Cook's Illustrated
  • Click to share on Pinterest (Opens in new window) Pinterest
  • Click to share on Facebook (Opens in new window) Facebook
  • Click to email a link to a friend (Opens in new window) Email
  • Click to print (Opens in new window) Print
  • Click to share on X (Opens in new window) X
  • Click to share on Tumblr (Opens in new window) Tumblr
  • More
  • Click to share on Reddit (Opens in new window) Reddit

Filed Under: Bread Tagged With: buns, potato, potato buns

amazing golden fried rice with salmon garnished with Furikake.

September 16, 2020 by Becky Spoon

Golden Fried Rice with Salmon
Please follow and like us:
onpost_follow
fb-share-icon
Tweet
Golden Fried Rice with Salmon

Ya’ll this golden fried rice with salmon is absolutely delicious. This was on the front of the bon Appetit magazine September issue and I had to make it. Wow! I’m so glad I did.

Golden Fried Rice with Salmon

If you aren’t familiar with Furikake, it is a Japanese multi purpose seasoning. The ingredients are sesame seeds, nori, salt, sugar, chili flakes, bonito which is dried fish and maybe miso powder. You can buy at an Asian store or I ordered on line. Trader Joe’s has a Furikake and that’s what I ordered. Here’s the link: https://amzn.to/2FACzMt

amazing golden fried rice with salmon garnished with Furikake.

Golden Fried Rice with Salmon

This is what you will need to make this dish:

  • eggs
  • chilled cooked short grain white rice
  • vegetable oil
  • salmon filet or filets
  • ginger
  • onion
  • sugar
  • scallions
  • garlic
  • Furikake for serving

The yellow of the rice comes from dividing the eggs, yolks and whites, then adding the rice and yolks to a bowl to make sure every grain of the rice is covered before frying in a pan.

I used a non stick skillet which I think worked better because you do want to cook at a medium high heat so the rice will actually brown and crisp a little. This is really an easy recipe, just requires the right technique.

amazing golden fried rice with salmon garnished with Furikake.

Want another recipe for fried rice? https://the2spoons.com/delicious-easy-shrimp-fried-rice/

Shrimp Fried Rice
Shrimp Fried Rice

Both of these are delicious. Ok, here’s the recipe for this new recipe! I hope you try it!

golden fried rice with salmon

Print Recipe
Course dinner, Lunch, Main Course
Cuisine Asian
Servings 4 servings

Ingredients
  

  • 4 large eggs
  • 4 cups chilled cooked short-grain white rice
  • 5 tbsp vegetable oil, divided, plus more for drizzling
  • kosher salt
  • 1 12-oz salmon filet cut into one inch pieces
  • 1 1" piece ginger, peeled, finely copped
  • 1/2 small onion, finely chopped
  • 1 tsp sugar
  • 4 scallions, white and pale green parts finely chopped, dark green parts thinly sliced, separated
  • 3 garlic cloves, finely chopped
  • Furikake (for serving

Instructions
 

  • Separate egg yolks from whites, placing yolks in a medium bowl and whites in a small bowl. Add rice to bowl with yolks and mix to break up any clumps and coat each grain with yolks (take your time with this as any clumps will cook together); set aside. Stir 2 Tbsp. oil into egg whites and season lightly with salt.
  • Heat a dry large nonstick skillet over high. Add egg white mixture and cook, pushing around constantly with chopsticks or a heatproof rubber spatula, until gently set, about 30 seconds. Transfer to a plate. Wipe out skillet if needed.
  • Heat 1 Tbsp. oil in same skillet over medium-high. Season fish with salt and cook, undisturbed, until golden brown underneath, about 2 minutes. Turn and cook just until lightly browned on the other side and opaque throughout, about 1 minute. Transfer to another plate. Wipe out skillet.
  • Heat 2 Tbsp. oil in skillet over medium-high. Cook ginger, stirring, until very fragrant, about 20 seconds. Add onion and season with a pinch of salt. Cook, stirring, until onion is translucent, about 1 minute (remove from heat if onion starts to go past golden brown). Add reserved rice mixture, sprinkle with sugar, and season with salt. Toss to combine, then cook, undisturbed, until rice is beginning to warm and crisp underneath, about 1 minute. Push some of the rice to the side to clear a few inches in skillet. Drizzle a bit of oil into the clearing. Add scallion white and pale green parts and garlic and cook, stirring, until just softened and fragrant, about 45 seconds. Toss into rice mixture and cook, tossing occasionally, until warmed through and rice is crisp and chewy, about 3 minutes. Return cooked egg whites to pan and cook, tossing and breaking up with spatula until distributed. Return salmon to pan and toss once to combine.
  • Divide among plates and top with furikake and scallion greens.
Keyword fried rice, golden fried rice, golden fried rice with salmon, rice, salmon
  • Click to share on Pinterest (Opens in new window) Pinterest
  • Click to share on Facebook (Opens in new window) Facebook
  • Click to email a link to a friend (Opens in new window) Email
  • Click to print (Opens in new window) Print
  • Click to share on X (Opens in new window) X
  • Click to share on Tumblr (Opens in new window) Tumblr
  • More
  • Click to share on Reddit (Opens in new window) Reddit

Filed Under: Fish/Seafood Tagged With: golden fried rice, salmon

  • « Go to Previous Page
  • Page 1
  • Interim pages omitted …
  • Page 15
  • Page 16
  • Page 17
  • Page 18
  • Page 19
  • Interim pages omitted …
  • Page 67
  • Go to Next Page »

Primary Sidebar

Categories

  • Appetizer
  • Beans, Lentils, Grains, Rice
  • Beef
  • Bread
  • Breakfast/Brunch
  • Cocktails
  • Dessert
  • Dishes of Mexico, Tex Mex and New Mexico Red and Green Chile
  • Fish/Seafood
  • Ice Cream
  • Pasta
  • Pizza
  • Pork
  • Poultry
  • Salad Dressings
  • Salads
  • Salsas
  • Sandwiches/Burgers/Hot Dogs
  • Sauces, Compound Butters, Condiments
  • Side dish
  • Soups/Stews/Gumbo//Chili
  • Stocks, Broths, Gravies
  • Vegetables

Copyright © 2025 The 2 Spoons on the Foodie Pro Theme

Manage Cookie Consent
We use cookies to optimize our website and our service.
Functional Always active
The technical storage or access is strictly necessary for the legitimate purpose of enabling the use of a specific service explicitly requested by the subscriber or user, or for the sole purpose of carrying out the transmission of a communication over an electronic communications network.
Preferences
The technical storage or access is necessary for the legitimate purpose of storing preferences that are not requested by the subscriber or user.
Statistics
The technical storage or access that is used exclusively for statistical purposes. The technical storage or access that is used exclusively for anonymous statistical purposes. Without a subpoena, voluntary compliance on the part of your Internet Service Provider, or additional records from a third party, information stored or retrieved for this purpose alone cannot usually be used to identify you.
Marketing
The technical storage or access is required to create user profiles to send advertising, or to track the user on a website or across several websites for similar marketing purposes.
Manage options Manage services Manage {vendor_count} vendors Read more about these purposes
Preferences
{title} {title} {title}