• Skip to primary navigation
  • Skip to main content
  • Skip to primary sidebar

A cook named Rebecca

  • Home
  • Favorite Cookbooks
  • Recipes
  • Travel
You are here: Home / Archives for Sauces, Compound Butters, Condiments

Sauces, Compound Butters, Condiments

Dirty Spaghetti Recipe: Viral Meal You Must Try

April 23, 2026 by Becky Spoon Leave a Comment

Jump to Recipe
Dirty Spaghetti
Dirty Spaghetti

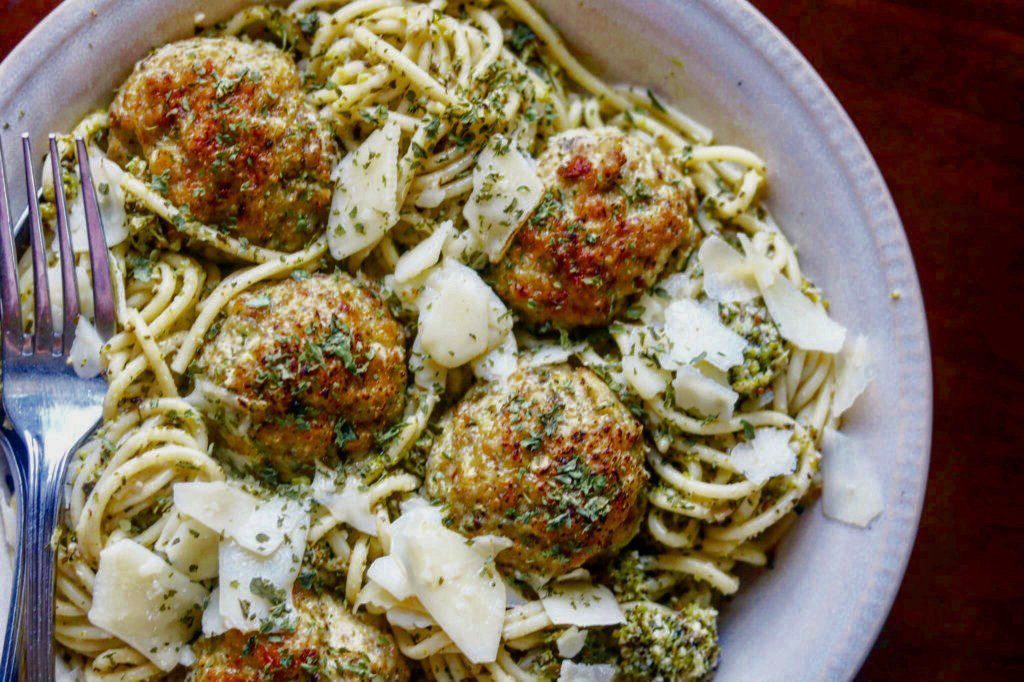
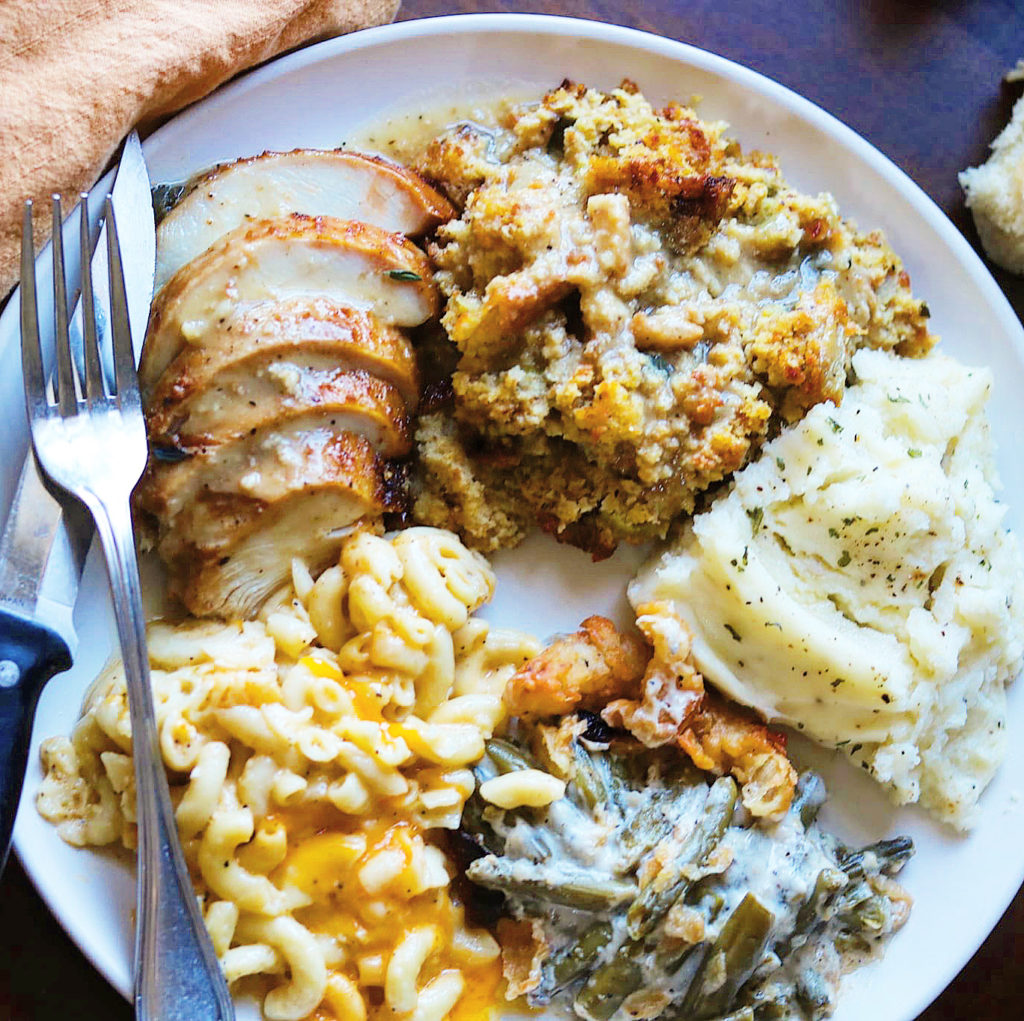
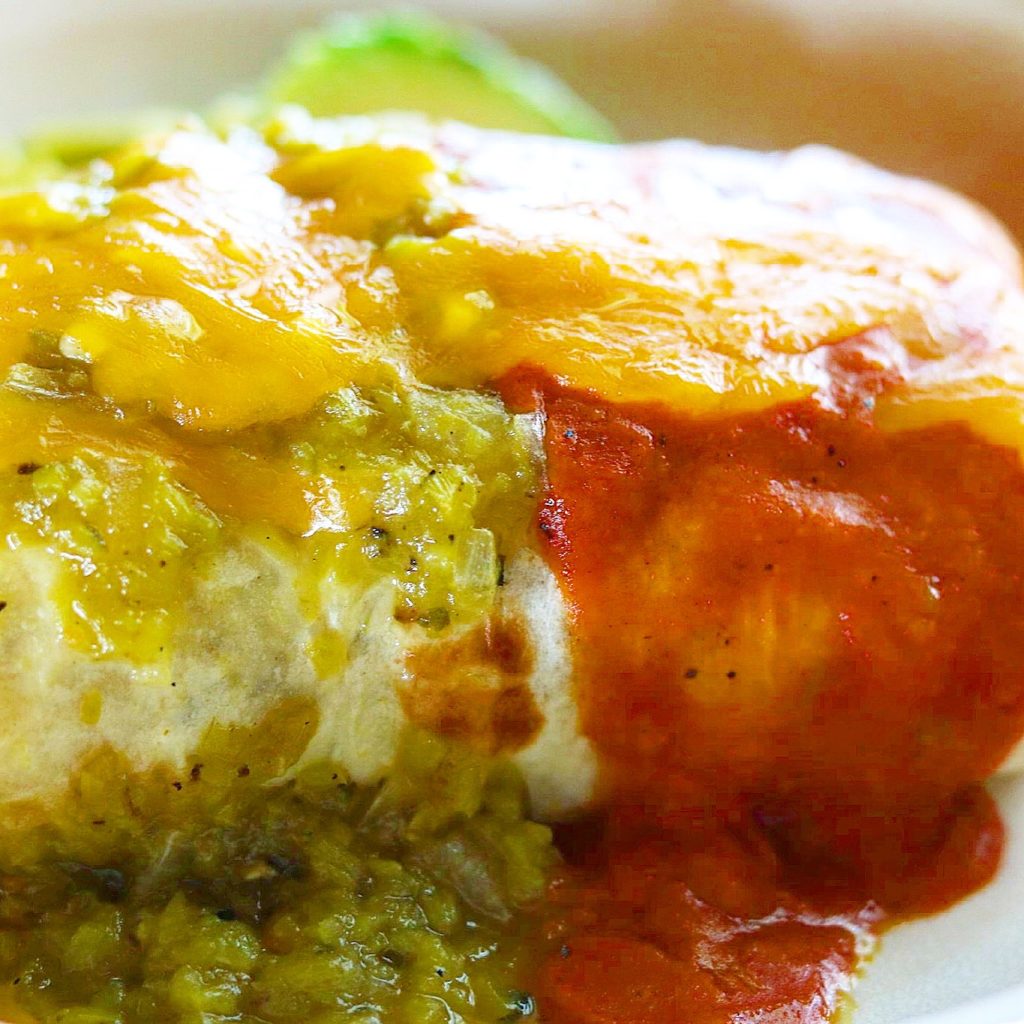
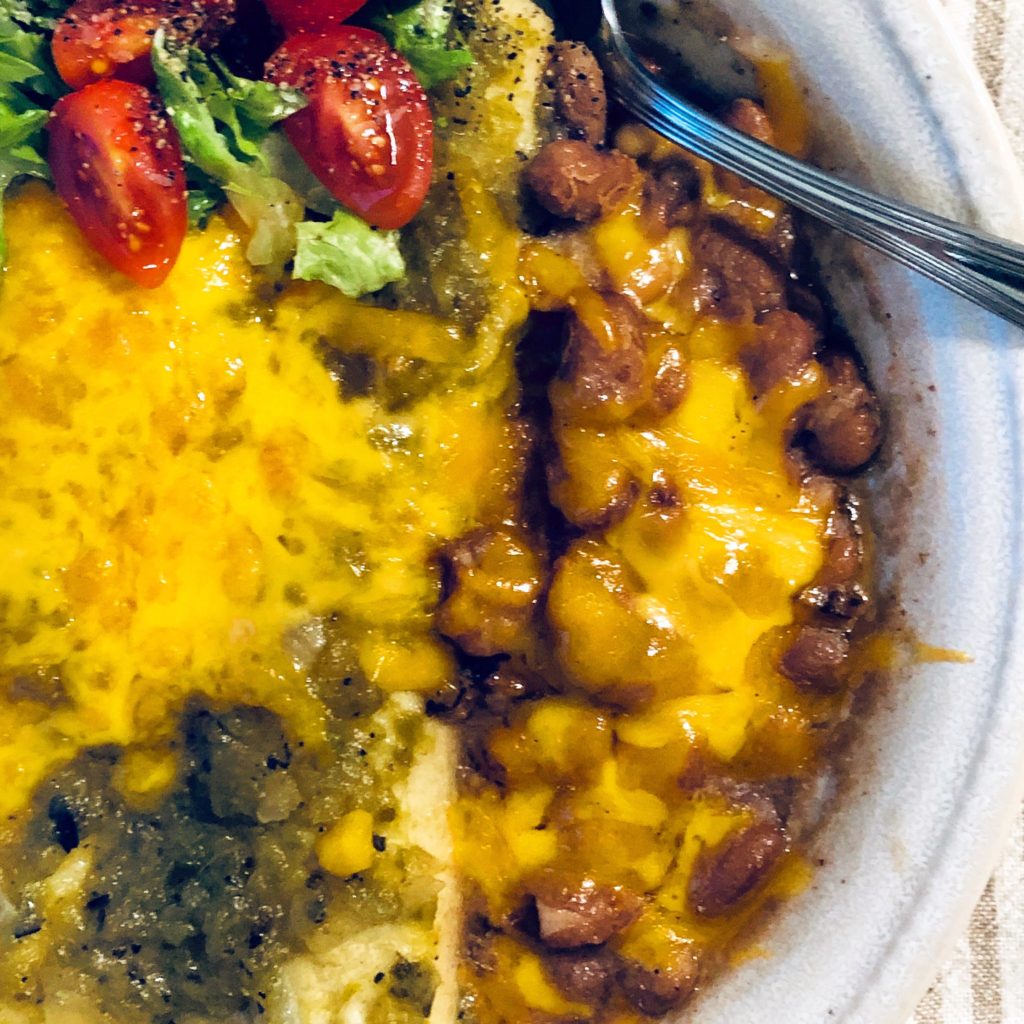
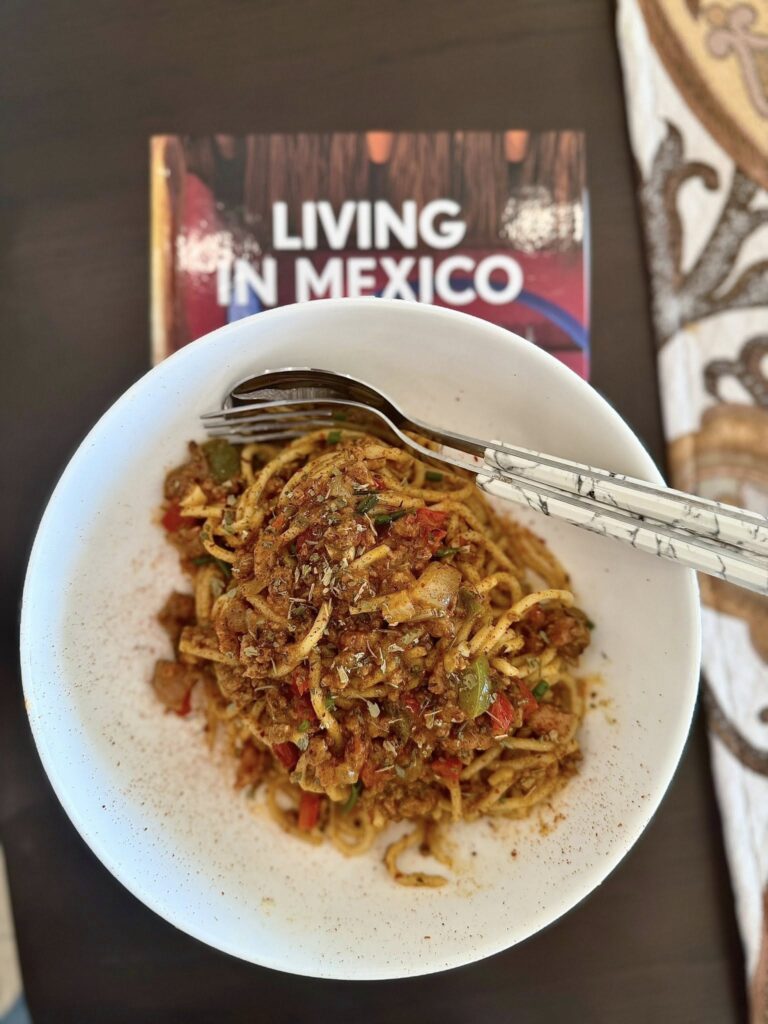
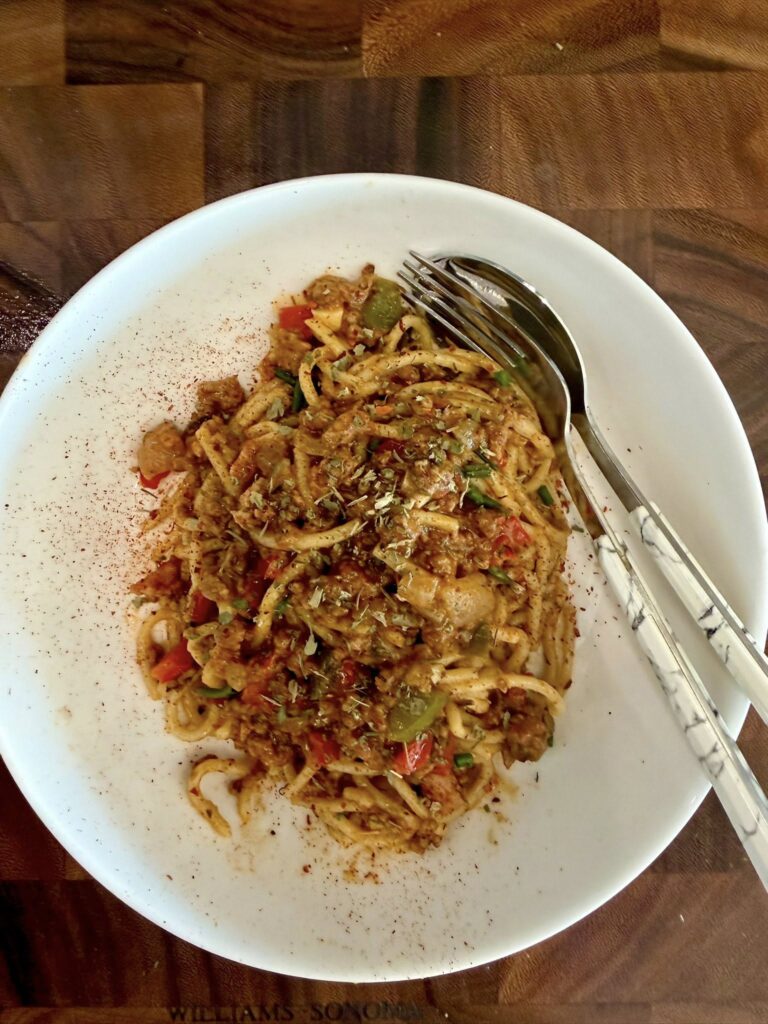
Dirty spaghetti is like dirty rice, but it’s with spaghetti! If you are on Tiktok, this is a viral recipe and did I mention that’s really delicious!

To give you a sense of its popularity, dirty spaghetti has gone viral on platforms like TikTok, where users showcase their unique takes on the recipe. You can find creative twists where home cooks experiment with different meats, such as chicken or sausage, and even try out gluten-free pasta options. This adaptability is what keeps the dish relevant and loved by many.

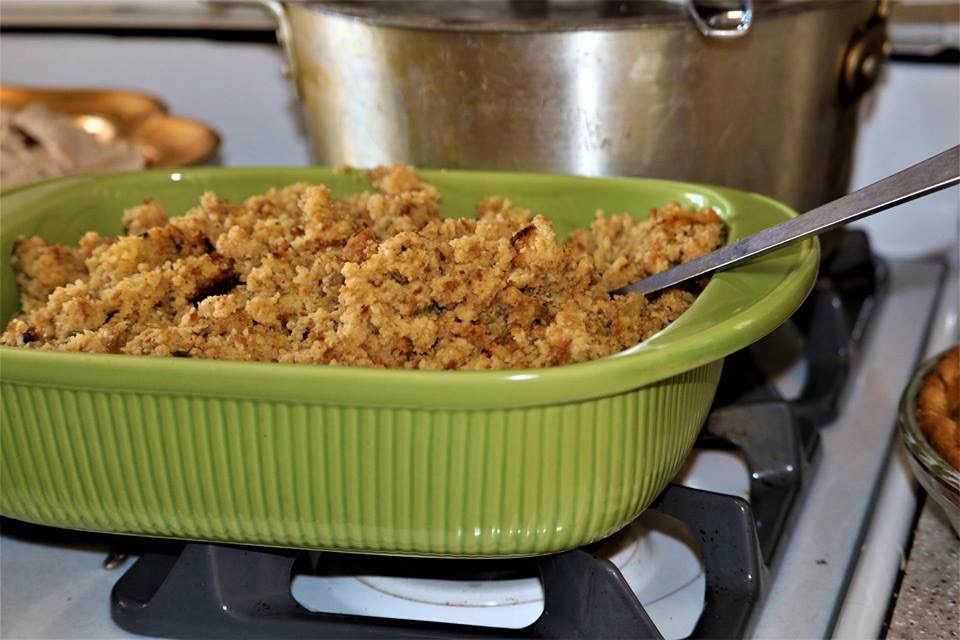
The concept of dirty spaghetti borrows inspiration from the traditional dish known as dirty rice, which is a beloved staple in Southern cuisine. Just like dirty rice, dirty spaghetti is hearty, flavorful, and perfect for feeding a crowd. It’s a one-pot meal that combines a range of ingredients for a satisfying experience. The beauty of dirty spaghetti lies in its versatility; you can easily customize it by adding your favorite vegetables or proteins. Imagine the delightful mix of spices and textures as the ingredients meld together, creating a dish that is both comforting and exciting.
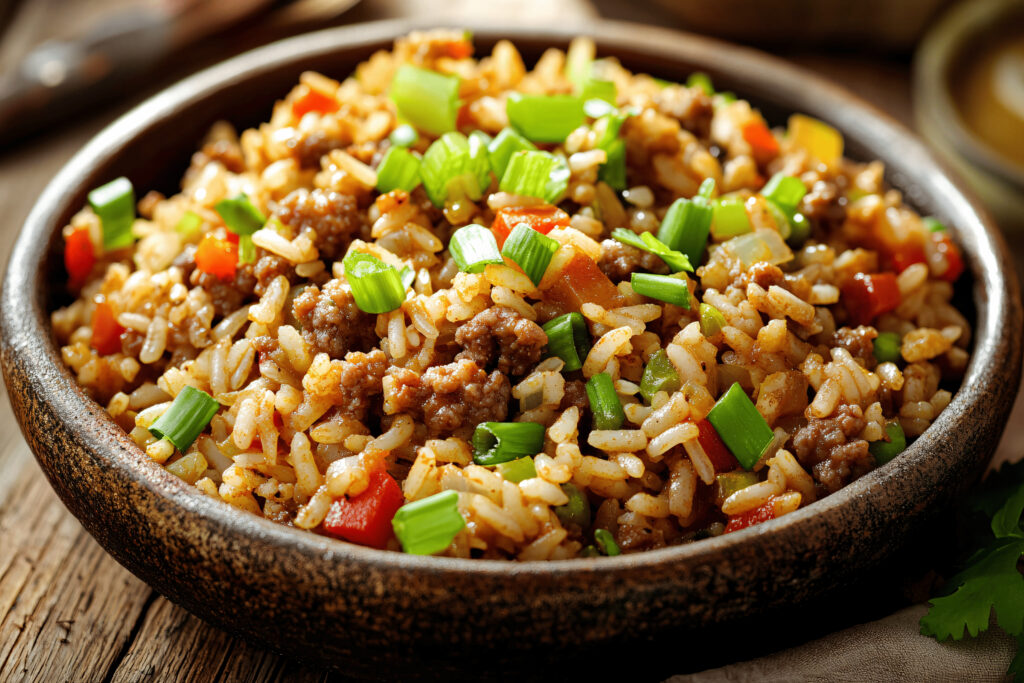
Dirty Rice

What do you need for this dish?

  • Ground beef
  • Italian sauage
  • red and green bell pepper
  • white or yellow onion
  • AP flour
  • tomaton paste
  • worcestershire sauce
  • garlic
  • beef broth
  • spaghetti
  • onion soup mix
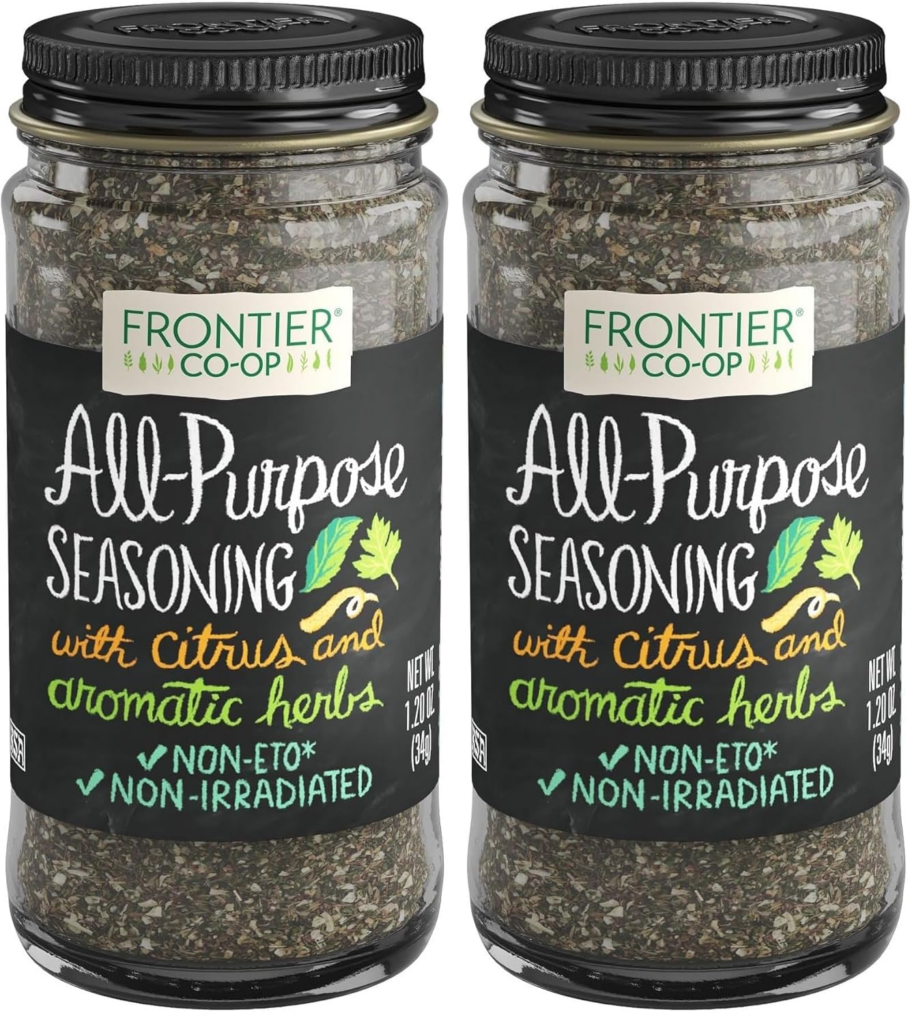
  • Morton Nature’s seasoning
  • Italian seasoning

Note: Because I live in Mexico, there’s a couple of items that I couldn’t get here; for example, Morton’s natures seasoning. Let me show my followers in Mexico what it is and where they can find similar. This link is within the US: https://amzn.to/48juBSg

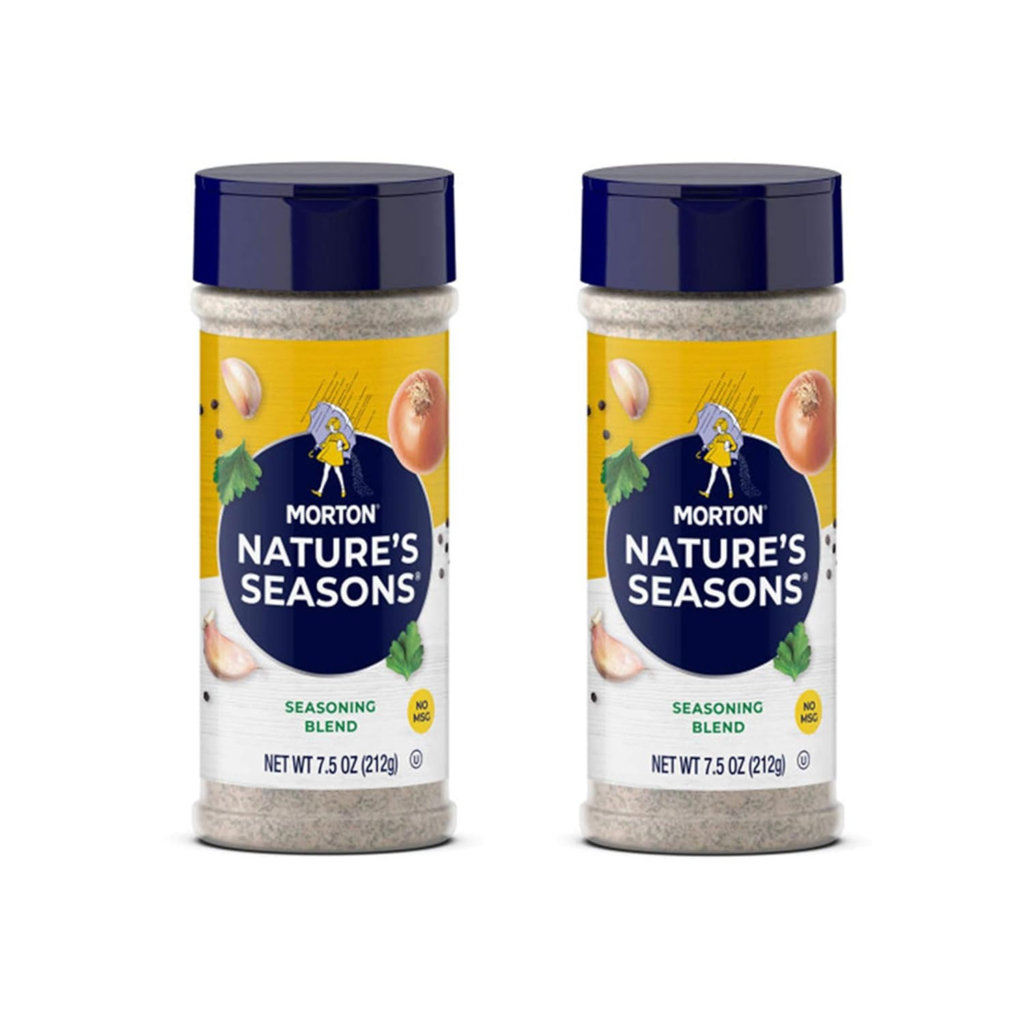
A good substitute for my Mexico friends would be: https://amzn.to/41Tjsnz

Why is Dirty Spaghetti So Popular?

Dirty Spaghetti
Dirty Spaghetti

Dirty spaghetti’s rise in popularity can be attributed to its simplicity and incredible flavor. In a time when many people are looking for quick and easy meal solutions, this dish offers a satisfying option that doesn’t skimp on taste. It’s also a budget-friendly recipe that allows you to use whatever you have on hand, making it a hit among families and college students alike.

Another reason for its appeal is the communal aspect of dirty spaghetti. It’s perfect for gatherings, whether it’s a family dinner or a potluck with friends. Everyone can dive into the same pot, and the dish often brings back memories of home cooking, making it nostalgic for many. The warmth and heartiness of dirty spaghetti create a sense of togetherness that enhances the dining experience.

How to Make Dirty Spaghetti

Making dirty spaghetti is straightforward and can be done in under an hour. Start by browning the ground beef and Italian sausage in a large pot. This step is crucial as it builds the foundational flavors of the dish. Once the meats are browned, you’ll want to add in the chopped bell peppers and onions, allowing them to soften and release their flavors.

As you build the base, don’t forget to season generously with garlic, Worcestershire sauce, and your choice of spices. The addition of tomato paste will give the spaghetti its signature ‘dirty’ look, as well as a rich, robust flavor. Stir these ingredients well before mixing in the beef broth, which will provide the necessary liquid for cooking the spaghetti.

Finally, add the spaghetti. You can break the noodles in half if you prefer shorter pieces, but traditional long spaghetti works just as well. Let everything simmer together, allowing the flavors to meld beautifully. The result is a dish that’s not only visually appealing but also packed with flavor in every bite.

Tips for Perfect Dirty Spaghetti

To elevate your dirty spaghetti to the next level, consider adding some fresh herbs like parsley or basil right before serving. A sprinkle of cheese can also enhance the flavor profile beautifully. If you enjoy a bit of heat, adding red pepper flakes is a great way to spice things up. Additionally, serving the spaghetti with a side of garlic bread or a fresh salad can round out the meal perfectly.

In conclusion, dirty spaghetti is more than just a meal; it’s an experience that combines comfort, flavor, and fun. Whether you’re cooking for family or hosting friends, it’s a guaranteed crowd-pleaser. So gather your ingredients, follow these steps, and dive into a bowl of delicious dirty spaghetti!

This dish is highly customizable; feel free to experiment with different vegetables or proteins according to your taste preferences. You might try incorporating diced zucchini or mushrooms for additional texture. The possibilities are endless, and that’s part of what makes dirty spaghetti such an appealing dish to create and enjoy.

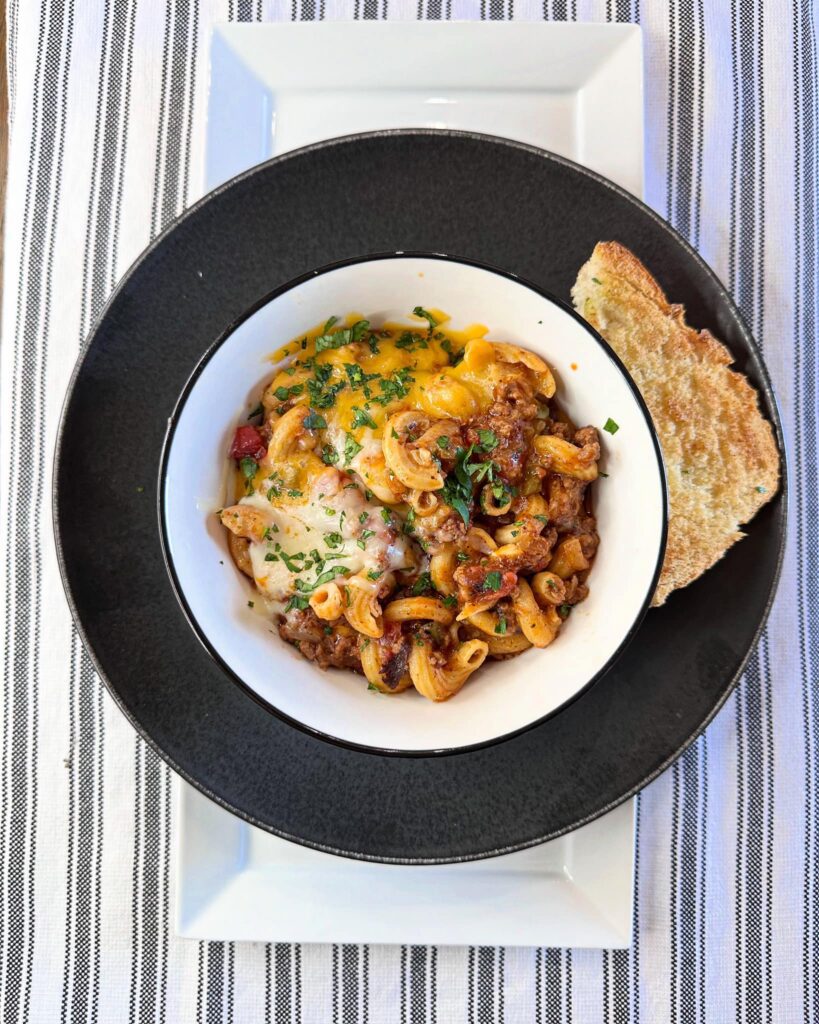
Need another easy dish:

Try this American Goulash recipe! Ultimate comfort food – Old Fashioned American Goulash

Ultimate comfort food - Old Fashioned American Goulash
Ultimate comfort food – Old Fashioned American Goulash

Dirty Spaghhetti

Print Recipe

Ingredients

  • 1 lb Ground Beef
  • 2 Italian sausagef links or Italian sausage
  • 1 Red Bell pepper, diced
  • 1 Green Bell Pepper, diced
  • 1/2 Large white onion
  • 4 tbsp All purpose flour
  • 2 tbsp Tomato Paste
  • 2 tbsp Worcestershire
  • 4 Cloves garlic
  • 3-4 cups Beef broth
  • 1 lb Spaghetti
  • 1/2-1 cup Pasta water
  • Salt for pasta
  • Onion Soup mix, the amount you prefer
  • 1-2 tsp Italian seasoning
  • 1 tsp Nature's Seasoning (I made mine because I cannot find it in Mexico, recipe below)
  • 1 tsp Italian seasoning

For the Natures Seasoning mix

  • 3 tbsp  salt
  • 2 tbsp sugar
  • 2 tbsp paprika
  • 1 tbsp onion powder
  • 1 tbsp garlic powder
  • 1 tbsp black pepper
  • 1 tbsp turmeric
  • 1.5 tsp corn starch

Instructions

  • To a large pot or skillet, brown the ground beef and the Italian sausage. Cook, breaking up until lightly browned. Drain if needed. I didn't because the ground beef we get in Mexico is pretty lean. The fat adds to the flavor anyway. When meat has browned, add the flour and cook a minute or two.
  • Add in the tomato paste, combine and cook a couple of minutes. Add your chopped vegetables , along with your Worcestershire, the garlic. Slowly add your beef broth. Add your lipton soup mix (I had to use an onion dip mix because the soup mix is not available in Cabo) along with your Nature's seasoning (recipe below if you can't locate) the cajun seasoning, and the italian seasoning. Allow to cook 10-15 minutes vegetables are tender.
  • Cook the spaghetti in a large pot of salted water reserving about a cup of pasta water! Add the spaghetti to the meat sauce, combine well, Serve immediately with a little garlic bread.
  • Share on Pinterest (Opens in new window) Pinterest
  • Share on Facebook (Opens in new window) Facebook
  • Email a link to a friend (Opens in new window) Email
  • Print (Opens in new window) Print
  • Share on X (Opens in new window) X
  • Share on Tumblr (Opens in new window) Tumblr
  • More
  • Share on Reddit (Opens in new window) Reddit

Filed Under: Pasta, Sauces, Compound Butters, Condiments Tagged With: Spaghetti

Easy Greek Chicken Recipe for Every Occasion

April 18, 2026 by Becky Spoon Leave a Comment

Jump to Recipe
Greek Chicken
I love this easy and delicious Greek chicken

Greek cuisine is known for its emphasis on fresh ingredients and bold flavors. This Greek chicken dish exemplifies that tradition, bringing together aromatic herbs and spices to create a delightful meal that can be enjoyed any time of the year. The use of olive oil not only enhances the flavor but also adds a healthy fat that is a staple in Mediterranean diets. Whether you’re preparing a weeknight dinner or hosting a gathering, this recipe is sure to impress.

When it comes to serving this dish, consider pairing it with a fresh Greek salad, which includes ingredients like cucumbers, tomatoes, red onions, olives, and feta cheese. The crispness of the salad complements the richness of the fried chicken beautifully. Additionally, you might want to serve this Greek chicken with a side of tzatziki sauce, a cool and tangy yogurt-based sauce that adds another layer of flavor.

This recipe is also very versatile. You can easily modify it to suit your tastes or dietary needs. For example, if you prefer a healthier option, you can bake the chicken instead of frying it. Simply place the coated chicken breasts on a baking sheet lined with parchment paper, spray lightly with olive oil, and bake in a preheated oven at 400°F for about 20-25 minutes, or until the chicken is cooked through and the coating is crispy.

Switch the greek chicken up a litte

Another great idea is to use different spices in the breadcrumb mixture. Adding some dried oregano or thyme can give the chicken an even more authentic Greek flavor. For those who enjoy a bit of heat, consider incorporating some crushed red pepper flakes into the breading. The possibilities are endless!

Common Greek Bread Crumb Mixture Components:

  • Base: Dried breadcrumbs (plain or Panko).
  • Herbs/Spices: Dried oregano, dried thyme, parsley, paprika, and garlic powder.
  • Flavor Boosters: Lemon zest, olive oil, and finely grated salty cheeses (Kefalotyri or Parmesan).

As you prepare this Greek chicken, remember to enjoy the process. Cooking should be a joyful experience, and this recipe allows for creativity and personal flair. Don’t be afraid to experiment with different side dishes or variations of the chicken itself. The goal is to create a dish that you and your loved ones will enjoy and cherish.

Greek Chicken

How to prepare this Greek Chicken

This Greek chicken is incredibly simple to prepare and incredibly tasty! Start by flattening a chicken breast until it’s nice and thin, then coat it in a seasoned flour mixture. Next, dip it in egg and finish by rolling it in seasoned panko breadcrumbs. Fry it in a bit of extra olive oil until it reaches a golden brown color, making sure to cook the center thoroughly. This method locks in the chicken’s juices, ensuring a moist and flavorful bite every time. Let the chicken rest for a few minutes after cooking; this step is crucial as it allows the juices to redistribute throughout the meat.

While the chicken is resting, you can prepare your sides. A traditional Greek salad pairs excellently with this dish, combining refreshing cucumbers, juicy tomatoes, and tangy feta cheese. Toss in some kalamata olives and a splash of olive oil, and you’ve got a side that complements the Greek chicken perfectly. If you want to make it a complete meal, consider including a hearty grain like quinoa or couscous, seasoned with lemon juice and herbs. I opted to serve mine with some potatoes that were par boiled, then finished in the oven with similar herbs, and a big dollop of tzatziki.

After you’ve prepared the chicken, you can also experiment with different toppings. Chopped fresh herbs like parsley or dill can add a vibrant touch. For a touch of creaminess, a dollop of tzatziki sauce not only adds flavor but also helps to cool the heat from any spices used. The tangy yogurt-based sauce is a perfect balance for the savory chicken.

Don’t be afraid to get creative with your plating. Presenting your Greek chicken with colorful sides and garnishes makes the meal visually appealing, making it even more enjoyable to eat. Share your finished plate on social media to inspire others to try making this delightful dish.

Greek Chicken

Need another chicken recipe? Try this: https://acooknamedrebecca.com/baked-chicken-meatballs-broccoli-pesto-pasta/

Chicken Meatballs With Pasta

This is a great tool for pounding out your chicken: https://amzn.to/4ci4Nam

This is a great tool. I use either plastic wrap or parchment paper and place the chicken between two sheets. Then using this tool, gently pound out your chicken breast making sure to not break it apart.

Ok, Here’s the recipe!

Greek Chicken

Greek Chicken

Print Recipe
CourseMain Course
CuisineGreek
Keywordchicken, comfort food, Easy, greek salad, main course, panko
Servings2 servings

Ingredients

For the Chicken

  • 2 chicken breast
  • 2 eggs
  • enough flour to dredge the chicken
  • enough panko bread crumbs to dredge the chicken
  • season with salt and pepper, onion powder, garlic powder (optional)
  • good extra virgin olive oil for frying

For the Greek topping

  • 1/4 cup good extra virgin olive oil
  • 1 tbsp red wine vinegar (or to taste)
  • salt and pepper
  • 1/2 cup diced tomatoes
  • 1/2 cup diced cucumber (i use English)
  • 1/4 cup diced green pepper
  • 1/4 cup Kalamata olives
  • 1/4 cup cubed feta
  • couple tablespoons red onion or your desired amount
  • 1-2 tbsp chopped dil
  • salt and pepper to taste

Instructions

For the chicken

  • Place each chicken breast between plastic wrap or parchment paper and pound out the chicken being careful not to tear th chicken. Season lightly with a little salt, remember that the flour dredge and panko, along with the topping will have a little salt
  • Set up a dredging station. Add the flour to a dish with a little salt and pepper. I always taste it a little to see if there's enough salt. You can add onion power, garlic powder, even a little oregano.
    In another dish add the eggs and beat until frothy.
    In the last dish add your panko breadcrumbs. You can add a little salt and pepper.
  • Pat the chicken dry. Dredge the chicken in the flour
    mixture, then the egg mixture, then into the panko mixture. set aside.
  • Add the oil to a skillet, heat to medium and fry the chicken, turning to make sure each side is golden brown. Drain on a rack and make your topping.
  • For th topping
  • In a bowl, whisk together the evoo and th red wine vinegar. Add all the ingredients and toss.
  • To finish the dish, place the chicken on each plate and top with the salad mixture. Serve immediately with Tzatziki. Kali Orexi!
  • Share on Pinterest (Opens in new window) Pinterest
  • Share on Facebook (Opens in new window) Facebook
  • Email a link to a friend (Opens in new window) Email
  • Print (Opens in new window) Print
  • Share on X (Opens in new window) X
  • Share on Tumblr (Opens in new window) Tumblr
  • More
  • Share on Reddit (Opens in new window) Reddit

Filed Under: Poultry, Sauces, Compound Butters, Condiments Tagged With: chicken, Greek, main dish

who needs help with Thanksgiving sides and more?

November 19, 2024 by Becky Spoon

Let A Cook Named Rebecca cook for you! Here’s what we have.

Thanksgiving Take Out Menu

Smoked Turkey
Smoked Turkey
Oven Roasted Turkey
Oven Roasted Turkey
Smoked Ham
Smoked Ham
Southern Cornbread Dressing
Cornbread Dressing
Southern Cornbread Dressing
Turkey Gravy
Thanksgiving Gravy
Au Gratin Potatoes
Creamy Gratin dauphinois potato with melted cheese.
Scalloped Potatoes
Scalloped Potatoes
Buttery Mashed Potatoes
Lemony Green Beans
Green Bean Casserole
Broccoli Wild Rice Casserole
Creamy Baked Macaroni and Cheese
Sweet Potato Casserole with Marshmallow
Sweet potato casserole with baked marshmallows on top
Sweet Potato Casserole
Corn Casserole
Traditional corn casserole with cheese.
Roasted honey glazed carrots
Tasty Garlic Parmesan Roasted Brussels Sprouts
Crispy Bacon-Wrapped Asparagus Spears
Dinner Rolls
Dinner Rolls
Homemade american traditional pumpkin pie . Autumn food background
Apple Pie
Apple Pie

Pricing

These Prices are for 6-8 serving size. Any and all can be ordered.

Juicy Smoked Turkey 10-12 pounds $85.00. Smoked Spiral Ham $75.00. Southern Cornbread Dressing $24.99. Giblet Gravy $17.99 or Turkey gravy only $14.99. Au Gratin or Scalloped Potatoes 19.99 Buttery Mashed Potatoes $19.99. Lemony Sauteed Green Beans with toasted almonds. $17.99. Traditional Green Bean Casserole 24.99. Broccoli Wild Rice Casserole $24.99 Tini’s Mac ‘n Cheese $24.99. Sweet potato casserole $18.99. Corn Casserole $16.99. Roasted Carrots $14.99. Roasted Brussel Sprouts $14.99. Bacon Wrapped Asparagus $19.99. Homemade Dinner Rolls $12.00. Pumpkin Pie $14.99. Apple Pie, $16.99.

  • Share on Pinterest (Opens in new window) Pinterest
  • Share on Facebook (Opens in new window) Facebook
  • Email a link to a friend (Opens in new window) Email
  • Print (Opens in new window) Print
  • Share on X (Opens in new window) X
  • Share on Tumblr (Opens in new window) Tumblr
  • More
  • Share on Reddit (Opens in new window) Reddit

Filed Under: Sauces, Compound Butters, Condiments

A Favorite – New Mexico Hatch Green Chile Sauce Recipe

August 19, 2019 by Becky Spoon

Hatch Green ChileJump to Recipe
Hatch Green Chile
We love New Mexico Hatch Green Chile.  Every year during harvest time (late summer into September, varies at times) we start looking for green chiles.  We happened to be in Ruidoso this year during that time, but unfortunately. we were leaving before they were roasting again.  I checked on a Monday and they weren't roasting again until the weekend.  I could have bought them not roasted but I really wanted them roasted because they are just so much easier when they are placed in the big roaster's they have.
Hatch Green Chile

We love New Mexico Hatch Green Chile. Every year during harvest time (late summer into September, varies at times) we start looking for green chiles. We happened to be in Ruidoso this year during that time, but unfortunately. we were leaving before they were roasting again. I checked on a Monday and they weren’t roasting again until the weekend. I could have bought them not roasted but I really wanted them roasted because they are just so much easier when they are placed in the big roaster’s they have.

Hatch Green Chile
Hatch Green Chile
Hatch Green Chile
Hatch Green Chile
Hatch Green Chile
Hatch Green Chile

A Favorite – New Mexico Hatch Green Chile Sauce

Thanks to my favorite HEB in my area I have my New Mexico Hatch Green Chile! Booyah! Still in New Mexico and feeling very disappointed I called the Produce Manager of my favorite HEB on S Valley Mills in Waco! This was on a Monday and they weren’t roasting until the weekend. I told him I wanted a case of hot and a case of mild! No problem! He got my name but didn’t get my phone number and afterward I thought, hmmm….oh well, we’ll see!

Saturday comes and I decide I’m going to call them and see if this actually happened. To my surprise, because I hadn’t paid for them, they didn’t have my number, just my name, my chiles were roasted, in the cooler and ready for me to pick up. Amazing. This is the link to my favorite HEB Plus! They kind of cater to the Baylor students so you can get items you can’t get at other locations. https://www.heb.com/heb-store/US/tx/waco/valley-mills-h-e-b-plus!-672.

Hatch Green Chile
Hatch Green Chile

I picked up my roasted chiles and I place a dozen in quart size freezer bags. These were beautiful chiles. They are big and they peeled so easily!

Hatch Green Chile
Hatch Green Chile

A Favorite – New Mexico Hatch Green Chile Sauce

There are so very many recipes using Hatch Green Chile. Green Chile Enchiladas are always a favorite, but there are so many more recipes I use them in. Like this morning, I couldn’t resist! I had to have Green Chile! I made a Breakfast Burrito that was amazing. I’ll post this as an actual recipe later, but you need a little peek! Here is the link for my New Mexico Hatch Green Chile Beef Enchiladas https://the2spoons.com/new-mexico-hatch-green-chile-beef-enchiladas/.

Yum. I know. So delicious. Hope you enjoy the recipe!! I hope you learn to love green chile as much as we do! It is a staple in our home!

New Mexico Hatch Green Chile Beef Enchiladas

Print Recipe
Coursedinner, Lunch, Main Course
CuisineMexican
Keywordhatch green chile, hatch green chile sauce, new mexico green chile sauce

Ingredients

  • 2 tbsp vegetable oil
  • 1/2 to 1 medium onion, finely chopped
  • 2-3 garlic cloves minced or grated
  • 1 tbsp all purpose flour
  • 2 cups pureed green chile, mild, medium-hot from fresh roasted chile that the seeds have been removed, the stems and the outside char has been romoved.
  • 2 cups water
  • 1/4 tsp cumin
  • 1/4 tsp dried Mexican oregano
  • 1/2 tsp salt or to taste

For the filling and assembly

  • 1 lb ground beef
  • 1/2 white onion, finely chopped
  • 12 corn tortillas
  • oil for frying the corn tortillas
  • 1/2-1 lb cheddar cheese grated or a combination of cheddar and monterey jack (the amoun djust depends on how much cheese you want…some for stuffing and some for topping).
  • salt and pepper to season the ground beef
  • Prepared Green Chile Sauce

Instructions

For the Green Chile Sauce

  • Warm the oil in a heavy saucepan over medium heat. Add the onion and garlic and sauté until the onion is soft and translucent, about 5 minutes.
    Stir in the flour and continue cooking for another 1 or 2 minutes.
    Mix in the chile. Immediately begin pouring in the water or stock, stirring as you go, then add the salt. Add the cumin and oregano if adding.
    Bring the mixture to a boil. Reduce the heat to a low simmer and cook for about 15 minutes, until thickened but still very pourable. Use warm or refrigerate for later use.
    For an extra smooth sauce, I like to strain pushing the solids as much as you can through with the back of your spoon. You won't get all the solids, but you will definitely get the amazing flavors.

For the filling and assembly

  • Heat a large skillet with a little oil. When sizzling, place a corn tortilla in the oil for just a second to soften and remove to a paper towel. I place one side of the tortilla in oil, place the not oiled side up, repeat the process and put the oil side onto the unoiled previous tortilla. Sounds complicated, but not turning in the skillet and letting both sides into the oil helps with the tortillas holding together and to not fall apart…so basically your first tortilla is oil on the bottom, none on top but you'll top that with the oiled one, on and on. Set the tortillas aside.
  • Grate your cheese and chop your onions.
  • Cook your meat in a skillet with salt and pepper just until lightly browned.
  • Preheat your oven to 450 degrees. Get a large baking dish or individual plates if you prefer. Line up all your ingredients so easy folding.
  • place a tortilla down on a flat surface. Add your desired amount of beef, onion and cheese. Roll the tortilla with the seam side down and place in the baking dish or in a plate. Continue until all the tortillas have been used. You want to kind of eye the filling to make sue you have enough to the last tortilla or that you have used all of it by the last tortilla.
  • Ladle some of the sauce over the enchiladas, insuring the ends have sauce and the entire enchilada is covered in a little sauce. Add cheese down the middle of your enchiladas. You can cover if you really like them cheesy, but remember ou have cheese in the filling.
  • Place the enchiladas in the hot oven and cook just until your cheese has melted.
  • I serve these with Mexican rice and pinto beans! Yum! Delicious!
Hatch Green Chile
Hatch Green Chile
  • Share on Pinterest (Opens in new window) Pinterest
  • Share on Facebook (Opens in new window) Facebook
  • Email a link to a friend (Opens in new window) Email
  • Print (Opens in new window) Print
  • Share on X (Opens in new window) X
  • Share on Tumblr (Opens in new window) Tumblr
  • More
  • Share on Reddit (Opens in new window) Reddit

Filed Under: Dishes of Mexico, Tex Mex and New Mexico Red and Green Chile, Sauces, Compound Butters, Condiments Tagged With: hatch green chile, hatch green chile sauce, new Mexico Hatch green chile sauce

So Good! Simple Tarter Sauce

March 4, 2019 by Becky Spoon

Tarter Sauce
Tarter Sauce
Tarter Sauce

I love Tarter Sauce! When you are a Southern gal and love Southern Fried Catfish, you have to have Tarter Sauce. It is essential!

Even though there are some good brands out there, I like to make my own Tarter Sauce because I like to add more ingredients than you may get in the store bought and it is just so much more fresh.

Tarter Sauce
Tarter Sauce

Honestly, Tarter Sauce is so delicious with your Southern Fried Catfish. Here’s the link for the catfish: https://the2spoons.com/the-best-southern-fried-catfish/

So Good! Simple Tarter Sauce

I like my Tarter Sauce spicy, so I use Louisiana Hot Sauce. http://www.louisiana-brand.com. You can use your favorite hot sauce also!

Tarter Sauce

Tarter Sauce

Print Recipe
CourseCondiment
CuisineAmerican
KeywordTarter Sauce

Ingredients

  • 1/3 cup sliced dill pickles
  • 1/3 cup diced onions
  • juice of 1/2 lemon
  • 1 1/2 cup mayoniaise of our choice
  • 1/2 tbsp pickle juice
  • splash of worcestershire
  • splash of Louisiana Hot Sauce or your choice of a hot sauce (optional)
  • 1/4 tsp salt
  • 1/4 tsp pepper
  • 1/4 tsp fresh dill
  • 1/4 tsp parsley
  • 1 tsp capers
  • 1 green onion, tops and the green portion, sliced
  • pinch of sugar (optional)

Instructions

  • Either chop the pickles and onions in your food processor or finely chop them.  Add the rest of the ingredients and combine. I like to make this either the day ahead or at least 4 hours before use if possible.  The sauce really needs a little time for the ingredients to blend. 
  • Share on Pinterest (Opens in new window) Pinterest
  • Share on Facebook (Opens in new window) Facebook
  • Email a link to a friend (Opens in new window) Email
  • Print (Opens in new window) Print
  • Share on X (Opens in new window) X
  • Share on Tumblr (Opens in new window) Tumblr
  • More
  • Share on Reddit (Opens in new window) Reddit

Filed Under: Sauces, Compound Butters, Condiments Tagged With: Tarter Sauce

Easy & So Cheesy Puff Pastry Cheese Straws!

February 17, 2019 by Becky Spoon

Cheese Straws

Don’t overthink these Cheese Straws! They are literally two ingredients – puff pastry and cheese!

Cheese Straws
Easy & So Cheesy Puff Pastry Cheese Straws!

Cheese straws are the perfect appetizer. They go great with a glass of wine or a mug of beer. They are also great as part of a spread with things like pickles, deviled eggs, dips, and a charcuterie and cheese board!

Cheese Straws would be perfect with my Charcuterie Board!https://the2spoons.com/charcuterie-and-cheese-board/

Cheese Straws
Easy & So Cheesy Puff Pastry Cheese Straws!

Easy & So Cheesy Puff Pastry Cheese Straws

And honestly, these Cheese Straws are so easy! I use Pepperidge Farms Puff Pastry sheets in the freezer section. https://www.pepperidgefarm.com/product/puff-pastry-sheets/

I think they are so pretty too! Serve these Cheese Straws in a jar standing up or on a beautiful white platter or on a wooden tray!


Cheese Straws
Easy & So Cheesy Puff Pastry Cheese Straws!

Easy & So Cheesy Puff Pastry Cheese Straws

Cheese Straws

Easy & So Cheesy Puff Pastry Cheese Straws

Print Recipe
Prep Time10 minutes minutes
Cook Time25 minutes minutes
Total Time35 minutes minutes

Ingredients

  • 1 Puff pastry sheet
  • 1/2 Cup Cheddar cheese, finely grated
  • 1/2 Cup Pecorino Romano, finely grated

Instructions

  • Heat the oven to 375°F and line a baking sheet with parchment.
    Sprinkle a work surface with 1/4 cup of the cheese.
    Place 1 sheet of the unfolded puff pastry on the cheese. 
    Top with another 1/4 cup of cheese. 
    Using a rolling pin, roll the pastry out until 1/8-inch thick. This presses the cheese into the pastry and also smoothes out any seams or wrinkles.
    Fold the pastry in half. 
    Top with another 1/4 cup of  cheese. 
    Roll the pastry out again until 1/8-inch thick. The exact dimensions of the puff pastry doesnt matter. Aim for one side to be about 10 inches long to make longer puff pastry straws, or aim for 6 to 8 inches for shorter straws.
    Using a knife and cutting straight down (do not saw), cut the pastry into long strips about 1-inch wide. Again, dimensions don’t really matter, but I like my long puff pastry straws to measure about 10 inches.
    Transfer each strip to the baking sheet pans, spaced an inch or so apart. As you set them down, twist the ends in opposite directions to give the straws a spiraled look. If they start to untwist when you let go, gently press the ends into the parchment to make them stick.
    Refrigerate at least 10 minutes or up to 1 hour. This helps firm up the straws and give them better puff in the oven. While they are chilling, prepare the rest of the straws using the second sheet of puff pastry and the remaining cheese.
    Bake the cheese straws until they are puffed and crispy, feel dry to the touch, and are deep golden brown. The exact baking time will depend on the size of your straws. Begin checking shorter straws after about 15 minutes, and longer straws after 20 minutes.
     Let cool until the straws are firm enough to lift from the sheet without bending. Transfer to a cooling rack or serving plate. 
    Serve the cheese straws warm, or let them cool and then keep them in an airtight container until ready to serve. Puff pastry straws are best served the same day they are made.
  • Share on Pinterest (Opens in new window) Pinterest
  • Share on Facebook (Opens in new window) Facebook
  • Email a link to a friend (Opens in new window) Email
  • Print (Opens in new window) Print
  • Share on X (Opens in new window) X
  • Share on Tumblr (Opens in new window) Tumblr
  • More
  • Share on Reddit (Opens in new window) Reddit

Filed Under: Sauces, Compound Butters, Condiments Tagged With: cheese, Cheese Straws, Puff Pastry

  • Page 1
  • Page 2
  • Go to Next Page »

Primary Sidebar

Categories

  • Appetizer
  • Beans, Lentils, Grains, Rice
  • Beef
  • Bread
  • Breakfast/Brunch
  • Cocktails
  • Dessert
  • Dishes of Mexico, Tex Mex and New Mexico Red and Green Chile
  • Fish/Seafood
  • Ice Cream
  • Pasta
  • Pizza
  • Pork
  • Poultry
  • Salad Dressings
  • Salads
  • Salsas
  • Sandwiches/Burgers/Hot Dogs
  • Sauces, Compound Butters, Condiments
  • Side dish
  • Soups/Stews/Gumbo//Chili
  • Stocks, Broths, Gravies
  • Vegetables

Copyright © 2026 The 2 Spoons on the Foodie Pro Theme

Rate This Recipe

Your vote:


A rating is required
A name is required
An email is required