• Skip to primary navigation
  • Skip to main content
  • Skip to primary sidebar

A cook named Rebecca

  • Home
  • Favorite Cookbooks
  • Recipes
  • Travel
You are here: Home / Home

Love this Springtime – Ziti with Prosciutto and Peas with Scallion Cream

April 6, 2019 by Becky Spoon

Ziti with Prosciutto, Peas and Scallion Cream
Please follow and like us:
onpost_follow
fb-share-icon
Tweet
Jump to Recipe
Ziti with Prosciutto, Peas and Scallion Cream

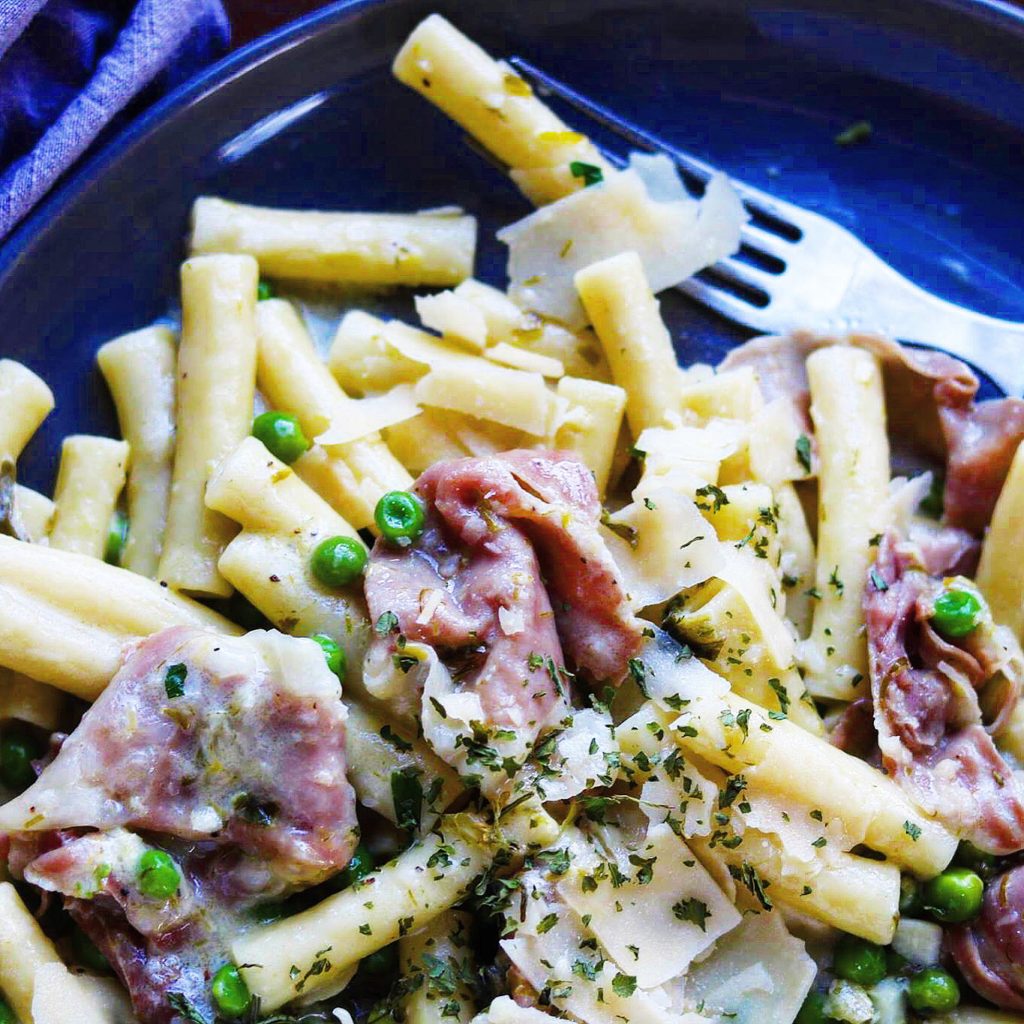
Looking for springtime dishes to make? This Ziti with Prosciutto, Peas and Scallion Cream is a perfect dish for spring. The cream sauce is cooked with loads of green onions, then pureed to a smooth consistency. Green onions are perfect this time of the year as well as the peas. I think it is a beautiful dish visually with it’s vibrant colors, but a beautiful tasting dish also.

Ziti with Prosciutto, Peas and Scallion Cream

Not that I followed their recipe to the T, but this recipe was on the cover of Food and Wine called Garganelli with Speck, Peas and Scallion Cream, and I immediately wanted to make it. I used Ziti and Prosciutto instead, but you know, that’s what cooking is all about. Using what you have and creating delicious dishes. Here is the Food and Wine link: https://www.foodandwine.com/recipes/garganelli-speck-peas-and.

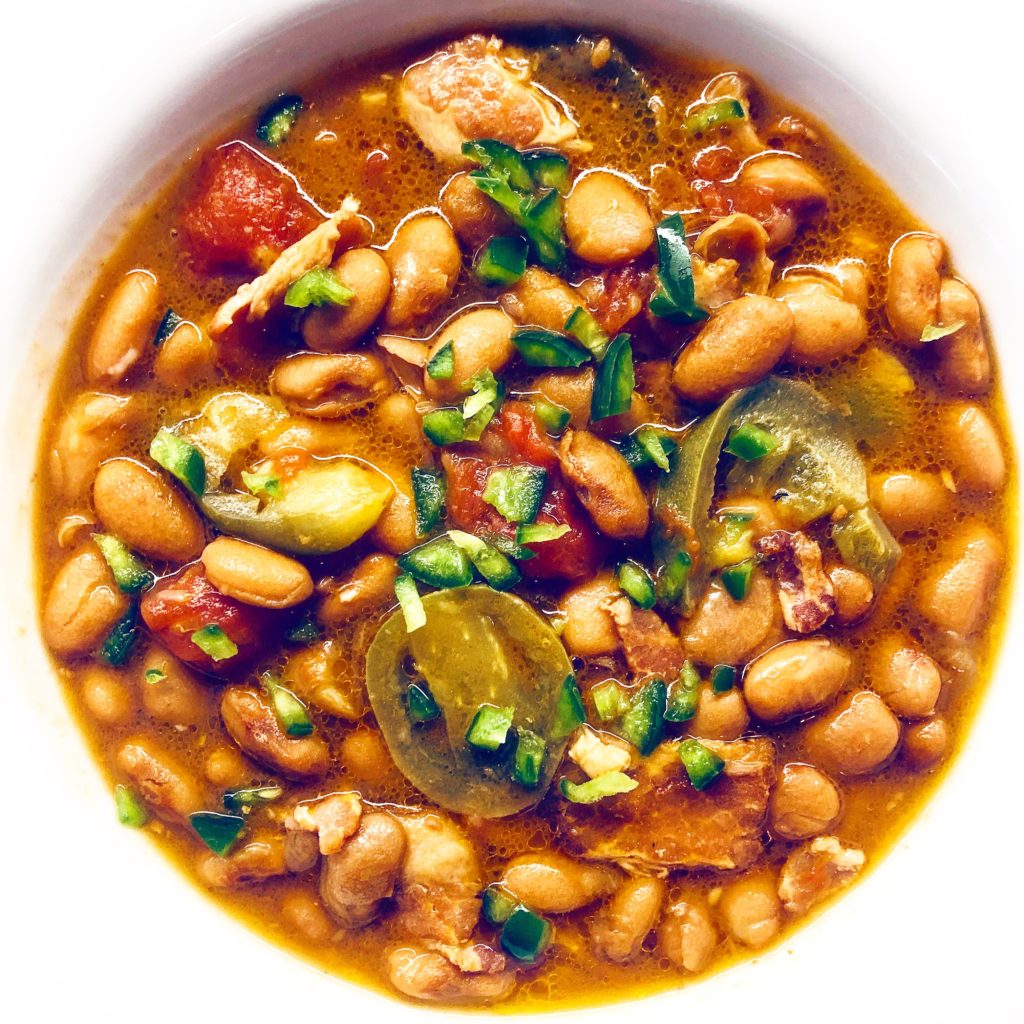
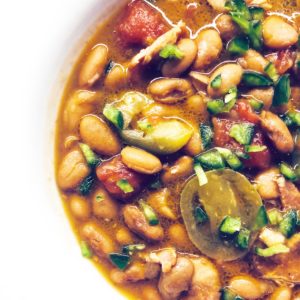
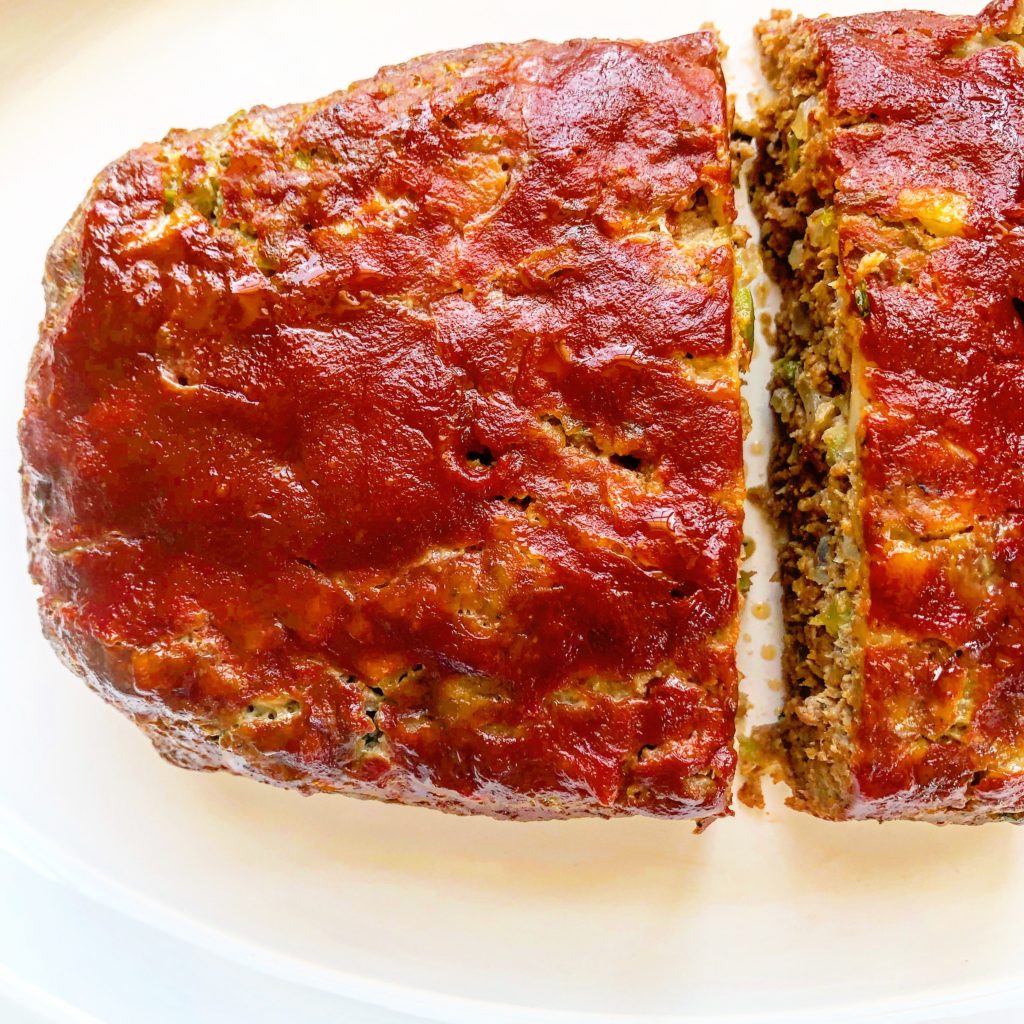
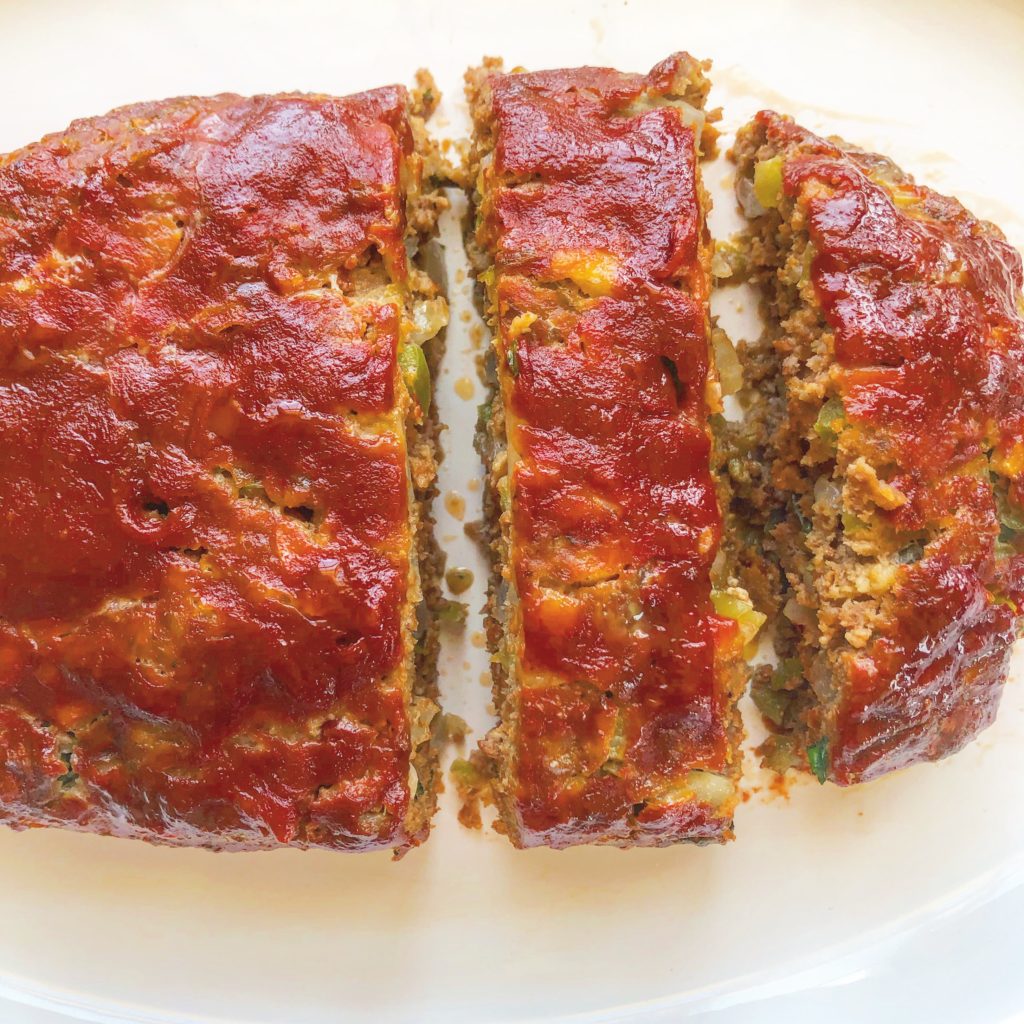
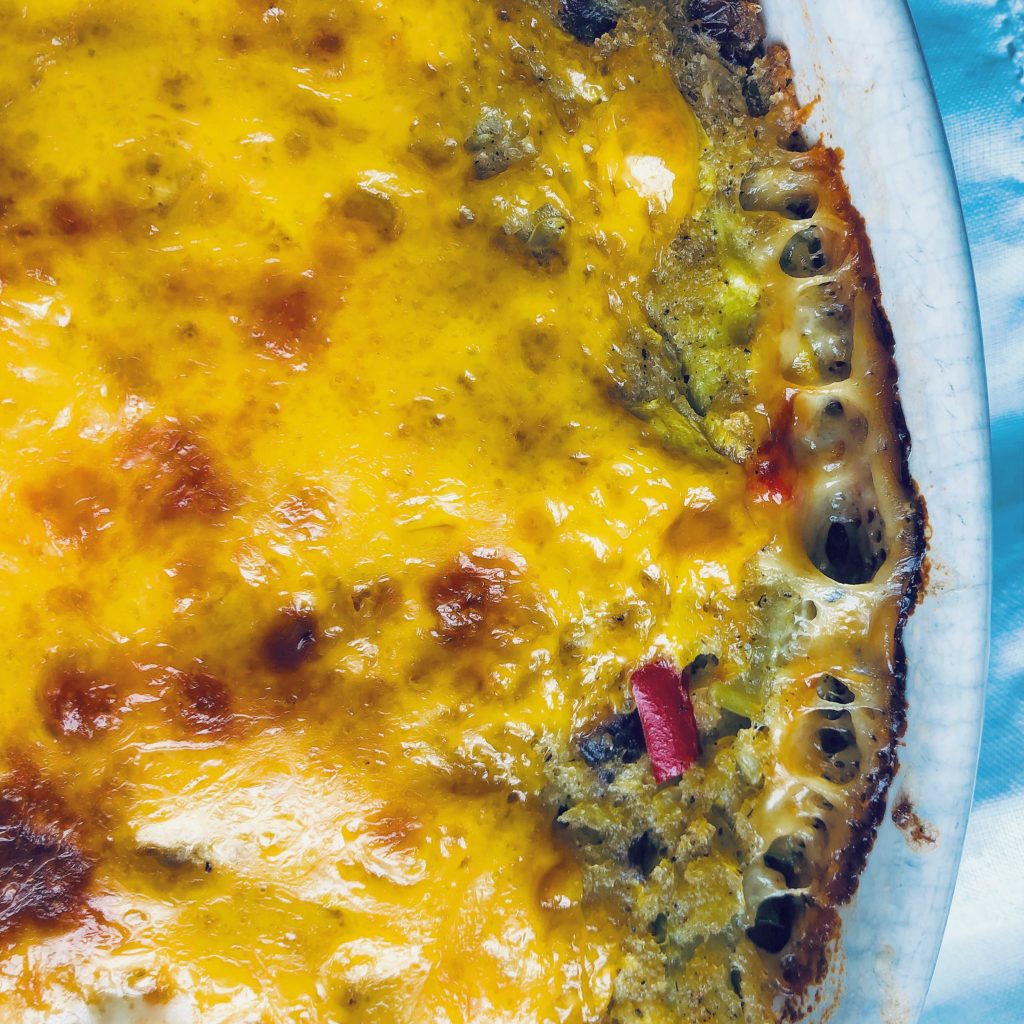
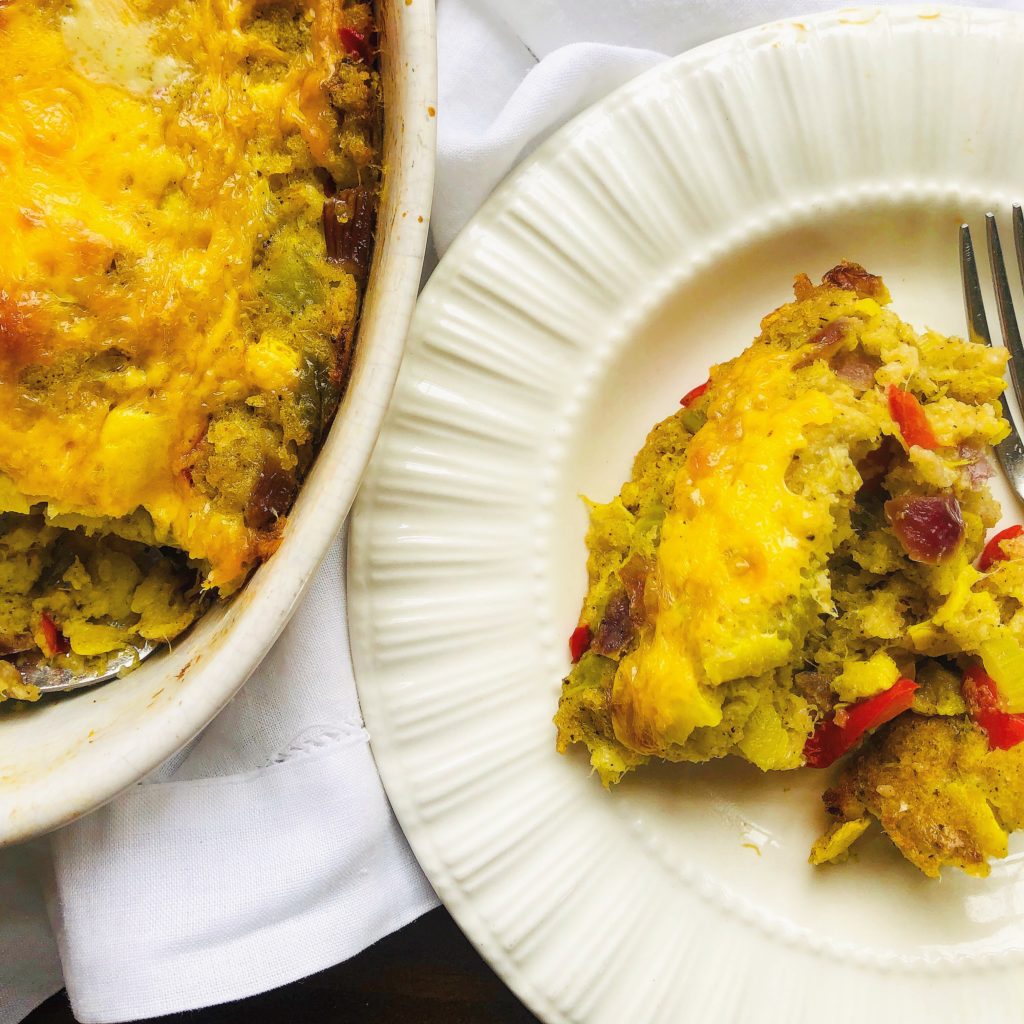
Love Springtime – Ziti with Prosciutto and Peas with Scallion Cream

This is a delicious recipe. You can serve it alone with just some garlic bread or a nice salad. My Italian Salad would be great, a Wedge Salad too; even my Caesar Salad would be great! https://the2spoons.com/a-classic-beautiful-caesar-salad/

You need to make this recipe soon! Delicious and so Springtime!

Ziti with Prosciutto, Peas and Scallion Cream

Ziti with Prosciutto, Peas and Scallion Cream

Print Recipe Pin Recipe
Course dinner, Lunch, Main Course, pasta
Cuisine Italian
Servings 4 servings

Ingredients
  

  • 6 medium garlic cloves, divided
  • 4 cups chopped scallions, green parts only (from 4 bunches)
  • 1 cup heavy cream
  • 1/4 tsp salt
  • 12 oz uncooked ziti
  • 1/4 cup unsalted butter cut into 1/2 inch pieces, divided
  • 1 1/2 cups sweet peas (6 oz)
  • 2 oz thinly slilced proscuitto, torn into 2 inch pieces
  • 2/3 cups Parmigiano Reggiano cheese, grated
  • 1 tsp lemon zest plus the juice from one lemon

Instructions
 

  • Smash 3 garlic cloves.  place the scallions, cream, and garlic in a small saucepan.  Finely chop the remaining 3 garlic cloves to equal 1 tablespoon: set aside.  
    Bring the scallion mixture to a boil over medium-low heat.  Reduce the heat to low and simmer stirring occasionally until scallions are crisp-tender and the garlic is softened about 10 minutes. Pour the mixture into a blender.  
    Secure the lid, remove the center piece to allow steam to escape.  Place a clean towel over the opening and process until smooth, about 40 seconds.  Stir in the salt and set aside.  
    Cook pasta in a pot until al dente, reserving the water. Do not drain, you will add the pasta to the skillet later.    
    While the pasta cooks, melt 2 tablespoons butter in a large skillet over medium heat.  Add the reserved 1 tablespoon chopped garlic; cook, stirring often, until softened and fragrant, about a minute or so.  
    Using a spider or other slotted utensil, transfer the pasta to the skillet, reserving the cooking liquid.  Add the scallion cream mixture and the peas to the skillet.  Increase the heat to medium-high.  Add 1/4 cup reserved cooking liquid.  Cook., stirring and shaking the skillet constantly, until the pasta is tender and the sauce is loose and creamy about 2 minutes.  Remove from the heat, add the prosciutto, cheese, parsley, lemon zest and juice, remaining 2 tablespoons butter, and 1/4 cup cooking liquid, stirring until combined.  
Keyword Ziti with Prosciutto, Peas and Scallion Cream
  • Click to share on Pinterest (Opens in new window) Pinterest
  • Click to share on Facebook (Opens in new window) Facebook
  • Click to email a link to a friend (Opens in new window) Email
  • Click to print (Opens in new window) Print
  • Click to share on X (Opens in new window) X
  • Click to share on Tumblr (Opens in new window) Tumblr
  • More
  • Click to share on Reddit (Opens in new window) Reddit

Filed Under: Pasta Tagged With: pasta, ziti, ziti with prosciutto and peas

Quick, Satisfying Cowboy Beans

April 3, 2019 by Becky Spoon

Cowboy Beans
Please follow and like us:
onpost_follow
fb-share-icon
Tweet

I love these Cowboy Beans. You know the kind of beans I’m talking about, the beans you get in a little cup at a Mexican food restaurant? Charro Beans? https://en.wikipedia.org/wiki/frijoles_charros They are absolutely delicious.

Cowboy Beans
Cowboy Beans

This recipe came about because I was making tacos for Allen, Taco Tuesday you know, and I was trying to think of something different, not just the usual TexMex ground beef tacos. I had some ribeye steaks in the refrigerator that I didn’t just want to grill and serve with a baked potato so I decided I’d make ribeye steak tacos. Oh, yum! I was even looking forward to those!! Then, I was wondering, “how will I serve them”? That grilled ribeye steak deserved so much more than just some lettuce and tomatoes. I started thinking about how good beans would be with the ribeye, so there you go. Quick, easy, satisfying….all of the above!

Cowboy Beans
Cowboy Beans

Yummy and delicious these beans are perfect just as a side dish or a starter for your Mexican food dinner or lunch, or just by themselves.

Quick, Satisfying Cowboy Beans

I cooked these beans in my Instant Pot; however, you can cook them stovetop or in a slow cooker. There’s two steps, first to cook the beans then second to add the additional ingredients that make them the cowboy beans. Be sure and serve them when you make my Chipotle Grilled Ribeye Steaks!

Cowboy Beans

Qick Cowboy Beans

Print Recipe Pin Recipe
Course Side Dish
Cuisine Mexican, Texmex

Ingredients
  

For the Beans: In the Instant Pot or on the Stovetop

  • 1 lb dried pinto beans (soaked if you are cooking stovetop)
  • 2 Tbps lard or bacon drippings
  • 1 medium white onion, roughly chopped
  • salt

For the Quick Cowboy Beans

  • the cooked beans
  • 4 slices bacon, cut into 1 inch pieces
  • 2 cloves garlic, peeled and finely chopped
  • 1/2 can diced tomatoes in juice
  • 1/2 cup pickled jalapeno slices
  • salt to taste
  • 1/2 cup cilantro, optional

Instructions
 

For the Beans

  • To the Instant Pot add the beans, lard and onion and cover with water about 2 inches above the beans. Set the Instant Pot on beans mode (should be 30-35 minutes) and cook until the time has elapsed. Then, do the quick steam release. Leave the beans in your Instant Pot.  
    If you are going to cook stovetop, I would soak the beans the night before, combine all the ingredients adding about 2 quarts of water. Bring to a boil, then reduce heat and cook for about 2 hours or so until tender. I start my stovetop beans out with a lid, then when they begin to soften, I remove the lid and cook uncovered so the juice will begin to thicken.
    If you are using a slow cooker, the same instructions apply as stovetop. The myth about salt preventing the beans from softening is not true. You can add salt from the beginning. I would only add about a teaspoon if you add to beginning to prevent over salting. Then, when the beans are done check for seasoning and add salt to taste. You can do this step ahead, either the day before or even earlier that you have frozen.  

For the Final Quick Beans

  • In a saucepan or skillet cook the bacon over medium heat, stirring regularly, until browned, about 4 minutes.  Add the garlic and cook for a minute or so, preventing burning.  Add the tomatoes with their juices.  Cook about 3 or 4 minutes blending the flavors.  
    To the beans in the Instant Pot, add this mixture and set the Instant Pot for an additional 10-15 minutes.  When that time has elapsed, either do the quick release or allow to release the steam on their own.  
    If you cooked your beans in a slow cooker, add this mixture to your beans after the first 2/3 of cooking.  
    If you cooked stovetop, add the mixture after the two hour or so when your beans are done, then cook an additional 15 minutes or so.  
  • Click to share on Pinterest (Opens in new window) Pinterest
  • Click to share on Facebook (Opens in new window) Facebook
  • Click to email a link to a friend (Opens in new window) Email
  • Click to print (Opens in new window) Print
  • Click to share on X (Opens in new window) X
  • Click to share on Tumblr (Opens in new window) Tumblr
  • More
  • Click to share on Reddit (Opens in new window) Reddit

Filed Under: Beans, Lentils, Grains, Rice Tagged With: charro beans, mexican food, Pinto Beans, texmex

The Best – Mom’s Meatloaf

April 2, 2019 by Becky Spoon

The Best - Mom's Meatloaf
Please follow and like us:
onpost_follow
fb-share-icon
Tweet
Mom's Meatloaf
Mom’s Meatloaf

Mom’s meatloaf wasn’t an “everything in the fridge” recipe, like that meatloaf you’ve heard stories about. I’ve heard so many say they hate meatloaf because of the meatloaf they had growing up. I can’t even imagine that. I love meatloaf!

Mom’s wasn’t a creation just to get rid of stuff but well thought out, even though it was simple, with just a few ingredients that worked well together. It was absolutely delicious. I have a couple of other meatloaf recipes in my collection, but I always come back to this recipe when I want some comfort food that I grew up with.

The Best – Mom’s Meatloaf

I don’t know why, but I really like to read about the history of food. I didn’t realize meatloaf actually dates back to ancient Rome, did you? Here’s a little history: https://www.thekitchn.com/origins-of-a-classic-the-histo-156555

Mom's Meatloaf
Mom’s Meatloaf

The Best – Mom’s Meatloaf

I made this meatloaf the other day and served my Summer Squash Casserole as a side dish. Don’t forget the mashed tomatoes or scalloped potatoes! Here’s the link for my Summer Squash Casserole: https://the2spoons.com/two-cheese-qick-summer-squash-casserole/

Here’s the recipe!! Hope you and your family like it!

Mom's Meatloaf

Mom’s Meatloaf

Print Recipe Pin Recipe
Prep Time 10 minutes mins
Cook Time 45 minutes mins
Total Time 55 minutes mins
Course dinner, Lunch, Main Course
Cuisine American
Servings 4 servings

Ingredients
  

  • 1 lb ground beef
  • 1/2 onion, diced
  • 1/2 bell pepper, diced
  • 1 egg
  • 1/3 cup tomato sauce
  • 1 tbsp fresh parsly
  • 1/2 tsp dried thyme
  • 1/2 tsp salt
  • 1/4 tsp black pepper
  • 1 1/4 cups bread crumbs

For the Topping

  • 1/4 cup tomato sauce
  • 1/4 cup ketchup
  • 1 tbsp brown sugar, packed
  • 1/2 tsp Worcestershire sauce

Instructions
 

  • Preheat oven to 325 degrees.  Add all the ingredients (except for the topping) and thoroughly combine.  Add more bread crumbs if needed.  Unlike when you are cooking a burger, you want to really combine this mixture.  
    Form into a loaf and place on a sheet pan or in a casserole dish. Cover the top and all sides of the meatloaf with the topping mixture.  It’s fine if it flows down into your dish.
    Bake until the meatloaf is firm and the internal temperature reaches 165 degrees.  Remove from the oven, allow to rest a few minutes. 
    Remove to a serving platter and slice.  Enjoy! 
    This meatloaf is easily doubled.   
Mom's Meatloaf
Mom’s Meatloaf
Summer Squash Casserole
  • Click to share on Pinterest (Opens in new window) Pinterest
  • Click to share on Facebook (Opens in new window) Facebook
  • Click to email a link to a friend (Opens in new window) Email
  • Click to print (Opens in new window) Print
  • Click to share on X (Opens in new window) X
  • Click to share on Tumblr (Opens in new window) Tumblr
  • More
  • Click to share on Reddit (Opens in new window) Reddit

Filed Under: Beef Tagged With: Comfort food, dinner, meatloaf, mom's meatloaf

Two Cheese, Quick Summer Squash Casserole

April 2, 2019 by Becky Spoon

Summer Squash Cassero.le
Please follow and like us:
onpost_follow
fb-share-icon
Tweet
Jump to Recipe

I have made this summer squash casserole for years. It is quick and easy, and oh, so good. With all the summer squash available in the supermarkets or soon to be in your garden, this dish is an essential addition to your side dish repertoire. This is the perfect side dish for your Southern entrees like meatloaf or southern fried chicken; the possibilities are endless.

Summer Squash Cassero.le
Summer Squash Casserole

Not only is the casserole topped with cheddar cheese but I’ve added just a little Velveeta (yes, Velveeta!) to the ingredients that creates richness and creaminess all at the same time. Who doesn’t love a little Velveeta, after all? The addition of a little poultry seasoning almost makes this squash have the taste of cornbread dressing. The red and green bell peppers add vibrant colors that make this a visual appetizing dish also!

Summer Squash Casserole

Two Cheese, Quick Summer Squash Casserole

Not only is squash delicious but it is good for you. Just a small serving adds a significant amount of the daily requirements of your vegetable required intake. Here’s a link that gives you a little more information regarding squash’s health benefits: https://whatscooking.fns.usda.gov/sites/default/files/factsheets/.

With the addition of the Velveeta and topped with the cheddar cheese, it’s an easy way to get the kids to eat their veggies….and adults!!

Not only can you use yellow squash in this recipe but you can use a combination of zucchini and yellow squash, or just zucchini squash.

Two Cheese, Quick Summer Squash Casserole

Here’s the recipe, hope you enjoy. Click on the link for my meatloaf recipe which this is a perfect side dish for!

Summer Squash Cassero.le

Summer Squash Casserole

Print Recipe Pin Recipe
Prep Time 10 minutes mins
Cook Time 25 minutes mins
Total Time 35 minutes mins
Course Side Dish
Cuisine American
Servings 4 Servings

Ingredients
  

  • 4 -6 summer squash, sliced into 1/2 inch pieces
  • 1/2 onion, diced
  • 1/4 red bell pepper, diced
  • 1/2 green bell pepper, diced
  • 1 celery stalk, thinly sliced
  • 2 tbsp butter
  • 1 tsp olive oil
  • salt and pepper
  • 1/2 tsp poultry seasoning
  • 1 egg, beaten
  • 1 inch slice velveeta cheese, cut into chunks
  • 1/2-1 cup bread crumbs
  • 1/2 cup cheddar cheese, grated

Instructions
 

  • Boil the summer squash in salted water until tender.  Drain, pressing to squeeze out as much water as you can.  Place in a bowl and mash.  Add the Velveeta while the squash is still hot so that it will start to melt.  
  • Melt the butter in a skillet or pan.  Add the olive oil and the onion, red and green peppers along with the celery and saute until the celery is soft and the onion is translucent. Pour this mixture over your squash and Velveeta.  Mix to combine. Add the poultry seasoning and salt and pepper to taste.  Check the seasoning before you add the egg.  When your seasoning is where you want it, add the beaten egg and start with about a half cup of the bread crumbs, adding more if needed.  
  • Pour the squash mixture into a buttered casserole. Top with the cheese and cover with foil and cook about 20 minutes. Uncover and cook for an additional 5 minutes or so until the cheese is melted and starts to slightly brown.  
Keyword Summer Squash Casserole
Mom's Meatloaf
Mom’s Meatloaf
  • Click to share on Pinterest (Opens in new window) Pinterest
  • Click to share on Facebook (Opens in new window) Facebook
  • Click to email a link to a friend (Opens in new window) Email
  • Click to print (Opens in new window) Print
  • Click to share on X (Opens in new window) X
  • Click to share on Tumblr (Opens in new window) Tumblr
  • More
  • Click to share on Reddit (Opens in new window) Reddit

Filed Under: Vegetables Tagged With: casserole, sidedish

so easy, the best jalapeno cornbread.

April 1, 2019 by Becky Spoon

Jalapeno Cornbread
Please follow and like us:
onpost_follow
fb-share-icon
Tweet
Jalapeno Cornbread
Jalapeno Cornbread

We love cornbread, but we really love this Jalapeno Cornbread especially with beans like my Texas Smoked Brisket Beans. This cornbread is loaded with pickled jalapenos, lots of cheddar cheese and creamed cream corn! Yum, the perfect buttermilk cornbread turned spicy and even more luscious with the corn and cheese!

Jalapeno Cornbread
Jalapeno Cornbread

Remember the creamed corn recipe from the other day that I posted? I had some leftover in the freezer so I used that in the recipe, but any good creamed corn will work. Here’s the recipe for my creamed corn, but a can of creamed corn works just as well. https://the2spoons.com/effortless-southern-creamed-corn/

Southern Creamed Corn

I also used pickled jalapenos, Los Costena Brand are what I use: https://amzn.to/34cxceH

I like to use the pickled jalapenos because you know what you are getting. You can use a fresh jalapeno that you seed and dice, but you don’t always know how hot they will be. Sometimes I use a combination of both, the pickled jalapenos and the fresh jalapeno.

I hope you like the easy recipe!! It is the best with my Texas Smoked Brisket Beans. Here’s the link: https://the2spoons.com/amazing-texas-smoked-brisket-beans/

Texas Smoked Brisket Beans
Brisket Beans

Make both! They are great together…

Jalapeno Cornbread

Jalapeno Cornbread

Print Recipe Pin Recipe
Prep Time 10 minutes mins
Total Time 35 minutes mins
Course Bread
Cuisine American

Ingredients
  

  • 1 cup cornmeal
  • 1 cup all purpose flour
  • 4 tsp baking powder
  • 1/2 tsp salt
  • 1/4 tsp black pepper
  • 1/4 cup sugar
  • 2 tbsp oil or melted butter plus more oil for your skillet
  • 1 can creamed corn
  • 1/2 cup chopped pickled jalapenos
  • 1/2-1 cup buttermilk
  • 2 large eggs
  • 1 1/2 cup grated medium to sharp cheddar cheese

Instructions
 

  • Preheat the oven to 425 degrees F.  Whisk together all the dry ingredients in a large bowl.  Add the creamed corn, the eggs, the oil or melted butter, the jalapenos, the cheese and start with a half of buttermilk then more if needed.  Place your skillet in the oven to heat with a thin layer of oil or on top of the stove.  Iron skillets work best.  When the skillet is heated, add your cornbread batter and cook until golden brown on top and a toothpick when inserted comes out clean.  
Keyword corn bread, cornmeal, Jalapeno Cornbread, jalapenos
  • Click to share on Pinterest (Opens in new window) Pinterest
  • Click to share on Facebook (Opens in new window) Facebook
  • Click to email a link to a friend (Opens in new window) Email
  • Click to print (Opens in new window) Print
  • Click to share on X (Opens in new window) X
  • Click to share on Tumblr (Opens in new window) Tumblr
  • More
  • Click to share on Reddit (Opens in new window) Reddit

Filed Under: Bread Tagged With: jalapeno cornbread

One of Allen’s Favorites – The Best Linguine with Clams (Linguine con le Vongole)

March 28, 2019 by Becky Spoon

Linguine with Clams
Please follow and like us:
onpost_follow
fb-share-icon
Tweet
Linguine with Clams
Linguine with Clams

Allen loves Linguine with Clams! Absolutely one of his favorites. Red clam sauce, white clam sauce, doesn’t matter. I was able to find fresh clams at the fish market the other day and decided I’d make this for him. In addition to the fresh clams, I always add a good quality canned whole clams because let’s be honest, the more clams the better and I don’t like to just rely on the clams in the shells. Canned clams are one of the few items I do buy in a can and they are really good. They add additional flavor with the juices they are packed in. Here’s the link for the clams I used: https://shop.cento.com/…/cento/products/cento-whole-baby-clams-10-oz

One of Allen’s Favorites – The Best Linguine with Clams (Linguine con le Vongole)

I love to serve this with a Caesar or Italian Salad and just some garlic bread for sopping up the juices. My Italian salad is perfect with this: https://the2spoons.com/italian-salad-with-lemon-olive-oil-vinaigrette/

Linguine with Clams
Linguine with Clams

Ok! Here’s the recipe! Bon Appetite!

Linguine with Clams

Linguine with Clams

Print Recipe Pin Recipe
Course dinner, Lunch, Main Course
Cuisine Italian

Ingredients
  

  • 1 lb fresh littleneck clams, washed
  • 1 10 oz can quality clams
  • 1 8 oz bottle clam juice
  • 1 14.5 oz San Marzano diced tomatoes (I used Muir Glen)
  • 1 garlic clove, finely minced
  • 2 anchovy filets
  • 2 tbsp olive oil
  • 1 small shallot, finely chopped
  • 1/2 tsp dried oregano
  • pinch of red pepper flakes
  • 1 cup dry white wine
  • 1 tbsp fresh basil, chopped
  • 1 1/2 tbsp minced italian parsley
  • 2 tbsp butter for finishing
  • 1 lb dried linguine
  • salt and pepper to tasste

Instructions
 

  • In a large skillet add the olive oil and heat to medium. You don’t want it too hot because it will burn your garlic.  Add the garlic, anchovy filets, shallot, red pepper flakes and cook until the garlic is fragrant. Add the white wine and cook until reduced in half.  Drain the can of clams, reserving the clams and add the juice from the can to the skillet along with the bottle of clam juice,  the can of tomatoes, the oregano, basil, and parsley  Cook for about 20 minutes.  Check for salt and pepper and adjust.  Add the 2 tablespoons butter the clams from the can and the fresh clams.  Cover and cook until all the clams have opened.  Discard any clams that do not open.  
    Meanwhile, cook the linguine in salted boiling water until pasta is done.  Remove the clam in their shells to a plate momentarily (you’ll return them to the skillet). Add the linguine to the sauce, adding a little pasta water, turn up the heat and constantly stir until the pasta absorbs the sauce, adding more pasta water as needed to make a nice sauce.  Turn the heat off and top with the clams in the shells.  Serve immediately in the skillet! Bon Appetite! 
  • Click to share on Pinterest (Opens in new window) Pinterest
  • Click to share on Facebook (Opens in new window) Facebook
  • Click to email a link to a friend (Opens in new window) Email
  • Click to print (Opens in new window) Print
  • Click to share on X (Opens in new window) X
  • Click to share on Tumblr (Opens in new window) Tumblr
  • More
  • Click to share on Reddit (Opens in new window) Reddit

Filed Under: Fish/Seafood Tagged With: Linguine Con le Vongole, Linguine with Clams

  • « Go to Previous Page
  • Page 1
  • Interim pages omitted …
  • Page 49
  • Page 50
  • Page 51
  • Page 52
  • Page 53
  • Interim pages omitted …
  • Page 67
  • Go to Next Page »

Primary Sidebar

Categories

  • Appetizer
  • Beans, Lentils, Grains, Rice
  • Beef
  • Bread
  • Breakfast/Brunch
  • Cocktails
  • Dessert
  • Dishes of Mexico, Tex Mex and New Mexico Red and Green Chile
  • Fish/Seafood
  • Ice Cream
  • Pasta
  • Pizza
  • Pork
  • Poultry
  • Salad Dressings
  • Salads
  • Salsas
  • Sandwiches/Burgers/Hot Dogs
  • Sauces, Compound Butters, Condiments
  • Side dish
  • Soups/Stews/Gumbo//Chili
  • Stocks, Broths, Gravies
  • Vegetables

Copyright © 2025 The 2 Spoons on the Foodie Pro Theme

Manage Cookie Consent
We use cookies to optimize our website and our service.
Functional Always active
The technical storage or access is strictly necessary for the legitimate purpose of enabling the use of a specific service explicitly requested by the subscriber or user, or for the sole purpose of carrying out the transmission of a communication over an electronic communications network.
Preferences
The technical storage or access is necessary for the legitimate purpose of storing preferences that are not requested by the subscriber or user.
Statistics
The technical storage or access that is used exclusively for statistical purposes. The technical storage or access that is used exclusively for anonymous statistical purposes. Without a subpoena, voluntary compliance on the part of your Internet Service Provider, or additional records from a third party, information stored or retrieved for this purpose alone cannot usually be used to identify you.
Marketing
The technical storage or access is required to create user profiles to send advertising, or to track the user on a website or across several websites for similar marketing purposes.
Manage options Manage services Manage {vendor_count} vendors Read more about these purposes
Preferences
{title} {title} {title}