• Skip to primary navigation
  • Skip to main content
  • Skip to primary sidebar

A cook named Rebecca

  • Home
  • Favorite Cookbooks
  • Recipes
  • Travel
You are here: Home / Archives for Side dish

Side dish

best okra and fresh summer tomatoes.

July 18, 2020 by Becky Spoon

okra & fresh summer tomatoesJump to Recipe
okra and fresh summer tomatoes

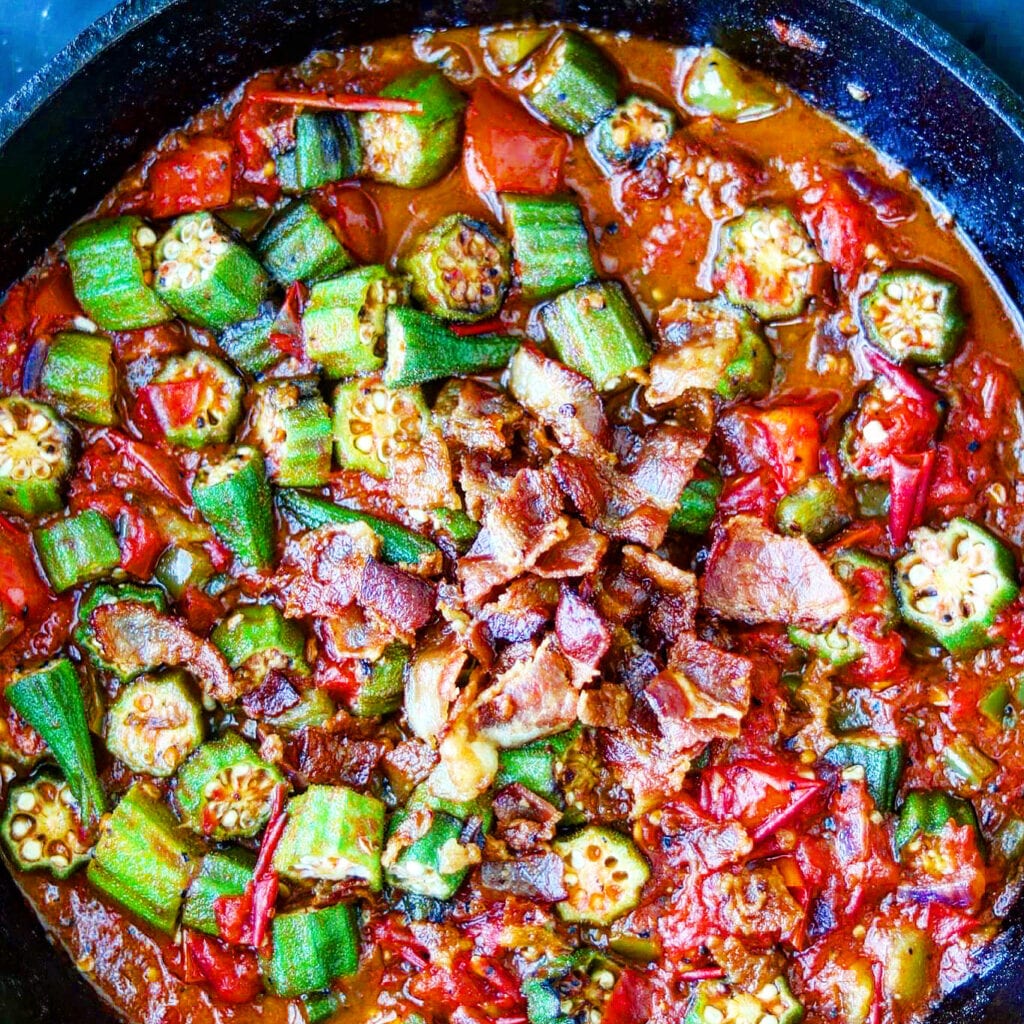
This okra and fresh summer tomatoes is the best. Do ya’ll like okra & tomatoes? I love it! Canned tomatoes are most used but I had fresh summer tomatoes I needed to use and they worked so well. I didn’t peel them, just diced them and tossed them in and cooked them until broken up and a sauce formed.

okra
okra

Okra, bacon, onions, jalapeno, garlic, tomatoes are some of the ingredients. How can you go wrong? Some don’t like okra because of the slime. I’m one of those folks. To get rid of the slime in this recipe, I fry the okra first. Yes. I fry the okra until a little crisp. I then remove it from the pan and set aside. Then I make the stewed tomatoes, adding the okra back in at the every end.

okra and fresh summer tomatoes

best okra and fresh summer tomatoes.

I cooked this in a cast iron skillet. I love my cast iron skillets. If you don’t have one already, they are well worth the purchase! Here’s a link: https://amzn.to/3fzVAvk

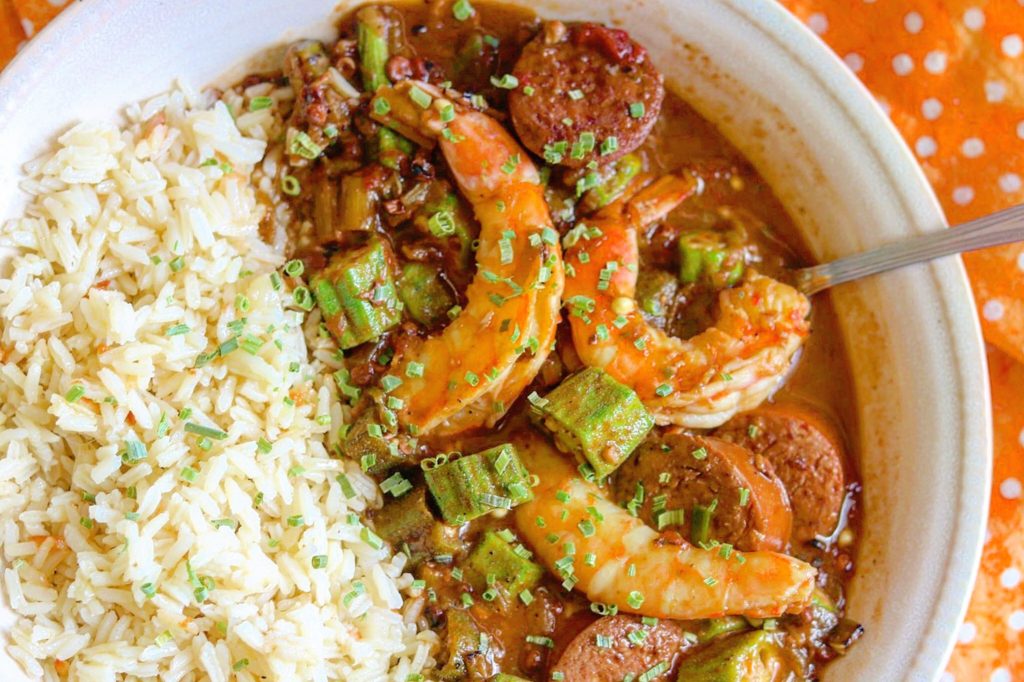
Want another recipe with okra? https://the2spoons.com/shrimp-okra-andouille-smoked-sausage-gumbo/

Shrimp, Okra and Andouille Smoked Sausage Gumbo

This is a delicious dish using okra! And, southern fried okra is always in our home during okra season: https://the2spoons.com/southern-fried-okra-with-creamy-buttermilk-dip/

Southern Fried Okra
Southern Fried Okra

Here’s the new recipe! Enjoy!

Okra and Fresh Summer Tomatoes

Print Recipe
Servings: 4 servings
Course: easy side dish, easy side dish, vegetable
Cuisine: American
Ingredients Method

Ingredients
  

  • 2 tbsp olive oil
  • 4 cups trimmed fresh okra cut into 1 inch pieces
  • 4 slices bacon, shopped
  • 1 tbsp reserved bacon fat
  • 1/2 medium onion, thinly sliced
  • 1 jalapeno stemmed, seeded, and finely chopped
  • 3 garlic cloves, minced
  • 3-4 cups diced fresh tomatoes
  • pinch of sugar
  • salt and pepper to taste
  • 1 bay leaf
  • red pepper flakes (optional)
  • 2 tbsp red wine vinegar
  • 1 1/2 cups chicken stock or vegetable stock

Method
 

  1. Heat the olive oil in a large skillet over medium-high heat.
  2. Add the okra and sauté for 5 to 8 minutes until the okra starts to slightly brown and most of the 'slime' has disappeared. Set aside.
  3. In a medium skillet, cook the bacon until crisp. Remove and set aside. Remove all but a tablespoon or so of the bacon fat. Add the onion, jalapeno, and garlic and sauté for 3 minutes.
  4. Add the tomatoes, a pinch of sugar, salt, pepper, bay leaves, red pepper flakes, and vinegar.
  5. Cook for 10 minutes, until the tomatoes start to break down and start forming something like a paste.
  6. Add the stock and simmer for 15 minutes longer over low heat.
  7. Stir the okra into the tomato sauce, raise the heat to medium, and simmer for another 10 minutes.
  8. Taste, and adjust seasonings, as needed. Remove bay leaves and serve at once.
  9. Add the crumbled bacon to the top.
  • Click to share on Pinterest (Opens in new window) Pinterest
  • Click to share on Facebook (Opens in new window) Facebook
  • Click to email a link to a friend (Opens in new window) Email
  • Click to print (Opens in new window) Print
  • Click to share on X (Opens in new window) X
  • Click to share on Tumblr (Opens in new window) Tumblr
  • More
  • Click to share on Reddit (Opens in new window) Reddit

Filed Under: Side dish, Vegetables Tagged With: okra, summer tomatoes

easy cheesy scalloped potatoes

March 8, 2020 by Becky Spoon

Cheesy Scalloped PotatoesJump to Recipe
Cheesy Scalloped Potatoes

These cheesy scalloped potatoes were the perfect side dish for my Harissa Chicken. I wanted a side dish that could soak up with the juices from the chicken and wow, the potatoes were the perfect side dish. They are so tender and have amazing flavors from garlic, thyme and of course the cheese!

easy cheesy scalloped potatoes

I love scalloped potatoes. My mother would make them growing up and all she did was layer potatoes with onions, added lots of butter and salt and pepper, then poured whole milk over them to cover. She would bake them until they were golden on top and the potatoes were fork tender.

I used Yukon gold for this recipe. I love the Yukon gold potato. They have such a creamy texture and so buttery making them perfect for sopping up the chicken juices.

I used just a regular Parmesan cheese in this recipe. I like to use parmigiana-reggiano most times, but for this recipe it is not necessary. I purchased shredded or grated Parmesan that comes in a container. Here’s a link for what I used: https://amzn.to/2TAnNK5. You can find the grated or shredded in your local store.

Here’s the link for the Harissa Chicken: https://the2spoons.com/so-good-simple-harissa-chicken/

Harissa Chicken
Harissa Chicken

Here’s the recipe for these delicious potatoes! Enjoy!!

Cheesy Scalloped Potatoes

Print Recipe
Servings: 6 servings
Course: easy side dish, Side Dish, Vegetable
Cuisine: American
Ingredients Method

Ingredients
  

  • 3 tbsp butter
  • 1 small onion, thinly sliced
  • 4 garlic cloves, minced
  • 1/4 cup all purpose flour
  • 1 cup chicken stock
  • 1 cup milk, half and half or heavy cream
  • 1 1/1 tsp kosher salt
  • 1/2 tsp pepper
  • 2 tsp fresh thyme leaves, divided
  • 4 lbs Yukon gold potatoes, sliced into 1/8 inch rounds
  • 1 cup grated parmesan cheese

Method
 

  1. Preheat oven to 400°F.  Butter a 9 x 13 baking dish.
  2. Melt butter in a large sauce pan over medium-high heat.  Add onion, and sauté for 4-5 minutes until soft and translucent.  Add garlic and sauté for an additional 1-2 minutes until fragrant.  Stir in the flour until it is evenly combined, and cook for 1 more minute.  Gradually pour in the stock, and whisk until combined.  Add in the milk, salt, pepper, and 1 teaspoon thyme, and whisk until combined.  Continue cooking for an additional 1-2 minutes until the sauce just barely begins to simmer around the edges of the pan and thickens.  Then remove from heat and set aside.
  3. Spread half of the sliced potatoes in an even layer on the bottom of the pan.  Top evenly with half of the cream sauce. Sprinkle with 1/2 cup of the shredded Parmesan cheese.  Top evenly with the remaining sliced potatoes, the other half of the cream sauce, and the remaining 1/c cup of cheddar cheese.
  4. Cover the pan with a lid or foil and bake for 30 minutes.  Remove the foil and bake uncovered for 25-30 minutes, or until the potatoes are cooked through.
  5. When the potatoes are tender and if you want the dish a little more brown on top, turn the broiler on, watching at all times and brown just a little. Sprinkle with fresh thyme. Enjoy!
  • Click to share on Pinterest (Opens in new window) Pinterest
  • Click to share on Facebook (Opens in new window) Facebook
  • Click to email a link to a friend (Opens in new window) Email
  • Click to print (Opens in new window) Print
  • Click to share on X (Opens in new window) X
  • Click to share on Tumblr (Opens in new window) Tumblr
  • More
  • Click to share on Reddit (Opens in new window) Reddit

Filed Under: Side dish, Vegetables Tagged With: potatoes, scalloped potatoes, side dish

The Best Green Chile Deviled Eggs & Corn Salsa

January 2, 2020 by Becky Spoon

Green Chile Deviled EggsJump to Recipe
Green Chile Deviled Eggs

These Green Chile Deviled Eggs are topped with fresh Corn Salsa and they are delicious. I think they’re really pretty too!

Green Chile Deviled Eggs

I cooked the eggs in the Instant Pot. If you haven’t tried eggs in an Instant Pot you have to. One cup of water, the number of eggs you want to use on a single layer, set the pressure cook mode and set for 10 minutes. Then I quick release, remove, crack the eggs all over (I find cracking the ends and rolling them works well) then remove the shells. This is so easy.

I keep frozen Hatch Green Chile in my freezer but for this recipe just a can of green chile is all you need. You can get from most supermarkets, but here is a link that will help: https://amzn.to/2sx132Y.

I made a quick corn salsa for the top of the deviled eggs that just adds texture and more flavor to these delicious deviled eggs. https://the2spoons.com/spicy-corn-salsa/. Yum. These are so good.

The Best Green Chile Deviled Eggs & Corn Salsa

Green Chile Deviled Eggs

Here’s the easy recipe for these deviled eggs!

Green Chile Deviled Eggs with Spicy Corn Salsa

Print Recipe
Course: Appetizer, easy side dish, Side Dish
Cuisine: American, Mexican
Ingredients Equipment Method Notes

Ingredients
  

  • 12 eggs
  • 6 tbsp mayonnaise
  • 2 tsp Dijon Mustard
  • 4 tsp chopped canned Hatch Green Chile
  • 2 tsp freshly squeezed lime juice
  • 2 tsp finely chopped fresh cilantro
  • salt to taste
  • freshly ground black pepper to taste
  • Corn Salsa (https://the2spoons.com/spicy-corn-salsa/)

Equipment

  • Instant Pot

Method
 

For the Eggs
  1. Place the eggs in the steamer basket or in the metal insert of your Instant Pot. Add one cup water. Set the Pressure Cooker on high and set for 10 minutes. When finished, quick release, remove the eggs from the pot. With the cold water running so you can handle them, crack each end of the eggs and gently roll the eggs on a counter top which will easily release the shells. Remove the shells and discard. Cut each egg in half, removing the yellow and placing into a bowl for mixing the other ingredients. *If you don't have an Instant Pot, that's ok, just hard boil your eggs your preferred method.
To Finish the Eggs
  1. Combine the egg yolks, mayonnaise, mustard, chiles, lime juice, and cilantro in a medium, nonreactive bowl. Season well with salt and pepper, then mix well until the yolks are broken up and the ingredients are evenly incorporated.
  2. Evenly pipe or spoon the yolk mixture into the reserved egg white halves. As desired, top with corn salsa.

Notes

http://spicy corn salsa
  • Click to share on Pinterest (Opens in new window) Pinterest
  • Click to share on Facebook (Opens in new window) Facebook
  • Click to email a link to a friend (Opens in new window) Email
  • Click to print (Opens in new window) Print
  • Click to share on X (Opens in new window) X
  • Click to share on Tumblr (Opens in new window) Tumblr
  • More
  • Click to share on Reddit (Opens in new window) Reddit

Filed Under: Appetizer, Side dish Tagged With: appetizer, deviled eggs, green chile eggs, hatch green chile deviled eggs, spicy corn salsa

Yay!! Easy Homemade Onion Rings

November 17, 2019 by Becky Spoon

Homemade Onion Rings

Who doesn’t love homemade Onion Rings?
They are crunchy and absolutely delicious!

We love these Onion Rings with steaks, a burger, or just by themselves served with a great dip as an appetizer. And they freeze great! If there are any leftover I freeze and save for a recipe like a Green Bean Casserole.

Green Bean Casserole

What’d be better than the Classic Green Bean Casserole with homemade onion rings! Here’s the link for my Green Bean Casserole: https://the2spoons.com/classic-green-bean-casserole-with-a-twist/.

Yay!! Easy Homemade Onion Rings

Homemade Onion Rings

I use a sweet onion for onion rings. Sweet onion varieties include Walla Walla, Maui, Vidalia, as well as others with the word “sweet” in the name, like Texas sweet. https://www.thespruceeats.com/uses-for-different-onion-types-4008831.

Here’s the easy recipe!! You’ll be making these all the time.

Homemade Onion Rings

Print Recipe
Course: Appetizer, easy side dish, easy side dish, vegetable
Cuisine: American
Ingredients Method

Ingredients
  

  • 1 Large Sweet onion, sliced and separated
  • 2 Cups Buttermilk + 2 tablespoons flour
  • 1 Tbsp Salt
  • 1/2 Tsp Black pepper or a combination a a little black and cayenne
  • 2-3 Cups Flour
  • 1 Qt Canola oil or vegetable oil

Method
 

  1. Slice onion in less than 1/4 inch slices and pull the layers apart being careful not to break them. In a large mixing bowl add the buttermilk and the 2 tablespoons flour. I use an emulsion blender to combine, but you can whisk it in also. I add the flour to help the make the buttermilk a little thicker which will help the flour adhere to the rings. Add the onion rings and let them soak for about an hour or so.
  2. Place 2 to 3 cups flour into a large bowl. I find a large bowl is much easier to toss the onion rings in a few at a time. Add the salt and black pepper to taste and thoroughly combine.
  3. Heat the oil in a large stockpot to about 365-375. Add a few onion rings at a time to the flour mixture, tossing with the flour to coat, shaking off excess. you don't want to pack the flour because it will make them tough, so I just toss them until they are coated.
  4. Add the onion rings, a few at a time, to the hot oil and cook turning with a large rounded spatula and cook until golden brown. Remove to a rack lined sheet pan and keep in a warm oven until all are done.
  • Click to share on Pinterest (Opens in new window) Pinterest
  • Click to share on Facebook (Opens in new window) Facebook
  • Click to email a link to a friend (Opens in new window) Email
  • Click to print (Opens in new window) Print
  • Click to share on X (Opens in new window) X
  • Click to share on Tumblr (Opens in new window) Tumblr
  • More
  • Click to share on Reddit (Opens in new window) Reddit

Filed Under: Side dish, Appetizer Tagged With: Homemade onion rings, onion rings, onions

Best Cheesy Au Gratin Potatoes

October 29, 2019 by Becky Spoon

Cheesy Au Gratin Potatoes

I made these Cheesy Au Gratin Potatoes as a side dish for my Beer Can Cornish Hen because I though how good they’d bee to sop up all those yummy juices from the sauce on the hens and I was right. The hens had a beautiful spice rub that made an even more beautiful sauce and the gruyere cheese I used in this dish just all went together so well. Here’s the link for my Beer Can Cornish Hen that you have to try! https://the2spoons.com/so-yummy-simple-beer-can-cornish-hen/.

Beer Can Cornish Hen

I used gruyere which alway works well because it melts beautifully. You can use cheddar or another good melting cheese of your choice. These are really simple. I cook my potatoes first to the point of “almost done”. I drain them and add them to some sautéed onions, Then I butter a baking dish and stack the potatoes a few at a time. When all the potatoes are in the dish, I pour the sauce over and add just a little more cheese to the top. I then bake them until browned and bubbly.

Best Cheesy Au Gratin Potatoes

Cheesy Au Gratin Potatoes

What’s the difference between Scalloped Potatoes and Au Gratin Potatoes? Here’s a little explanation for you: “Au gratin, by definition, means “covered with breadcrumbs or cheese and then baked until brown,” while scalloped potatoes refers to tubers that have been baked in a creamy sauce and covered with seasoned bread or cracker crumbs. The big difference between the two, then, is the cheese component.” Here’s the link for this reference: http://www.leaf.tv/articles/the-difference-between-potatoes-au-gratin-and-scalloped-potatoes/.

Here’s the delicious recipe! Enjoy!

Cheesy Au Gratin Potatoes

Print Recipe
Servings: 6 servings
Course: easy side dish, Side Dish, Vegetable
Cuisine: American
Ingredients Method

Ingredients
  

  • 4 medium russet potatoes, medium sliced I used a mandolin and used the largest slice
  • chicken stock for cooking the potatoes
  • salt
  • 2 tbsp butter
  • 1 tbsp olive oil
  • 1 medium onion, sliced
  • 2 tbsp flour
  • 1 1/2 cup cooking broth from the potatoes
  • 1 cup heavy cream
  • 1 fresh sage leaf (optional)
  • 2-3 sprigs fresh thyme
  • salt and pepper to taste
  • 3 oz gruyere cheese

Method
 

  1. Slice the potatoes in a medium sliced round. I used a mandolin set on the largest cut. Place the potatoes in a sauce pan and cover with chicken stock. Season with a little salt. Bring to a boil and cook about 6 or 7 minutes. Remove the potatoes to a bowl with a slotted spoon reserving the cooking liquid.
  2. While the potatoes are cooking add the butter and olive oil to a skillet and add the sliced onions. Cook until the onions are a beginning to brown. Remove them and add them to the bowl with the potatoes reserving the oil in your skillet. Gently distribute or combine the potatoes and onions, being careful to not break up the potato slices. If you break some, no worries, but you do want to keep them whole if possible.
  3. Preheat the oven to 350 F. Butter the dish and start stacking the potatoes in the dish until all have been used. Use a dish that will just hold those potatoes, not too big.
  4. To make the sauce: In the butter and olive oil skillet that you cooked the onions and reserved, heat and add 2 tablespoons flour and cook for a minute or so until it starts to brown a lilttle. Add the 1 1/2 cup of the cooking broth and whisk to prevent lumps. When the sauce has thickened, add the heavy cream and all of the cheese except just a small portion that you'll add to the top before baking. Cook until heated throgh. Check for salt and pepper and adjusst. Pour the sauce over the potatoes and bake until golden brown. If you want a little extra browning, place them under the broiler for just a few minutes watching closely until your desired browness. Remove from the oven and serve immediately. They can be brought to room temperature and re-heated later.
  • Beer Can Cornish Hen
    Beer Can Cornish Hen
  • Cheesy Au Gratin Potatoes
    Cheesy Au Gratin Potatoes
  • Click to share on Pinterest (Opens in new window) Pinterest
  • Click to share on Facebook (Opens in new window) Facebook
  • Click to email a link to a friend (Opens in new window) Email
  • Click to print (Opens in new window) Print
  • Click to share on X (Opens in new window) X
  • Click to share on Tumblr (Opens in new window) Tumblr
  • More
  • Click to share on Reddit (Opens in new window) Reddit

Filed Under: Side dish, Vegetables Tagged With: au gratin, au gratin potatoes, cheesy, Easy Side Dish, potatoes, side dish

Super Southern Fried Okra with Creamy Buttermilk Dip

July 5, 2019 by Becky Spoon

Southern Fried Okra
Southern Fried Okra
Southern Fried Okra

Do ya’ll like Fried Okra? Yes I said ya’ll! I guess posting this Southern recipe really brings out the “South” in me! LOL! I saw this recipe in one of Emeril’s cookbooks and I’ve made it many times!

I love the foods of the South I grew up eating. I love this okra! It’s crispy and the buttermilk dressing is so yummy and it can be used for so many other fried things or even for a crudité platter! Salad Dressing? Yes, it’d be great! Oh, and it’d be a great dip for potato chips!

Southern Fried Okra
Southern Fried Okra

I like to just spit the okra down the middle for presentation purposes, but I think most are more familiar with the sliced in about a 1/2 inch thick round. So, either way works, whatever is your particular preference.

I have a few different ways I fry okra. For one, you can just toss in some seasoned flour and fry. Another way I cook fried okra is to have a batter station set up with flour, beaten eggs, then seasoned cornmeal. I coat each piece in flour, then the beaten eggs and then seasoned cornmeal. It’s really good, very similar to this, but this recipe has fewer steps and is really easy.

Super Southern Fried Okra with Creamy Buttermilk Dip

Before I start the recipe let’s talk ingredients, specifically the buttermilk. I have made this buttermilk dressing with a low-fat readily available brand, but it just seemed so thin, resulting in a watery consistency. I want thicker buttermilk for this dip. I mean, it’s a dip! You don’t want a thin coating from a watery dip, you want a dollop of dip!

With all that said, use whole buttermilk, not low-fat. I only use whole milk even if it’s not buttermilk. It’s like using the real thing, like butter. The real thing is healthier in the long run because it is more natural, it doesn’t have a lot of “stuff” to change its character. My philosophy is always “everything in moderation”. And, honestly, how can the “real” stuff as it is intended to be, be bad for you? I don’t want to lead you wrong so here’s a link that will give you certain health benefits of both. https://healthyeating.sfgate.com/whole-vs-lowfat-buttermilk-1947.html.

I just love Fried Okra. I guess I just love okra! I love okra as in Okra and Tomatoes. I love okra fried with potatoes and onions. Oh, and in Gumbo. Absolutely one of my favorite uses for okra! So, the other day my have to have meat hubby was gone so I made Macaroni and tomatoes from my garden and I made this along with it. Here’s that link because you need that recipe too! https://the2spoons.com/macaroni-with-fresh-tomatoes/.

Super Southern Fried Okra with Creamy Buttermilk Dip

Here’s the super easy recipe! Hope you try this!

Southern Fried Okra

Print Recipe
Servings: 4 servngs
Course: Appetizer, Side Dish
Cuisine: American
Ingredients Method

Ingredients
  

For the Okra
  • vegetable oil for frying
  • 1 cup buttermilk
  • 1 egg
  • 2 tbsp Louisiana hot sauce or your favorite
  • 1 cup all purpose flour
  • 1 cup yellow cornmeal
  • 2 tsp. cayenne pepper (omit if you don't like the heat or reduce the amount)
  • 2 tsp garlic powder or granulated garlic
  • 1 tbsp salt plus more for seasoning
  • 1 tsp black pepper
  • 2 lbs okra, either sliced into 1/2 inch thick rounds or sliced down the middle like I did)
For the Buttermilk Dip
  • 3/4 cup buttermilk, not low fat
  • 1/2 cup mayonaise
  • 1/4 cup sour cream
  • 1/2 tsp cayenne pepper (optional)
  • 1 tsp minced garlic
  • 1 tbsp green onion tops
  • salt to taste

Method
 

For the Okra
  1. Heat the oil in a deep-fryer to 360°F or in a heavy iron dutch oven, or similar.


  2. In a small bowl, whisk the buttermilk, egg, and hot sauce to combine. In a second bowl, combine the flour, cornmeal, cayenne, granulated garlic, the 1 tablespoon salt, and the black pepper.
  3. Working in batches, dredge the okra first in the buttermilk mixture, allowing any excess to drip off, then in the flour mixture. Shake to remove any extra breading. Repeat until all of the okra is breaded.
  4. Fry the okra, in batches, in the hot oil, turning it as necessary, until lightly golden, about 5 minutes. Transfer the fried okra to paper towels to drain, and season lightly with salt. Repeat with the remaining okra.
  5. Serve the okra hot, with the Creamy Buttermilk Dip on the side for dipping.
For the Buttermilk Dip
  1. Combine the buttermilk, mayonnaise, sour cream, cayenne, garlic, and chives in a small bowl, and stir to mix well. Add salt to taste. Serve immediately, or cover and refrigerate until ready to serve (up to 1 day in advance).
  • Southern Fried Okra
    Southern Fried Okra
  • Macaroni and Tomatoes
    Macaroni and Tomatoes
  • Click to share on Pinterest (Opens in new window) Pinterest
  • Click to share on Facebook (Opens in new window) Facebook
  • Click to email a link to a friend (Opens in new window) Email
  • Click to print (Opens in new window) Print
  • Click to share on X (Opens in new window) X
  • Click to share on Tumblr (Opens in new window) Tumblr
  • More
  • Click to share on Reddit (Opens in new window) Reddit

Filed Under: Appetizer, Side dish, Vegetables Tagged With: appetizer, fried okra, okra, side dish, southern, southern fried okra

  • « Go to Previous Page
  • Page 1
  • Page 2
  • Page 3
  • Page 4
  • Interim pages omitted …
  • Page 6
  • Go to Next Page »

Primary Sidebar

Categories

  • Appetizer
  • Beans, Lentils, Grains, Rice
  • Beef
  • Bread
  • Breakfast/Brunch
  • Cocktails
  • Dessert
  • Dishes of Mexico, Tex Mex and New Mexico Red and Green Chile
  • Fish/Seafood
  • Ice Cream
  • Pasta
  • Pizza
  • Pork
  • Poultry
  • Salad Dressings
  • Salads
  • Salsas
  • Sandwiches/Burgers/Hot Dogs
  • Sauces, Compound Butters, Condiments
  • Side dish
  • Soups/Stews/Gumbo//Chili
  • Stocks, Broths, Gravies
  • Vegetables

Copyright © 2025 The 2 Spoons on the Foodie Pro Theme

Manage Cookie Consent
We use cookies to optimize our website and our service.
Functional Always active
The technical storage or access is strictly necessary for the legitimate purpose of enabling the use of a specific service explicitly requested by the subscriber or user, or for the sole purpose of carrying out the transmission of a communication over an electronic communications network.
Preferences
The technical storage or access is necessary for the legitimate purpose of storing preferences that are not requested by the subscriber or user.
Statistics
The technical storage or access that is used exclusively for statistical purposes. The technical storage or access that is used exclusively for anonymous statistical purposes. Without a subpoena, voluntary compliance on the part of your Internet Service Provider, or additional records from a third party, information stored or retrieved for this purpose alone cannot usually be used to identify you.
Marketing
The technical storage or access is required to create user profiles to send advertising, or to track the user on a website or across several websites for similar marketing purposes.
Manage options Manage services Manage {vendor_count} vendors Read more about these purposes
Preferences
{title} {title} {title}