• Skip to primary navigation
  • Skip to main content
  • Skip to primary sidebar

A cook named Rebecca

  • Home
  • Favorite Cookbooks
  • Recipes
  • Travel
You are here: Home / Archives for Fish/Seafood

Fish/Seafood

Yes! Crazy Good Salmon Rice Bowl!

January 25, 2020 by Becky Spoon

Salmon Rice BowlJump to Recipe
Salmon Rice Bowl
Salmon Rice Bowl

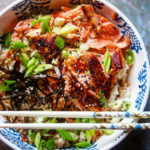
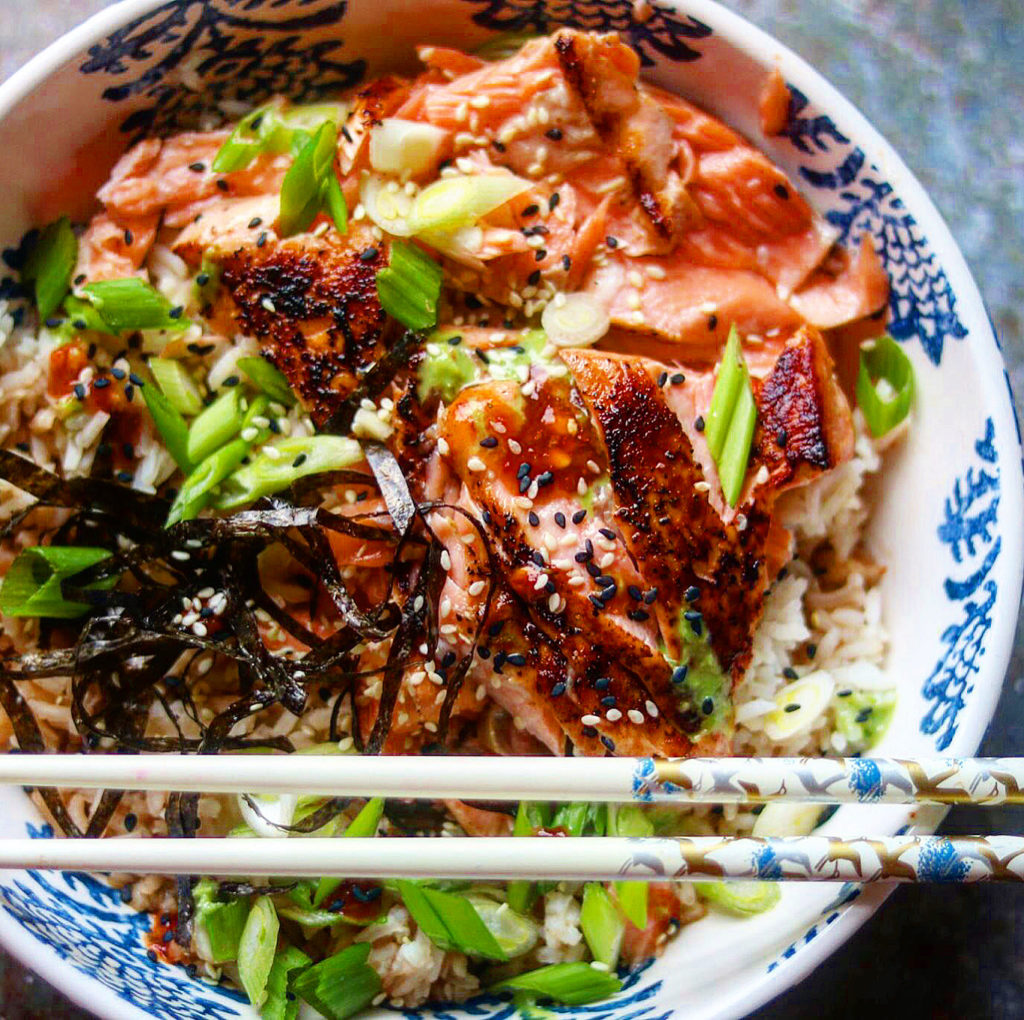
Oh, my gosh! If you aren’t having a Salmon Rice Bowl in your menus, you are truly missing out! So light, so simple, so amazingly fresh and delicious!

Salmon Rice Bowl
Salmon Rice Bowl

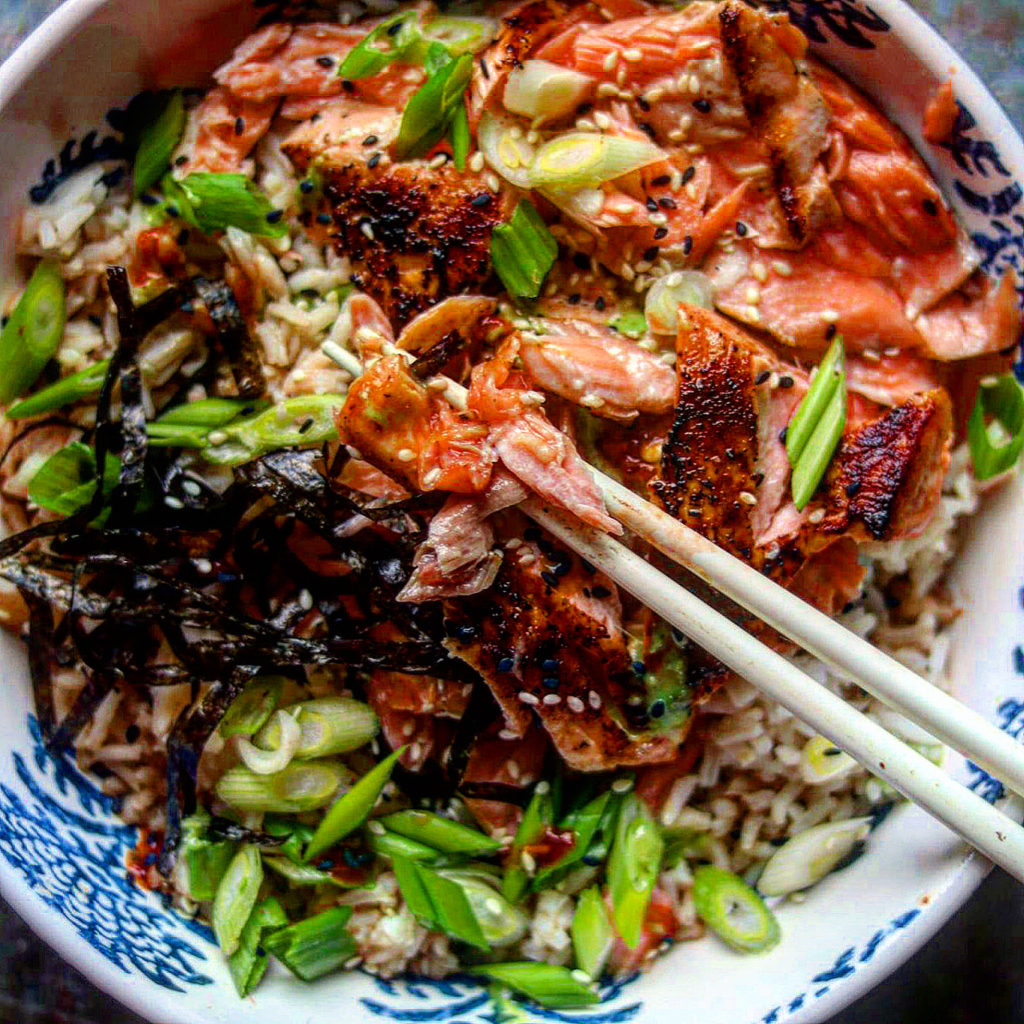
Delicious fresh wild salmon that is not overcooked in this dish is the star ingredient me! I got this recipe idea from Food and Wine Magazine. They used a Japanese tea, Gen Maicha, a green tea with roasted brown rice tea bags for the broth. https://amzn.to/2uBQVpZ.

I steeped a tea bag in boiling water and I went a step further. I added one of the spice packets that you find in ramen noodles! Yes they are always a great spice to add to rice bowls or other dishes like ramen, even Pho.

The rice I used was sushi rice which I love. I keep it on hand for making sushi of course, or I love to use it in Asian dishes, either as a side dish for a stir fry or in a rice bowl. Here’s a link for the rice. https://amzn.to/2GjNxTo.

One more ingredient you may not keep on hand unless you are making Japanese or other Asian dishes is Nori. https://amzn.to/2tOh4lq Nori is the shredded green in the bottom of the bowl. Nori is roasted seawood and it is:

  • a Low calorie Superfood
  • Packed with vitamins, minerals and amino acids

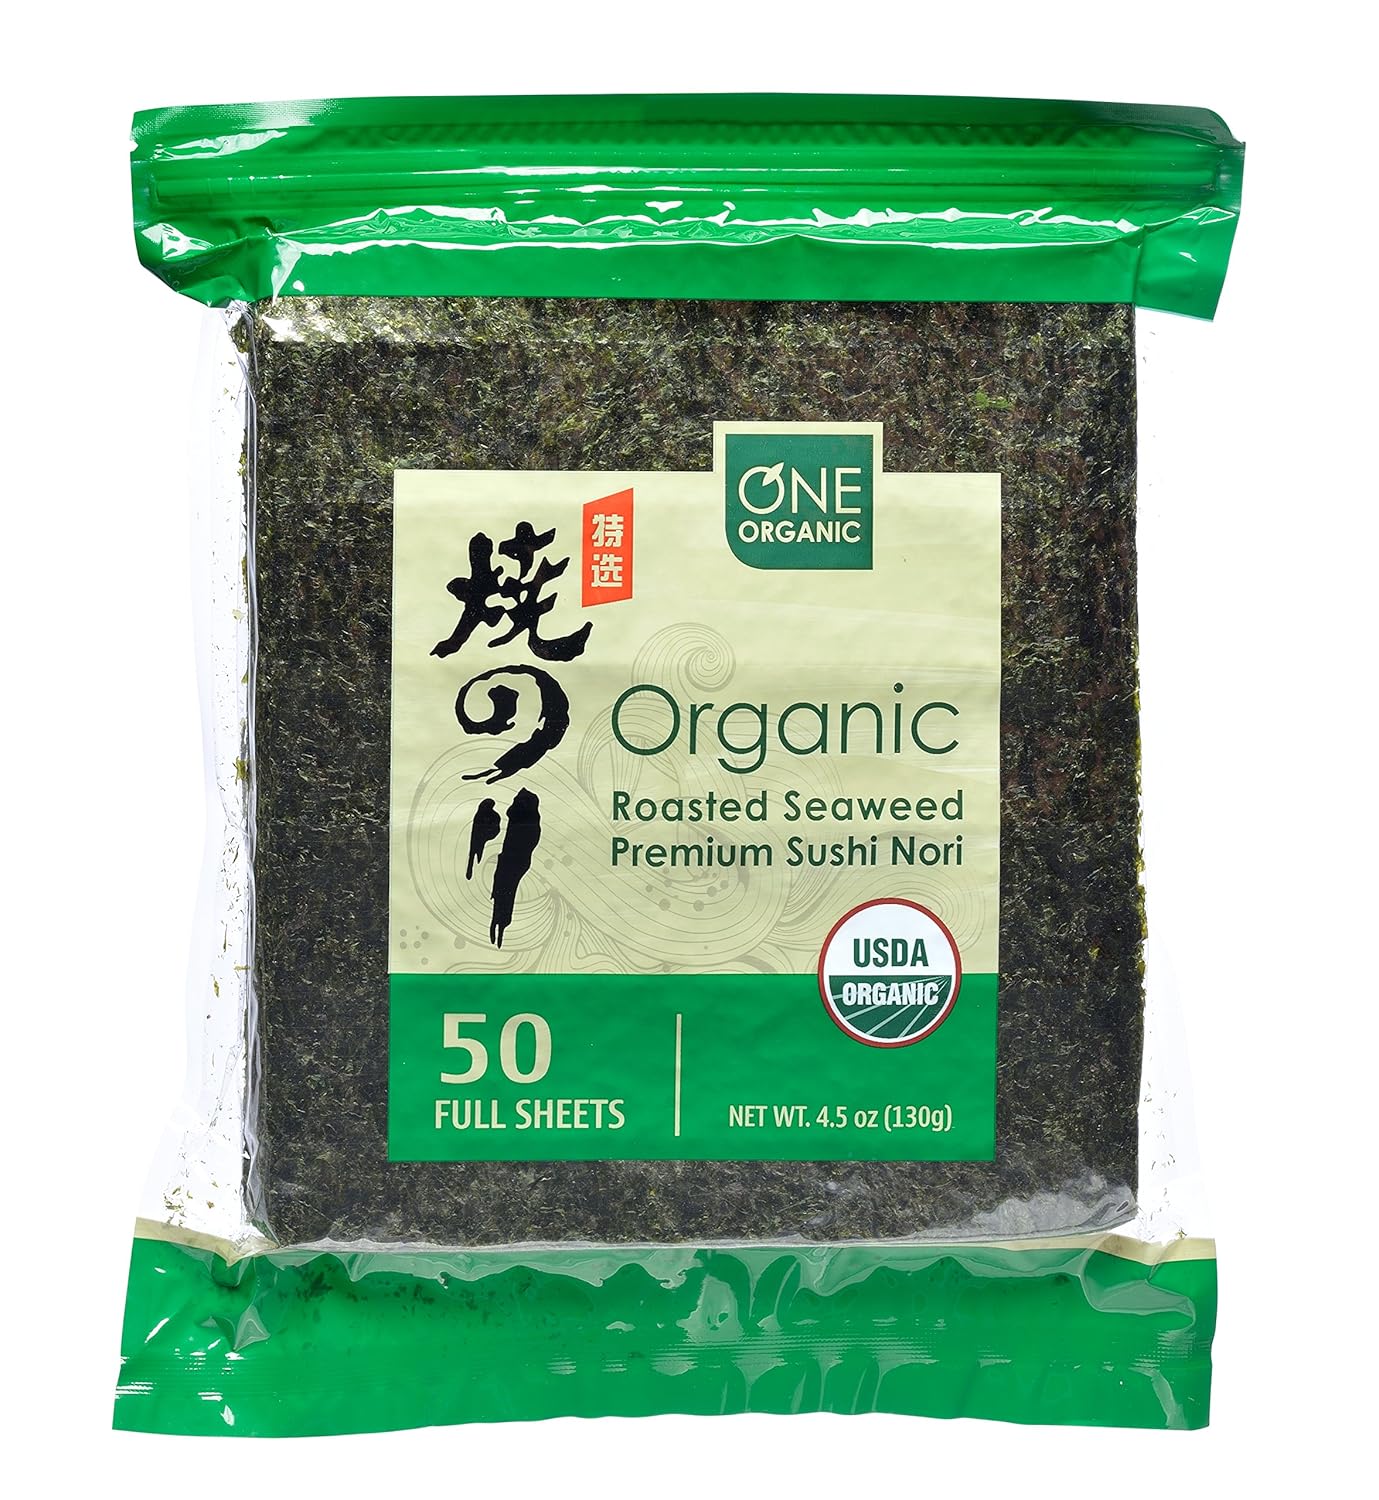
I keep Nori in the pantry for shushi or for making a broth for ramen.

Yes! Crazy Good Salmon Rice Bowl!

Salmon Rice Bowl

Here’s this easy recipe!

Salmon Rice Bowl

Print Recipe
Servings: 2 servings
Course: brunch, dinner, Lunch, Main Course
Cuisine: Asian, Japanese
Ingredients Method

Ingredients
  

  • 2 cups water
  • 3 single serving Gen Maicha (japanese green tea with roasted brown rice) tea bags, see link in post
  • 1 seasoning packet from a pack of ramen noodles
  • 1/2 tsp salt, divided
  • 1 1/2-2 cups hot cooked sushi rice (see link in post)
  • 2 4 oz salmon fillets, pan fried, skin discarded and flesh flaked
  • olive oil for cooking the salmon
  • sprinkling of salt and pepper over the salmon
  • Sliced scallion, shredded roasted nori, pickled ginger, black and white sesame seeds, wasabi paste (options for topping) I used all of these as my toppings

Method
 

  1. Bring 2 cups water to a boil in a teapot or small saucepan over high heat; remove from the heat. Add the tea bags and 1/4 tsp salt and the ramen noodle seasoning pack. Cover and let steep 2 to 3 minutes.
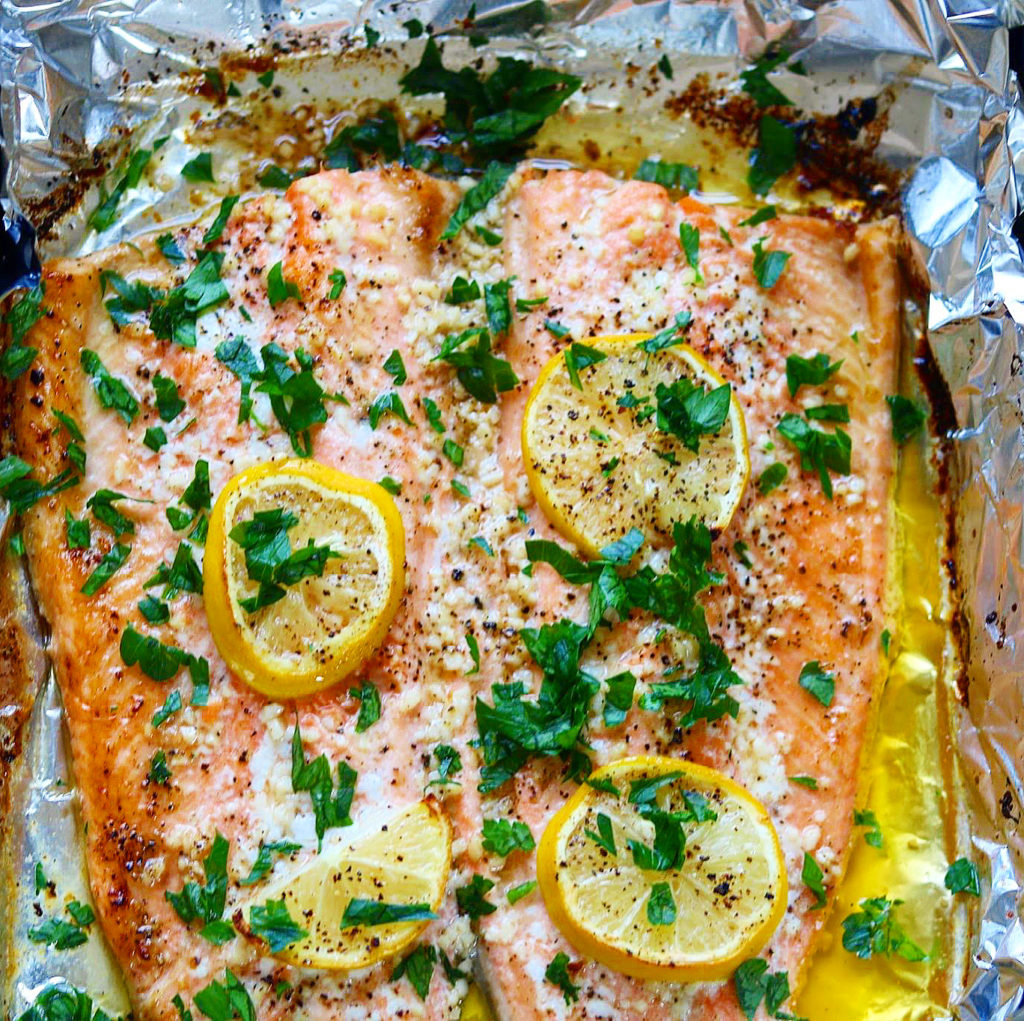
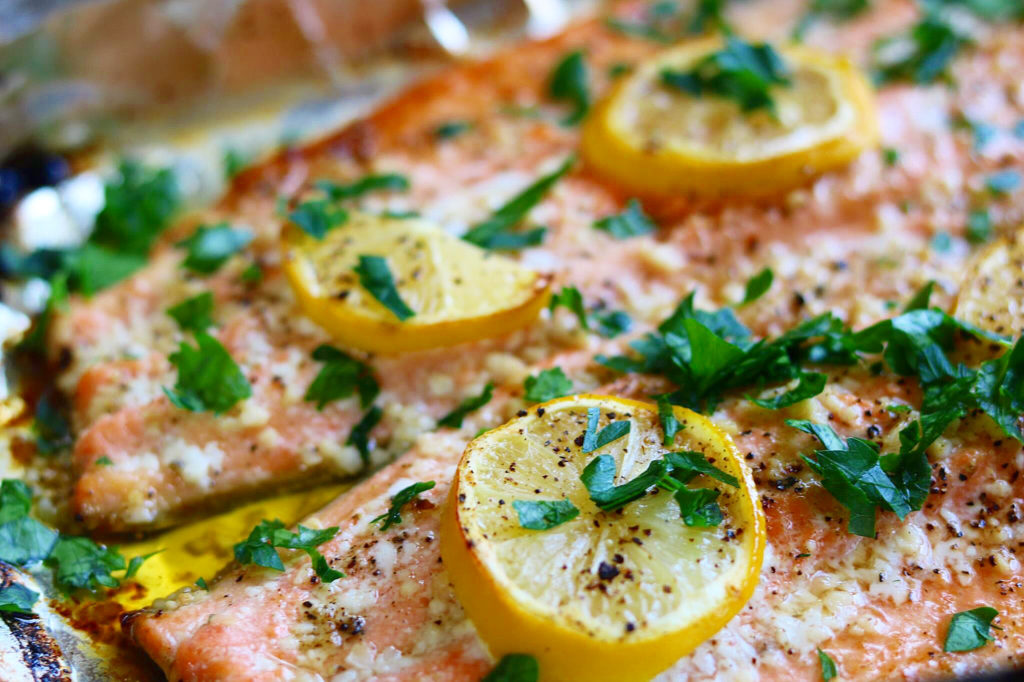
  2. Meanwhile, heat a skillet to medium high. Dry the salmon and salt and pepper on both sides. Add a little olive oil, about 1 tablespoon, to the pan and add the salmon filet. Cook about 4 minutes skin side down or until easily moves in the pan. Flip over and cook on the other side for about 2 minutes for medium rare. Remove from pan and set aside.
  3. Divide rice between 2 bowls. Remove and discard the tea bags. Pour the tea over the rice. Add the flaked salmon filet to each bowl. Sprinkle evenly with the remaining 1/4 teaspoon salt. Serve with the desired toppings above. Enjoy!
  • Click to share on Pinterest (Opens in new window) Pinterest
  • Click to share on Facebook (Opens in new window) Facebook
  • Click to email a link to a friend (Opens in new window) Email
  • Click to print (Opens in new window) Print
  • Click to share on X (Opens in new window) X
  • Click to share on Tumblr (Opens in new window) Tumblr
  • More
  • Click to share on Reddit (Opens in new window) Reddit

Filed Under: Fish/Seafood Tagged With: japanese cooking, Rice, rice bowl, salmon

Easy Lemony Baked Steelhead Trout

January 13, 2020 by Becky Spoon

Baked Steelhead TroutJump to Recipe
Steelhead Trout
Baked Steelhead Trout

This baked Steelhead Trout takes minutes to bake! Loaded with garlic and lemon, this dish was absolutely delicious. I purchased this trout fresh, immediately froze it, then allowed it to thaw in my refrigerator overnight. The trout was still as fresh as it had been the day I bought it!

Steelhead Trout
Baked Steelhead Trout

Steelhead and Rainbow Trout are the same species of fish. The difference between the two are that the rainbow trout remain in fresh water, while the steelhead are anadromous – living in both fresh water and the ocean for parts of their lives.

Steelhead trout is a member of the salmon family that is commonly fished for sport in the United States. It is related to (and similar in many ways to) the rainbow trout, but steelhead trout are slightly larger, are less colorful.

Steelhead trout taste much like salmon. It is a little stronger in flavor, but you can easily substitute salmon in this recipe. It is a beautiful fish that makes a wonderful presentation.

Steelhead Trout
Baked Steelhead Trout

I actually had this for breakfast. It was wonderful with some hashbrowns, fried eggs and toast.

This would be wonderful with just some buttered red potatoes, a nice salad or a vegetable like asparagus or sautéed spinach. Here is an asparagus recipe on the blog that would be delicious with this: https://the2spoons.com/sesame-roasted-asparagus-with-whipped-boursin/.

ROASTED asparagus

Easy Lemony Baked Steelhead Trout

When I bought this it was whole. Before cooking I removed the head and cut the fish down the middle. There is a line of bones that I removed, but all of this was easily done.

Melted butter with garlic and lemon juice, along with slices of lemon makes for such a delicious meal. I cooked I in a 400 degree oven for about 20 minutes, checking after about 10. You want to cook it until the fish is a little flaky, but you sure don’t want to overcook it.

Easy Baked Steelhead Trout

Print Recipe
Ingredients Method

Ingredients
  

  • 1 Whole steelhead trout cut down the middle and bones removed (about 3-5 bounds)
  • 1/2-1 stick butter depending on the size of your trout
  • 1-2 tsp minced garlic
  • zest of one lemon
  • juice of one lemon
  • 1 lemon sliced
  • salt and pepper

Method
 

  1. Preheat the oven to 400 degrees. Prepare the fish by removing the head and slicing through but leaving it whole, so you can lay flat. Thoroughly wash the fish. Dry the fish and lay flat so you can remove the bones. There is a strip of bones I just easily removed with a sharp knife pulling them out, you can feel them and it's not hard to do. You may be able to buy your fish already prepped, but mine was whole, but still very easy.
    Line a sheet pan or baking dish with foil. Place your fish in the dish. Melt your butter, then add the minced garlic, lemon zest and lemon juice. Brush on both sides of your fish, pouring the remainder on and around the fish. Sprinkle all over with salt and pepper. Lay the lemons on top of your fish on both sides.
    Bake for about 10 minutes, then check for doneness. You want the fish to be a little firm but flaky. If not done, place back into the oven and cook an additional 10 minutes or until flaky. you could even cook under the broiler, watching closely so that it doesn't burn.
    Use any leftover to make croquettes. Use just like flaked salmon. Enjoy
  • Click to share on Pinterest (Opens in new window) Pinterest
  • Click to share on Facebook (Opens in new window) Facebook
  • Click to email a link to a friend (Opens in new window) Email
  • Click to print (Opens in new window) Print
  • Click to share on X (Opens in new window) X
  • Click to share on Tumblr (Opens in new window) Tumblr
  • More
  • Click to share on Reddit (Opens in new window) Reddit

Filed Under: Fish/Seafood Tagged With: baked steelhead trout, dinner, fish, garlic, lemon butter, main course, seafood, steelhead trout, sunday lunch, trout

The Best – Coconut Shrimp

December 26, 2019 by Becky Spoon

Coconut ShrimpJump to Recipe
Coconut Shrimp
Coconut Shrimp

Add Coconut Shrimp to your Holiday menu! This is one of my favorite appetizers! There is nothing not to love about crispy and crunchy breadcrumb coated fried shrimp, with coconut flakes, and served with a sauce!

We have plenty of time for holiday cooking and parties. Even though Christmas has passed, we still have the New Year celebrations that call for more tasty treats.

So good and easy, this shrimp is first dredged in flour, then egg, then panko with unsweetened coconut. They fry up in minutes and you have a fabulous dish! Great for finger food platters, leave the tail on for easy dipping and eating!

Coconut Shrimp
Coconut Shrimp

The Best Shrimp!

I served these with some lemon wedges and a spicy sriracha mayo. Not familiar with siracha? Here’s a link to help: https://www.amazon.com/Huy-Fong-Sriracha-Chili-Bottle/dp/B00JV21X2W.

Coconut Shrimp

Need more appetizers for New Years? Try my simple Pigs in a Blanket, an all time favorite! https://the2spoons.com/still-a-favorite-retro-pigs-in-a-blanket/.

Retro Pigs In A Blanket

Add my Spicy Hot wings to the mix:https://the2spoons.com/sticky-baked-chicken-wings/

Spicy Chicken Wings
Spicy Chicken Wings

And, don’t forget the Muffuletta’s I posted the other day! https://the2spoons.com/love-a-new-orleans-muffuletta/

New Orleans Muffuletta

The Best Shrimp!

Coconut Shrimp

Here’s the simple recipe! Make them soon! You will love them. I like to use a large shrimp. When cleaning, I use scissors, cut along the back shell, remove the shells and be sure and devein the shrimp. Be careful to leave the tail on because this will assist in serving, especially if you are having finger foods. I always wrap the shells and place them in the freezer to use in making stock at a later time, especially if I’m making gumbo that calls for a seafood stock from the shells. I also buy head on. Not only are they less expensive, but they make an amazing stock.

Coconut Shrimp

Print Recipe
Servings: 4 servings
Course: Appetizer, dinner, Lunch, Main Course
Cuisine: American, Seafood
Ingredients Method

Ingredients
  

  • 3/4 cup all purpose flour
  • 2 tsp paprika
  • 1 tsp garlic powder
  • 1 tsp onion powder
  • Pinch of kosher salt, plus more for sprinklilng
  • 3 large eggs
  • 1 cup panko breadcrumbs
  • 1 cup shredded unsweetened coconut
  • 1 lb large peeled and deveined shrimp, with tails on
  • 1 1/2 cup coconut or vegetable oil
  • Spicy Mayo
  • Lemon Wedges
Spicy Mayo
  • 1/2 cup mayonnaise
  • 1 to 2 tbsp sriracha
  • juice of one lemon

Method
 

  1. Whisk the flour, paprika, garlic powder, onion powder and 1 teaspoon salt in a wide, shallow bowl. Beat the eggs with a splash of water in a second bowl. Combine the panko and coconut in a third bowl. Line a pan in foil and set aside.


  2. Toss the shrimp in the flour mixture to coat; then, working one at a time, shake off the excess flour and dip the shrimp in the egg. Let the excess egg drip off, then toss the shrimp in the coconut-panko mixture until thoroughly coated. Put the shrimp on the lined pan and repeat with the remaining shrimp.
  3. Heat the coconut oil in a large skillet over medium-high heat until very hot and a panko crumb dropped into it sizzles immediately. Line a plate with a paper towel. Add about half of the shrimp, making sure the skillet is not too crowded, and pan-fry, turning once, until the shrimp are cooked through and golden brown all over, 3 to 4 minutes; transfer to the lined plate and sprinkle with salt. Repeat with the remaining shrimp. Serve with the Spicy Mayo and lemon wedges.
  4. Combine the mayonnaise, sriracha and lemon juice in a small bowl.
  • Click to share on Pinterest (Opens in new window) Pinterest
  • Click to share on Facebook (Opens in new window) Facebook
  • Click to email a link to a friend (Opens in new window) Email
  • Click to print (Opens in new window) Print
  • Click to share on X (Opens in new window) X
  • Click to share on Tumblr (Opens in new window) Tumblr
  • More
  • Click to share on Reddit (Opens in new window) Reddit

Filed Under: Fish/Seafood Tagged With: holidays, shrimp, sriracha

Fun! Super Good Oyster Po’Boy

October 24, 2019 by Becky Spoon

Oyster Po’BoyJump to Recipe
Oyster Po’Boy
Oyster Po’Boy

This Oyster Po’Boy is super good and fun!! These delicious fried oysters are served on a buttered and toasted hoagie bun, slathered with homemade Remoulade! I love fried oysters!

Here’s a little history of the po’boy from this link: https://www.whereyat.com/the-history-of-the-po-boy

“No one is going to argue about how important food is to the very identity of New Orleans. The city has graced the culinary world with all kinds of savory (gumbo, crawfish etouffée, red beans and rice) and sweet (beignets, Bananas Foster, sno-balls) creations. One New Orleans food dish, however, is almost deceptive in its simplicity, and that is the humble po-boy.

For the uninitiated, a poor boy (aka po-boy, po’ boy, or po boy) is a sandwich that uses a six-inch or foot-long baguette-style bread that is more commonly known as French bread. Traditionally, po-boys are filled with either roast beef or fried seafood (oysters, shrimp, crab, what have you) and topped with pickles, lettuce, tomatoes, and mayonnaise. Nowadays, however, you can fill a po-boy with basically anything you want (burger patties, hot sausage, french fries, alligator meat, caprese salad, etc.). But for a sandwich with such a modest look, it has a pretty unique history behind it.

The sandwich itself has been present in New Orleans since around the late 1800s, when it was then called an oyster loaf (literally, fried oysters on French loaves). The origins of when it started being called a “po-boy” are actually not too certain, because a lot of different legends have attached themselves to the sandwich over the years. The most common consensus to explain the “po-boy” term, at least locally, comes from the story of the Martin brothers.

In the mid-1910s, Bennie and Clovis Martin moved to New Orleans from their home in Raceland, Louisiana, to work as streetcar conductors. In 1922, the brothers then decided to open up their own restaurant, Martin Brothers’ Coffee Stand and Restaurant, specializing in French loaf sandwiches with anything you wanted on them. These sandwiches wouldn’t be called po-boys until 1929, when members of the Amalgamated Association of Street and Electric Railway Employees of America, Division No. 194, went on a four-month- long strike, thereby leaving over a thousand union streetcar workers without a source of income.

The Martin brothers, to show their support for the workers affected by this strike, wrote a letter to one of the local newspapers, stating that they would give a free meal to any members of Division 194. Legend has it that when the brothers saw one of the union workers walk into their restaurant, one of them would yell, “Here comes another poor boy!” Since the free meal given to these workers often included the customary sandwich, the name “poor boy” gradually became associated with the sandwich itself.” Click on the link to read further.

Oyster Po’Boy
Oyster Po’Boy
Fried Oysters
Fried Oysters

Fun! Super Good Oyster Po’Boy

The oysters are very simple. I’ve seen a lot of recipes use cornmeal, some of the recipes use cornmeal and flour, some of the recipes use lots of spices, but I have found the best breading is a simple all purpose flour seasoned with salt and pepper.

Want another po’boy or sub type sandwich? Check out this recipe on the blog: https://the2spoons.com/perfect-roast-beef-and-provolone-sandwich/.

Here’s the simple recipe for this delicious oyster po’boy. You can substitute the oysters for shrimp if you don’t like oysters. Enjoy!

Fun! Super Good Oyster Po’Boy

Print Recipe
Servings: 2 servings
Course: dinner, Lunch, Main Course
Cuisine: cajun, creole
Ingredients Method

Ingredients
  

For the RÉMOULADE
  • 1 Cup Mayonnaise
  • 1/2 Cup Creole mustard (like Zatarains)
  • 2 Tbsp Louisiana hot sauce
  • 1 Tbsp Honey
  • 1 Tsp Finely chopped garlic
  • 1/8 Tsp Cayenne pepper
  • 1/2 Tsp file powder
  • 1/4 Cup Minced green onions
For the Oysters
  • 2 Pints Oysters
  • 2 1/2 All purpose flour
  • 1/2 Tsp Each Salt and pepper
To build the po’boy
  • rémoulade
  • Shredded lettuce
  • Sliced tomatoes
  • 2-4 Hoagie Buns
  • Butter for roasting the buns

Method
 

For the RÉMOULADE
  1. Place ingredients in mixing bowl and whisk until well combined. Transfer to storage container, cover, and refrigerate for up to one week.
For the Oysters
  1. In a mixing bowl, combine the flour with salt and pepper .
  2. Remove oysters from liquor, draining excess so oysters are still wet but not dripping. 
  3. One at a time, toss the oysters to coat all sides in the breading (gently press the breading onto the oyster to help it adhere). Transfer to waxed-paper-lined plate or cookie sheet until oysters are all breaded.
  4. In a heavy stockpot with high sides fitted with a deep-frying (or candy) thermometer, bring at least two inches of peanut oil to 375ºF.
  5. Keeping the heat at a steady 375ºF and working in batches of six, fry the oysters until they are golden brown and just cooked through, about 90 seconds. (The oysters will curl slightly when they are done.) Using a slotted spoon, remove oysters and drain on brown-paper-bag-lined plate. 
to build the po’boy
  1. Heat a large skillet or griddle. Slit the hoagie buns and butter the insides. Place on a griddle and toast until golden and browning on the side. Flip and cook just a few seconds just to warm.
  2. Slather both sides with the rémoulade.
  3. Pile some shredded lettuce on the bottom bun, then pile with the fried oysters. Top with the sliced tomatoes that have been lightly salt and peppered. Slice in half and enjoy!
  • Click to share on Pinterest (Opens in new window) Pinterest
  • Click to share on Facebook (Opens in new window) Facebook
  • Click to email a link to a friend (Opens in new window) Email
  • Click to print (Opens in new window) Print
  • Click to share on X (Opens in new window) X
  • Click to share on Tumblr (Opens in new window) Tumblr
  • More
  • Click to share on Reddit (Opens in new window) Reddit

Filed Under: Fish/Seafood Tagged With: oysters

Best Pasta and Clams

September 5, 2019 by Becky Spoon

Best Pasta and ClamsJump to Recipe
Best Pasta and Clams

This is the Best Pasta and Clams! It really is! This dish is loaded with garlic, lemon, anchovy to name a few, and the dish is finished with buttery breadcrumbs. The buttery breadcrumbs thicken the sauce and brings the dish together.

Best Pasta and clams
Best Pasta and Clams

Best Pasta and Clams

Jump to Recipe
Best Pasta and Clams

I always check out the seafood department to see what is fresh that day. While shopping at my favorite HEB the other day, they had these fresh calms and I could not resist. Pasta and Clams is one of Allen’s favorite dishes and one of his most requested. These are Littleneck Clams. Here’s a link that describes the difference in clams: https://www.thekitchn.com/whats-the-difference-little-ne-61333.

If you like this recipe, try my recipe for delicious mussels, another favorite: https://the2spoons.com/mussels-with-tomatoes-garlic-lemons/.

Best Pasta and Clams

Here’s the recipe! Hope you enjoy!

Best Linguine with Clams

Print Recipe
Course: Appetizer, dinner, Lunch, Main Course
Cuisine: American, Italian
Ingredients Method

Ingredients
  

  • 2 tbsp. kosher salt for the pasta water, plus more for seasoning
  • 12 garlic cloves, divided
  • 4 oz sourdough or country-style bread, crusts removed, cut into 1/2 inch pieces
  • 2 tbsp plus 1/4 cup olive oil, plus more for serving
  • 2 tsp finely grated lemon zest
  • 2 oil-packed anchovy filets (optional)
  • 1/2 tsp crushed red pepper flakes, plus more for serving
  • 1/3 cup dry white wine
  • 2 lbs littleneck clams (about 24) or cockles (about 32) scrubbed
  • 12 oz linguine or spaghetti
  • 1/2 cup finely chopped parsley
  • 2 tbsp unsalted butter

Method
 

  1. Bring 2 Tbsp. salt and 10 cups water to a boil in a large pot.
  2. Meanwhile, pulse 3 garlic cloves in a food processor until chopped. Add bread and pulse several times until fine crumbs form.
  3. Heat 2 Tbsp. oil in a large Dutch oven over medium-high. Add breadcrumb mixture and cook, stirring often, until crumbs are golden and crisp, 5–7 minutes. Transfer to a medium bowl. Add lemon zest, season with salt, and toss to combine; set aside.
  4. Wipe out Dutch oven. Using a mandoline if you have one (if not, use a really sharp knife), very thinly slice remaining 9 garlic cloves. Heat ¼ cup oil in Dutch oven over medium. Cook garlic, stirring often, until golden around the edges, about 3 minutes. Add anchovies, if using, and ½ tsp. red pepper flakes and cook, stirring, until garlic is golden all over and anchovies are dissolved. Quickly stir in wine and simmer until only a couple of tablespoons of liquid are left in pot. Add clams and toss to combine. Cover and cook until clams are open, 5–7 minutes (about 4 minutes for cockles). Uncover pot and transfer clams to a medium bowl, leaving liquid in pot. If any clams are still closed, cover pot again and cook a few minutes longer, then transfer to bowl with others (discard any that have not opened at this point). Tent clams with foil.
  5. Cook pasta in boiling water 5 minutes. Using a ladle or heatproof measuring cup, scoop out about 2 cups pasta cooking liquid. Using tongs, transfer pasta to pot with clam liquid. Add 1 cup pasta cooking liquid and bring to a boil. Cook, tossing constantly and adding more pasta cooking liquid a splash at a time if needed, until pasta is al dente and sauce is glossy and thick enough to cling to noodles, about 5 minutes.
  6. Remove from heat. Add parsley and butter and toss until butter is melted. Sprinkle about one-third of breadcrumbs over pasta and toss to combine (you can add more or less depending on how much liquid is in bottom of pot—you want them to absorb some of the sauce but not make it dry). Give pasta a taste; you probably won’t need additional salt, but you can add some if you’d like. Divide pasta among shallow bowls and top with reserved clams, more breadcrumbs, red pepper flakes, and a drizzle of oil. Bon Appetit!
Best Pasta and Clams
Mussels with Tomatoes, Garlic, Lemons, & Wine
  • Click to share on Pinterest (Opens in new window) Pinterest
  • Click to share on Facebook (Opens in new window) Facebook
  • Click to email a link to a friend (Opens in new window) Email
  • Click to print (Opens in new window) Print
  • Click to share on X (Opens in new window) X
  • Click to share on Tumblr (Opens in new window) Tumblr
  • More
  • Click to share on Reddit (Opens in new window) Reddit

Filed Under: Fish/Seafood Tagged With: clams, littleneck clams, pasta with clams

Perfectly Cooked – Skillet Cod with Brown-Butter Tomato Sauce

September 1, 2019 by Becky Spoon

Skillt cod with Brown-Butter Tomato Sauce
Skillet Cod with Brown-Butter Tomato Sauce

This Skillet Cod with Brown-Butter Tomato Sauce is absolutely delicious! It is a quick and easy weeknight dish! The brown-butter adds a nuttiness to the dish and is brightened with barely-cooked fresh tomatoes with a splash of white wine, then spooned over pan-seared cod. There’s a sweetness, then a little tartness from the fresh cherry tomatoes.

I love a dish like this. The entire time I was eating it I was thinking, this is so good! I wished I had made more cod because I could have eaten two pieces!

Perfectly Cooked – Skillet Cod with Brown-Butter Tomato Sauce

Skillet Cod with Brown-Butter Tomato Sauce

If you aren’t familiar with brown-butter I’m adding a tutorial just to give you an idea. You think you’ll be burning the butter….so hope this helps. http://dish.allrecipes.com/browning-butter/.

I saw this dish on Instagram that Saveur had posted and I just had to make it! I’m so glad I did.

I just feel like I’m eating so healthy! I try to add fish to our diets a couple of times a week. Just look at these health benefits cod offers: https://www.organicfacts.net/cod-fish.html.

Sauteed spinach, kale, a nice salad would all be a great side dish. My rice pilaf would be perfect to serve alongside this to sop up all of the juices from the tomatoes. Here’s the link if you want to make the pilaf: https://the2spoons.com/yummy-rice-pilaf-perfect-side-dish/.

Make this recipe! I think there are so many other fish that would work. Catfish or Red Snapper would be delicious. Please make this dish for your children, your family. Please start cooking from scratch for your children.

Skillet Cod with Brown-Butter Tomato Sauce

Print Recipe
Servings: 2 servings
Course: dinner, Lunch, Main Course
Cuisine: American
Ingredients Method

Ingredients
  

  • 2 6 oz. skinless cod fillets
  • kosher salt
  • freshly ground black pepper
  • 1 tbsp. extra virgin olive oil
  • 4 tbsp. unsalted butter, divided
  • 1 medium shallot, thinly sliced (1/4 cup)
  • 1 medium garlic clove, thinly sliced
  • 7 oz. mixed cherry and grape tomatoes, halved
  • 2 tbsp white wine
  • 2 tsp. coarsley chopped flat leaf parsley for serving

Method


  1. Pat the fillets dry with paper towels, then lightly season all over with salt and pepper; set by the stove. Hold a large, heatproof rimmed plate under hot running water to warm, then pat dry and set by the stove.

  2. In a large stainless-steel skillet over medium-high, heat the oil with 1 tablespoon of the butter. When the foam begins to subside, add the fillets and cook without disturbing until the fish is lightly browned and turning white and opaque about ¼ of the way up from the skillet, 1–2 minutes. Using a wide, thin metal spatula, gently flip the fillets, then continue cooking until the other side is lightly browned and turning white and opaque about ¼ of the way up from the skillet, 1–2 minutes more. Carefully transfer to the warm plate, cover tightly with an inverted bowl or aluminum foil, and set aside in a warm place to steam while you make the sauce.
  3. Return the skillet to medium-high heat, add the remaining 3 tablespoons butter, and swirl to melt. Cook, using a wooden spoon to scrape the bottom of the skillet frequently, until the foam completely subsides, the solid milk particles sink to the bottom and turn a deep golden brown, and the butter takes on a toasted fragrance, 2–3 minutes. Add the shallot and cook, stirring and shaking the skillet continuously, until it just begins to soften, about 1 minute. Add the garlic and cook until fragrant, 30 seconds. Add the tomatoes and cook, stirring gently without crushing them, until they are heated through and beginning to soften and turn jammy, and their juices are silky and slightly thickened, 4–5 minutes. Add the wine and continue cooking until the alcohol evaporates, 15–30 seconds more; remove from the heat. Uncover the fish (it should now be cooked through), and if desired, transfer to a large rimmed platter or a shallow bowl. Pour the sauce over the fish, top with parsley, and serve immediately.
Pan-Fried Cod in Tomato Basil Sauce with Rice Pilaf
  • Click to share on Pinterest (Opens in new window) Pinterest
  • Click to share on Facebook (Opens in new window) Facebook
  • Click to email a link to a friend (Opens in new window) Email
  • Click to print (Opens in new window) Print
  • Click to share on X (Opens in new window) X
  • Click to share on Tumblr (Opens in new window) Tumblr
  • More
  • Click to share on Reddit (Opens in new window) Reddit

Filed Under: Fish/Seafood Tagged With: cod with brown butter

  • « Go to Previous Page
  • Page 1
  • Page 2
  • Page 3
  • Page 4
  • Page 5
  • Go to Next Page »

Primary Sidebar

Categories

  • Appetizer
  • Beans, Lentils, Grains, Rice
  • Beef
  • Bread
  • Breakfast/Brunch
  • Cocktails
  • Dessert
  • Dishes of Mexico, Tex Mex and New Mexico Red and Green Chile
  • Fish/Seafood
  • Ice Cream
  • Pasta
  • Pizza
  • Pork
  • Poultry
  • Salad Dressings
  • Salads
  • Salsas
  • Sandwiches/Burgers/Hot Dogs
  • Sauces, Compound Butters, Condiments
  • Side dish
  • Soups/Stews/Gumbo//Chili
  • Stocks, Broths, Gravies
  • Vegetables

Copyright © 2025 The 2 Spoons on the Foodie Pro Theme

Manage Cookie Consent
We use cookies to optimize our website and our service.
Functional Always active
The technical storage or access is strictly necessary for the legitimate purpose of enabling the use of a specific service explicitly requested by the subscriber or user, or for the sole purpose of carrying out the transmission of a communication over an electronic communications network.
Preferences
The technical storage or access is necessary for the legitimate purpose of storing preferences that are not requested by the subscriber or user.
Statistics
The technical storage or access that is used exclusively for statistical purposes. The technical storage or access that is used exclusively for anonymous statistical purposes. Without a subpoena, voluntary compliance on the part of your Internet Service Provider, or additional records from a third party, information stored or retrieved for this purpose alone cannot usually be used to identify you.
Marketing
The technical storage or access is required to create user profiles to send advertising, or to track the user on a website or across several websites for similar marketing purposes.
Manage options Manage services Manage {vendor_count} vendors Read more about these purposes
Preferences
{title} {title} {title}