• Skip to primary navigation
  • Skip to main content
  • Skip to primary sidebar

A cook named Rebecca

  • Home
  • Favorite Cookbooks
  • Recipes
  • Travel
You are here: Home / Archives for Vegetables

Vegetables

Delicious! Grilled Cauliflower Steaks with Fresh Tomato and Olive Relish

July 8, 2019 by Becky Spoon

Caualiflower SteaksJump to Recipe
Cauliflower Steaks
Cauliflower Steaks

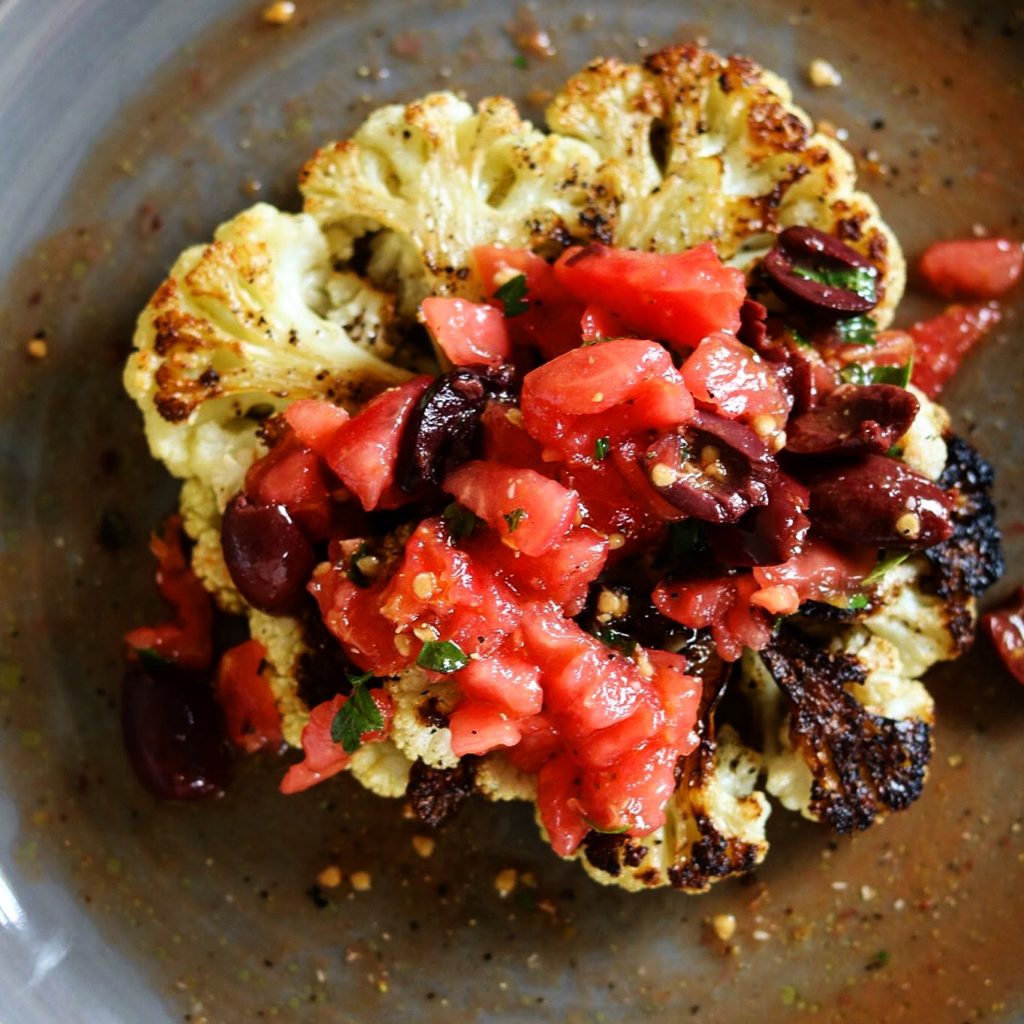
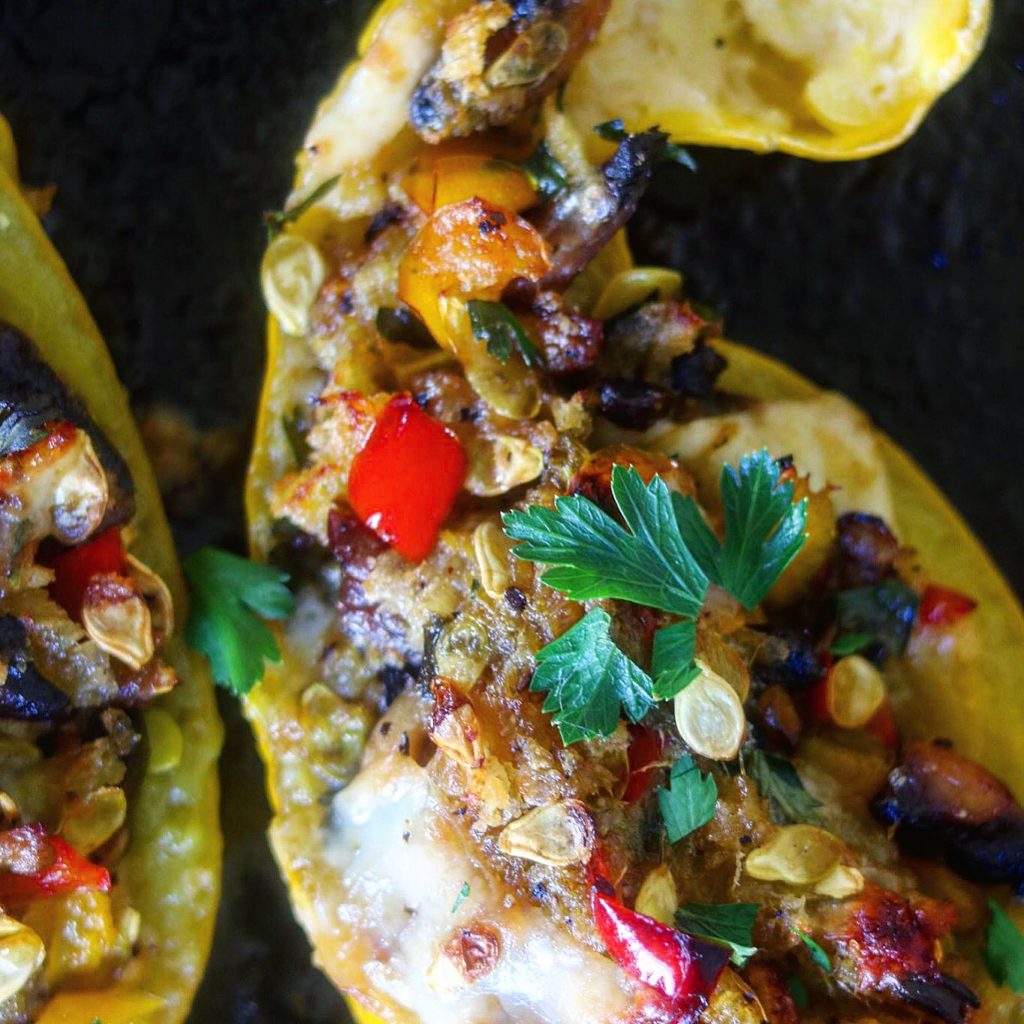
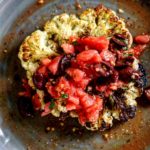
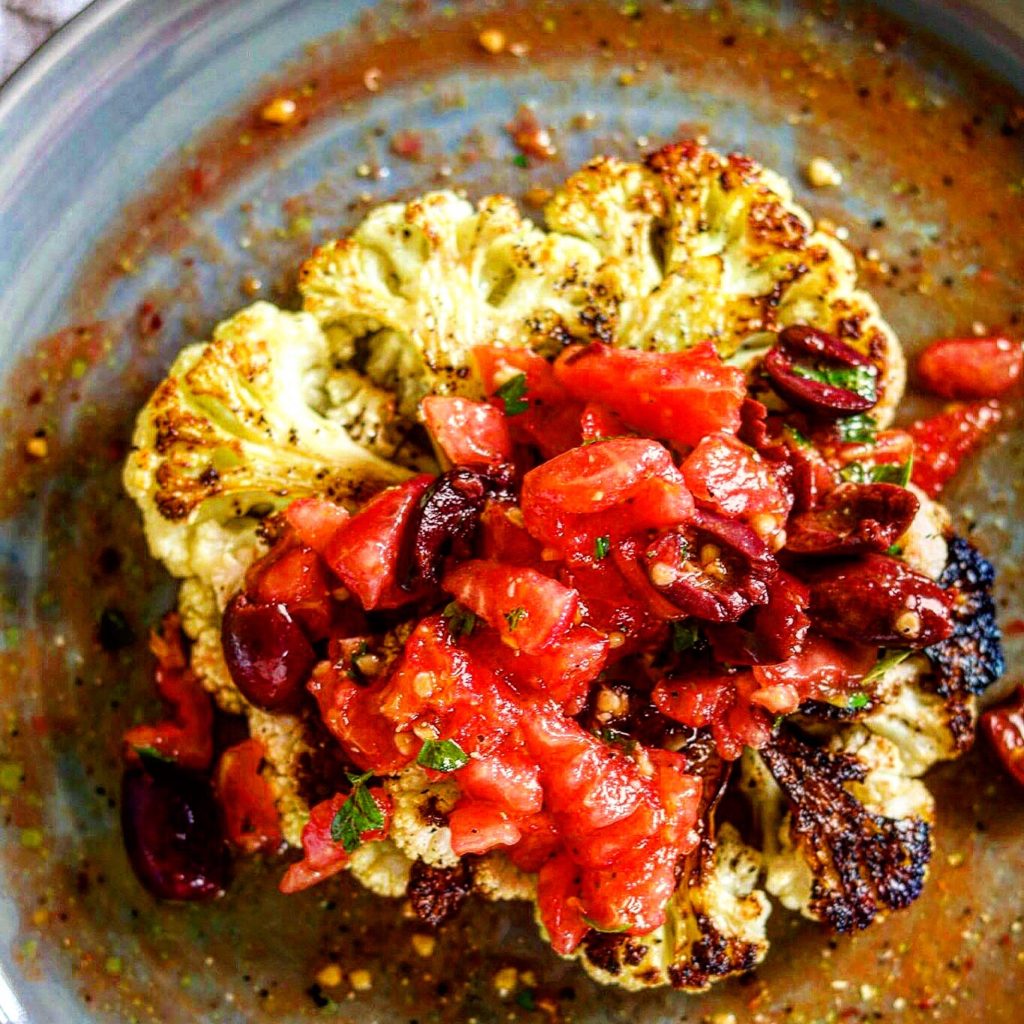
Just look at how beautiful this dish of Grilled Cauliflower Steaks with Fresh Tomato and Olive Relish is!

Cauliflower Steaks
Cauliflower Steaks

The other day I was planning to grill a steak for Allen so I decided I’d add these cauliflower steaks to the menu because I really didn’t want a heavy steak . Great decision. These were delicious, meat free and another perfect dish for my fresh tomatoes.

My cauliflower steaks are hearty, filling yet so low in calories, a great alternative when wanting to cut back on your meat intake. Providing Vitamin K, C and B, needed fiber, potassium and phosphorus, it is indeed a healthy alternative too.

Delicious! Grilled Cauliflower Steaks with Tomato and Olive Relish

I give instructions in the recipe of how to cut the cauliflower. Here’s a video that may be helpful. If you don’t cut the steaks right, you’ll just have a bunch of florets. https://www.youtube.com/watch?v=iKqd1lgmKCo.

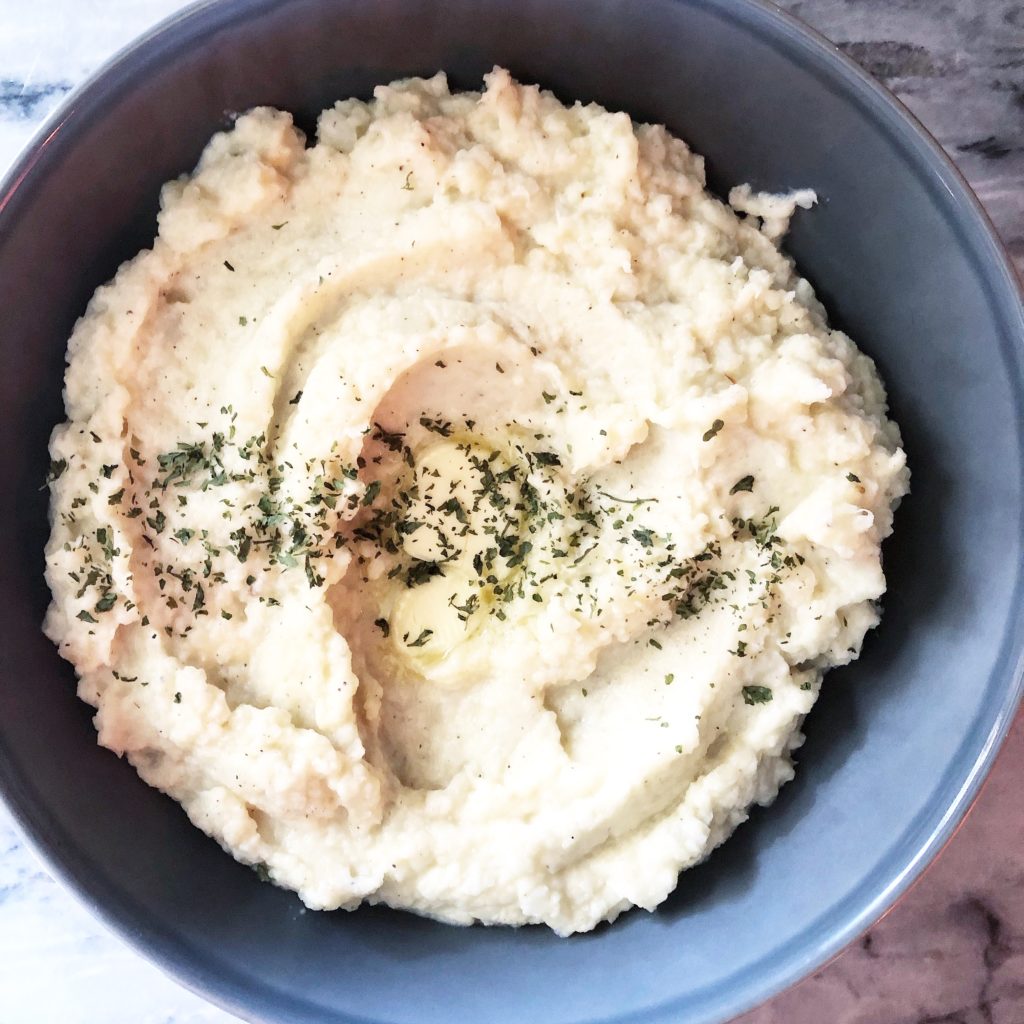
Another recipe I have on my blog for cauliflower is Cauliflower mashed potatoes which is a healthier way to have mashed potatoes and a way to get more vegetables in to those kiddos. Here’s the link for that recipe: https://the2spoons.com/love-this-roasted-garlic-cauliflower-mash/

Grilled Cauliflower Steaks with Tomato and Olive Relish

Print Recipe
Servings: 4 servings
Course: dinner, Lunch, Main Course, Side Dish
Cuisine: American
Ingredients Method

Ingredients
  

For the Cauliflower
  • 2 heads of Cauliflower
  • pot of boiling water that salt has been added to taste like mild seawater
  • 1/4 cup extra virgin olive oil
  • zest of one lemon
  • juice of two lemons
  • 1/2 tsp za'atar (if you can't find use an Italian Seasoning)
For the Fresh Tomato and Olive Relish
  • 2 cups Ripe fresh tomatoes that have been peeled and diced reserving the juices
  • 1/2 cup Kalamata olives, pitted and halved, or roughly chopped if you prefer
  • 2 tbsp extra virgin olive oil
  • 1 Lemon, the juice and zest
  • salt and pepper to taste

Method
 

  1. Place the first cauliflower upright (stem-side down) on a flat surface. Using a large knife trim a little off each end (sides) so that when you slit the cauliflower in half, each half will lie flat. Cut the Cauliflower in half. You will yield 2 steaks about 14 ounces each. Repeat with the other cauliflower. If you want thinner steaks, cut each half into halves.
  2. Bring about 6 quarts of water to a boil in a pot large enough to hole the cauliflower steaks. Add salt to the water and check for saltiness. You want it to taste like seawater. Layer a sheet pan with paper towel. Add the cauliflower steaks to the boiling water and cook until they are slightly tender when pierced with the tip of a knife, 6 to 8 minutes. Using a slotted spoon or spatula carefully transfer the steaks to the sheet pan to drain.
  3. In a small bowl whisk together the extra virgin olive oil, the lemon zest, the lemon juice, and the za'atar. Remove the paper towel from the sheet pan insuring the cauliflower steaks are dry. then, pour the mixture over each steak turning to make sure each steak is generously covered. Cover and let marinate at least 30 minutes.
  4. Heat a grill or your inside grill pan to high. Place the steaks on the grill and cook until each side is a little charred, being careful to not break up the cauliflower.
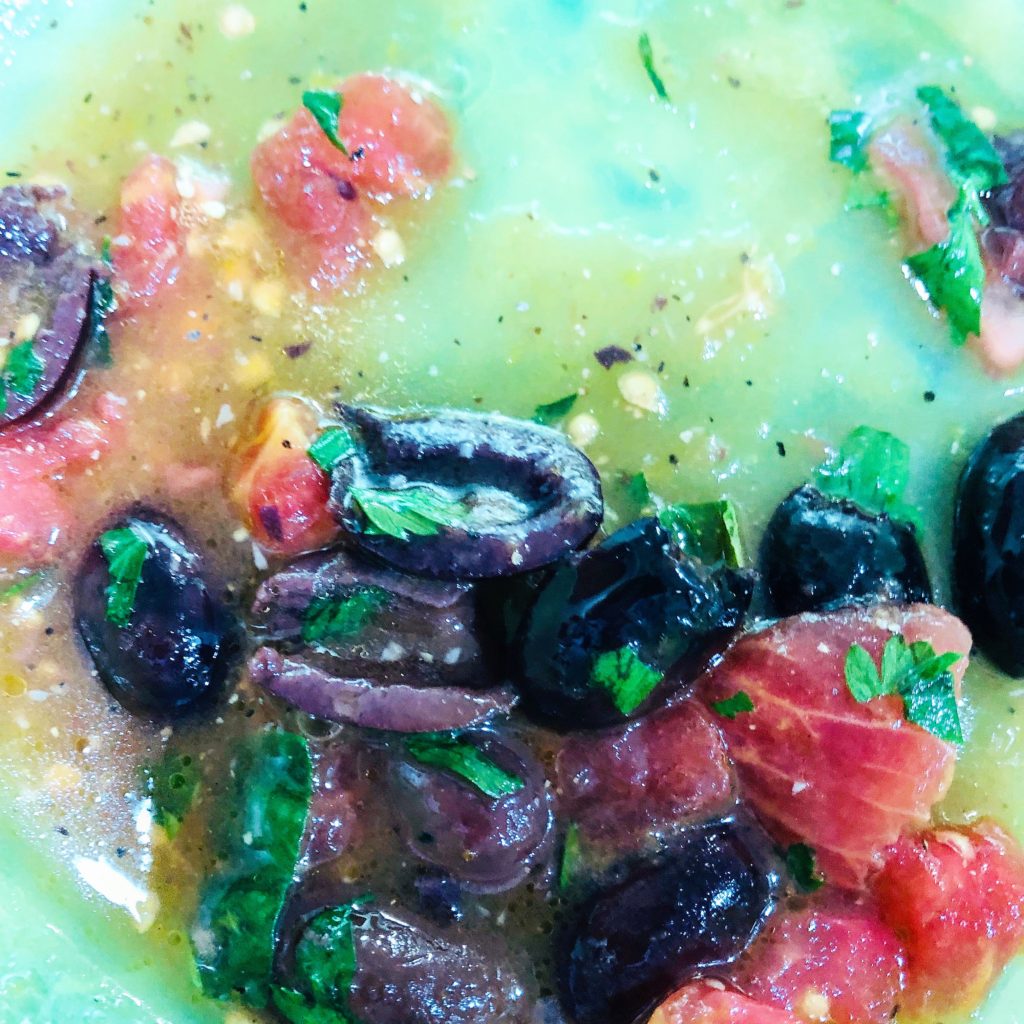
  5. Place on a serving platter and top with the Tomato and olive relish. Drizzle with a little more olive oil if you like. Garnish with a little fresh parsley.
For the Tomato and Olive Relish
  1. Peel and dice the tomatoes over and added to a bowl to reserve the juice. Add the Kalamata Olives. Drizzle the olive, add the lemon juice, the lemon zest and salt and pepper to taste. Serve over the grilled cauliflower steaks.
Tomato and Olive Relish
Cauliflower Steaks
Cauliflower Steaks
Roasted Garlic Cauliflower Mash
  • Click to share on Pinterest (Opens in new window) Pinterest
  • Click to share on Facebook (Opens in new window) Facebook
  • Click to email a link to a friend (Opens in new window) Email
  • Click to print (Opens in new window) Print
  • Click to share on X (Opens in new window) X
  • Click to share on Tumblr (Opens in new window) Tumblr
  • More
  • Click to share on Reddit (Opens in new window) Reddit

Filed Under: Vegetables Tagged With: cauliflowe steaks, Cauliflower, Tomato and olive relush, tomatoes, vegetables

Wonderful Mushroom Stuffed Summer Squash

July 5, 2019 by Becky Spoon

Mushroom Stuffed Summer Squash

This recipe for Mushroom Stuffed Summer Squash is the perfect solution for all that summer squash you have in your garden or that’s available in the grocery store. I didn’t grow squash this year, but I’m telling you, when I do, I am always looking for recipes to use the abundance I have. There’s different varieties of summer squash and this recipe would work with any of them. Here’s a link with the different varieties: https://www.gardeningknowhow.com/edible/vegetables/squash/different-summer-squashes-to-grow.htm

Mushroom Stuffed Summer Squash

The other day I was trying to figure out what I was going to do with some squash a friend had given us. I remembered my stuffed mushrooms recipe and decided that filling tweaked a little would be the perfect stuffing for this squash and I was right! If you later want to try the stuffed mushrooms, here’s that link: https://the2spoons.com/youll-love-these-stuffed-mushrooms/

Wonderful Mushroom Stuffed Summer Squash

I actually served this the other day with my . I thought it’d make a nice side dish for my Sunday Pot Roast, but this would be a great side dish for almost any meal or even the main course!! With the mushrooms it would be a hearty meal on its own! Here’s the Sunday Pot Roast recipe if you don’t already have: https://the2spoons.com/the-best-instant-pot-sunday-pot-roast/.

Hope you try this!! Remember, it makes a great no meat meal! It shines and does not have to be a side dish!

Mushroom Stuffed Summer Squash

Print Recipe
Prep Time 15 minutes mins
Cook Time 20 minutes mins
Total Time 35 minutes mins
Servings: 6
Course: Appetizer, Side Dish
Cuisine: Italian
Ingredients Method

Ingredients
  

  • 10-12 Button or Baby Bella mushrooms, thickly sliced or chopped
  • 2 Tbsp Extra-virgin olive oil, plus more for the tops of the mushrooms
  • 1/2 Cup Finely chopped green onions
  • 1/2 Cup Finely chopped red bell peppers
  • 1/2 Cup Coarse bread crumbs ( I used Panko)
  • 1/2 Cup Parmigiana -reggiano cheese or other Parmesan cheese
  • 1/4 Cup Finely chopped fresh Italian parsley
  • Salt
  • Freshly ground pepper
  • 4 Tbsp Unsalted butter
  • 1/2 Cup Chicken stock
  • 1/4 Cup Dry white wine, optional
  • 4-6 summwr squash, can be yellow or zucchini, par boiled with the inside scraped out after par boiling

Method
 

  1. Preheat oven to 425 degrees.
    Par boil the squash in boiling water a couple of minutes. Remove from the water, drain and when cool enough to handle, cut in half and scrape the inside of the squash into a bowl. Including the stems, thinly slice or chop the mushrooms.
    Heat 2 tablespoons olive oil in a medium skillet over medium heat. Add the green onions and cook until wilted, about one minute. Stir in the red peppers and chopped or sliced mushrooms and cook, stirring until tender and they begin to slightly brown and carmalize. Remove and cool, then add to the scraper put squash and combine.
  2. Toss the bread crumbs and grated cheese, 2 tablespoons of the parsley, add to the sautéed vegetables until thoroughly blended. Season to taste with salt and pepper. Stuff the cavity of each squash that has been halved with the filling.
    Using 2 tablespoons of the butter, grease a 12 X 18 inch low sided baking pan. Add the stock, wine, if using, and remaining 2 tablespoons parsley to the pan. If you like drizzle the top of the squash with olive oil. Bake until the squash are cooked through and the bread crumbs are golden brown, about 10-15 minutes. 
    Serve on a warmed platter. Pour the pan juices into a small pan and bring to a boil on top of the stove. Boil until lightly thickened, 1 to 2 minutes. Spoon the juices over the squash.
Mushroom Stuffed Summer Squash
Sunday Pot Roast
Sunday Pot Roast
  • Click to share on Pinterest (Opens in new window) Pinterest
  • Click to share on Facebook (Opens in new window) Facebook
  • Click to email a link to a friend (Opens in new window) Email
  • Click to print (Opens in new window) Print
  • Click to share on X (Opens in new window) X
  • Click to share on Tumblr (Opens in new window) Tumblr
  • More
  • Click to share on Reddit (Opens in new window) Reddit

Filed Under: Vegetables Tagged With: Easy Side Dish, mushroom Stuffed summer squash, side dish, Squash, summer squash

Super Southern Fried Okra with Creamy Buttermilk Dip

July 5, 2019 by Becky Spoon

Southern Fried Okra
Southern Fried Okra
Southern Fried Okra

Do ya’ll like Fried Okra? Yes I said ya’ll! I guess posting this Southern recipe really brings out the “South” in me! LOL! I saw this recipe in one of Emeril’s cookbooks and I’ve made it many times!

I love the foods of the South I grew up eating. I love this okra! It’s crispy and the buttermilk dressing is so yummy and it can be used for so many other fried things or even for a crudité platter! Salad Dressing? Yes, it’d be great! Oh, and it’d be a great dip for potato chips!

Southern Fried Okra
Southern Fried Okra

I like to just spit the okra down the middle for presentation purposes, but I think most are more familiar with the sliced in about a 1/2 inch thick round. So, either way works, whatever is your particular preference.

I have a few different ways I fry okra. For one, you can just toss in some seasoned flour and fry. Another way I cook fried okra is to have a batter station set up with flour, beaten eggs, then seasoned cornmeal. I coat each piece in flour, then the beaten eggs and then seasoned cornmeal. It’s really good, very similar to this, but this recipe has fewer steps and is really easy.

Super Southern Fried Okra with Creamy Buttermilk Dip

Before I start the recipe let’s talk ingredients, specifically the buttermilk. I have made this buttermilk dressing with a low-fat readily available brand, but it just seemed so thin, resulting in a watery consistency. I want thicker buttermilk for this dip. I mean, it’s a dip! You don’t want a thin coating from a watery dip, you want a dollop of dip!

With all that said, use whole buttermilk, not low-fat. I only use whole milk even if it’s not buttermilk. It’s like using the real thing, like butter. The real thing is healthier in the long run because it is more natural, it doesn’t have a lot of “stuff” to change its character. My philosophy is always “everything in moderation”. And, honestly, how can the “real” stuff as it is intended to be, be bad for you? I don’t want to lead you wrong so here’s a link that will give you certain health benefits of both. https://healthyeating.sfgate.com/whole-vs-lowfat-buttermilk-1947.html.

I just love Fried Okra. I guess I just love okra! I love okra as in Okra and Tomatoes. I love okra fried with potatoes and onions. Oh, and in Gumbo. Absolutely one of my favorite uses for okra! So, the other day my have to have meat hubby was gone so I made Macaroni and tomatoes from my garden and I made this along with it. Here’s that link because you need that recipe too! https://the2spoons.com/macaroni-with-fresh-tomatoes/.

Super Southern Fried Okra with Creamy Buttermilk Dip

Here’s the super easy recipe! Hope you try this!

Southern Fried Okra

Print Recipe
Servings: 4 servngs
Course: Appetizer, Side Dish
Cuisine: American
Ingredients Method

Ingredients
  

For the Okra
  • vegetable oil for frying
  • 1 cup buttermilk
  • 1 egg
  • 2 tbsp Louisiana hot sauce or your favorite
  • 1 cup all purpose flour
  • 1 cup yellow cornmeal
  • 2 tsp. cayenne pepper (omit if you don't like the heat or reduce the amount)
  • 2 tsp garlic powder or granulated garlic
  • 1 tbsp salt plus more for seasoning
  • 1 tsp black pepper
  • 2 lbs okra, either sliced into 1/2 inch thick rounds or sliced down the middle like I did)
For the Buttermilk Dip
  • 3/4 cup buttermilk, not low fat
  • 1/2 cup mayonaise
  • 1/4 cup sour cream
  • 1/2 tsp cayenne pepper (optional)
  • 1 tsp minced garlic
  • 1 tbsp green onion tops
  • salt to taste

Method
 

For the Okra
  1. Heat the oil in a deep-fryer to 360°F or in a heavy iron dutch oven, or similar.


  2. In a small bowl, whisk the buttermilk, egg, and hot sauce to combine. In a second bowl, combine the flour, cornmeal, cayenne, granulated garlic, the 1 tablespoon salt, and the black pepper.
  3. Working in batches, dredge the okra first in the buttermilk mixture, allowing any excess to drip off, then in the flour mixture. Shake to remove any extra breading. Repeat until all of the okra is breaded.
  4. Fry the okra, in batches, in the hot oil, turning it as necessary, until lightly golden, about 5 minutes. Transfer the fried okra to paper towels to drain, and season lightly with salt. Repeat with the remaining okra.
  5. Serve the okra hot, with the Creamy Buttermilk Dip on the side for dipping.
For the Buttermilk Dip
  1. Combine the buttermilk, mayonnaise, sour cream, cayenne, garlic, and chives in a small bowl, and stir to mix well. Add salt to taste. Serve immediately, or cover and refrigerate until ready to serve (up to 1 day in advance).
  • Southern Fried Okra
    Southern Fried Okra
  • Macaroni and Tomatoes
    Macaroni and Tomatoes
  • Click to share on Pinterest (Opens in new window) Pinterest
  • Click to share on Facebook (Opens in new window) Facebook
  • Click to email a link to a friend (Opens in new window) Email
  • Click to print (Opens in new window) Print
  • Click to share on X (Opens in new window) X
  • Click to share on Tumblr (Opens in new window) Tumblr
  • More
  • Click to share on Reddit (Opens in new window) Reddit

Filed Under: Appetizer, Side dish, Vegetables Tagged With: appetizer, fried okra, okra, side dish, southern, southern fried okra

Country Style Fresh Green Beans and New Potatoes

June 21, 2019 by Becky Spoon

Fresh Green Beans and New Potatoes

I cooked these Fresh Green Beans and New Potatoes in my Instant Pot and it literally took 15 minutes! I sautéed onion and bacon ends first, then I added my beans and potatoes, a little water along with seasonings, and set the pressure cooking time for 15 minutes! They were perfectly cooked! Oh, I forgot to mention that these potatoes were fresh from a garden. They were at our church grown by the youth group who are raising money for camp! There’s just something about some local grown new potatoes.

Country Style Fresh Green Beans and New Potatoes

I love green beans! Sometimes I make them crispy with lemon and garlic, but sometimes I want the country style like these, super tender in a delicious bacon flavored-broth, the kind I remember my Mom making growing up.

You can always find fresh green beans in the grocery store, probably year around. They are inexpensive and really have some health benefits. Check out the information in this link for some benefits of green beans. https://www.organicfacts.net/health-benefits/vegetable/green-beans.html

Country Style Fresh Green Beans and New Potatoes

This is a perfect side dish for so many different entrees! Click this link for my green beans with lemon which are also very delicious, just cooked crisper: https://the2spoons.com/perfect-browned-butter-and-garlic-green-beans/

Hope you try this very simple recipe!

Country Style Fresh Green Beans and New Potatoes

Print Recipe
Course: Side Dish
Cuisine: American
Ingredients Method

Ingredients
  

  • 1 1/2-2 lbs fresh green beans, ends trimmed and washed
  • 4-6 new potatoes, depending on the size
  • 2-3 strips bacon, or bacon ends, cut in 1 inch pieces
  • 1/2 onion, diced
  • 2 tbsp extra virgin olive oil
  • 1 tsp salt
  • fresh black pepper
  • 1-2 sprigs fresh thyme or about 1/2 teaspoon dried crushed
  • water or vegetable stock

Method
 

  1. I cooked the green beans and new potatoes in my instant pot, but the same instructions apply if you are cooking them stovetop, except for the cooking time.
    Trim your beans and wash them. You can either completely peel your potatoes or you can cut a strip around like I did. If they are small, leave them whole, but large I'd half or quarter, so you have a uniform potato size so they will cook evenly.
  2. Add the extra virgin olive oil to your pan or instant pot. Add the bacon and onions and sauté until the bacon fat has rendered and the onions begin to very lightly brown.
  3. Add your beans and potatoes and enough water or vegetable stock to almost the top of the beans, maybe 3/4 way. They do not have to be completely covered because they are quickly going to cook down and you don't want too much liquid.
  4. Add your salt and thyme, and set your Instant Pot to pressure cook for 15 minutes, or bring your stovetop pan to a boil, then reduce to a simmer and cook 30 minutes or so until the green beans and potatoes are tender.
  5. When the cooking has finished, check for salt and add fresh cracked black pepper. Serve with almost any entrée. Enjoy these country style green beans.
  • Click to share on Pinterest (Opens in new window) Pinterest
  • Click to share on Facebook (Opens in new window) Facebook
  • Click to email a link to a friend (Opens in new window) Email
  • Click to print (Opens in new window) Print
  • Click to share on X (Opens in new window) X
  • Click to share on Tumblr (Opens in new window) Tumblr
  • More
  • Click to share on Reddit (Opens in new window) Reddit

Filed Under: Side dish, Vegetables Tagged With: country style grean beans, fresh grean beans, grean beans, side dish, vegetable

Fresh from the Garden, Delicious Summer Squash with Peppers and Onions

June 20, 2019 by Becky Spoon

Summer SquashJump to Recipe
Summer Squash
Summer Squash

When you grow summer squash there is an abundance when you start harvesting and you’re trying to figure out what to do with all this squash! This is my quick go to!

Easy, yet delicious! Just a few ingredients and you have a side dish for any main course!

Fresh from the Garden, Delicious Summer Squash with Peppers and Onions

I actually made this with my Chicken and Dumplings the other day! It was the perfect side dish for the dumplings. Here’s my Chicken and Dumplings recipe which you have to try! https://the2spoons.com/chicken-and-dumplings-the-perfect-comfort-food/.

My Mom would boil squash, drain it, then mash it with a potato masher. Then she would add butter, salt and pepper. It was delicious! So simple, yet so delicious. I still make it that way. You know, it’s just one of those things you ate growing up and you just crave it sometime!

I didn’t grow squash this year. A friend of ours gave us this squash. There are a couple of different summer squash. Here’s a list for future growing: https://www.thekitchn.com/a-visual-guide-to-8-varieties-of-summer-squash-220740

Fresh from the Garden, Delicious Summer Squash with Peppers and Onions

Ok, back to cooking squash! And my recipe! I really shouldn’t call this a recipe because it’s so simple!

Summer Squash with Peppers and Onions

Print Recipe
Course: Side Dish
Cuisine: American
Ingredients Method

Ingredients
  

  • 3-4 Yellow she merry squash or Zucchini, or Combination of the two, diced
  • 1 Green bell pepper, diced
  • 1 red onion, diced
  • 2 tbsp extra virgin olive oil
  • 2 tbsp butter
  • sal and pepper to taste

Method
 

  1. Heat the oil and butter in a skillet to medium high. I like to use non stick skillet. add the onions and peppers and cook until they begin to soften. Add the squash, increase the heat if you need to so your ingredients will start to brown, turning as the bottom browns. Season with salt and pepper. Cook until good n brown and the squash is tender!
  • Click to share on Pinterest (Opens in new window) Pinterest
  • Click to share on Facebook (Opens in new window) Facebook
  • Click to email a link to a friend (Opens in new window) Email
  • Click to print (Opens in new window) Print
  • Click to share on X (Opens in new window) X
  • Click to share on Tumblr (Opens in new window) Tumblr
  • More
  • Click to share on Reddit (Opens in new window) Reddit

Filed Under: Side dish, Vegetables Tagged With: Easy Side Dish, side dish, summer squash, vegetables, yellow squash

Corn on the Cob – Perfectly Charred on the Grill

May 30, 2019 by Becky Spoon

Grilled Corn on the CobJump to Recipe
Grilled Corn on the Cob

I cooked this Corn on the Cob on the grill for my Texas Caviar recipe https://the2spoons.com/summertime-texas-caviar-bbq-side-dish/; however, this is a perfect side dish also, on it’s on for your summer BBQ! Honestly, who doesn’t love corn on the cob, especially when it’s perfectly charred on the grill!

First, I pulled the husk back and removed the silk. Then I poached in water that I added a cup of milk for a few minutes! Wow! Added so much moisture to this already juicy corn!

Grilled Corn on the Cob

The first thing you want to do is pick the right corn on the cob at the grocery store. Here’s a little help from Taste of Home: https://www.tasteofhome.com/article/how-to-pick-corn. If you can grow your own corn or get from the fields of neighbors if you live rural as I do, that is the absolute best!!

Grilled Corn on the Cob

Corn on the Cob – Perfectly Charred on the Grill

This corn is delicious just slathering it with butter, salt and pepper and serving, or dab with mayonnaise and sprinkle with cotija cheese! Yummy either way!

Hope you like this method!

Corn on the Cob – Perfectly Charred on the Grill

Print Recipe
Servings: 6 servings
Course: Side Dish
Cuisine: American
Ingredients Method

Ingredients
  

  • 6 ears fresh corn
  • 1 cup whole milk, optional
  • 1/2 cup unsalted butter, room temperature
  • salt and pepper to taste
  • Tajin seasoning (optional in place of salt)
  • Mayannaise to slather if adding Cotija cheese (optional in place of butter)

Method
 

  1. Build a fire in your grill, leaving one side free of coals. When coals are covered with gray ash and the temperature is medium (you can hold your hand 5 inches above the coals for 5 to 7 seconds), you are ready to cook. (For a gas grill, turn all burners to high, lower cover and heat for 15 minutes, then turn burners to medium.)
    Meanwhile, shuck the corn, removing both husks and silks.

    Fill a large pot halfway with water and set over high heat to come to a simmer. Add the milk, if using. Blanch the corn in the pot for about 3 minutes, then stack on a platter. Apply just a little butter to each ear of corn, then place on grill. Cook, turning often, until the corn is tender and some of the kernels are beginning to darken, about 5 minutes. Serve immediately with remaining butter and salt.
    Or, slather with mayonnaise and sprinkle with cotija cheese!
Texas Caviar
Texas Caviar
Grilled Corn on the Cob
  • Click to share on Pinterest (Opens in new window) Pinterest
  • Click to share on Facebook (Opens in new window) Facebook
  • Click to email a link to a friend (Opens in new window) Email
  • Click to print (Opens in new window) Print
  • Click to share on X (Opens in new window) X
  • Click to share on Tumblr (Opens in new window) Tumblr
  • More
  • Click to share on Reddit (Opens in new window) Reddit

Filed Under: Vegetables Tagged With: Corn on the Cob, side dish

  • « Go to Previous Page
  • Page 1
  • Page 2
  • Page 3
  • Page 4
  • Page 5
  • Page 6
  • Go to Next Page »

Primary Sidebar

Categories

  • Appetizer
  • Beans, Lentils, Grains, Rice
  • Beef
  • Bread
  • Breakfast/Brunch
  • Cocktails
  • Dessert
  • Dishes of Mexico, Tex Mex and New Mexico Red and Green Chile
  • Fish/Seafood
  • Ice Cream
  • Pasta
  • Pizza
  • Pork
  • Poultry
  • Salad Dressings
  • Salads
  • Salsas
  • Sandwiches/Burgers/Hot Dogs
  • Sauces, Compound Butters, Condiments
  • Side dish
  • Soups/Stews/Gumbo//Chili
  • Stocks, Broths, Gravies
  • Vegetables

Copyright © 2025 The 2 Spoons on the Foodie Pro Theme

Manage Cookie Consent
We use cookies to optimize our website and our service.
Functional Always active
The technical storage or access is strictly necessary for the legitimate purpose of enabling the use of a specific service explicitly requested by the subscriber or user, or for the sole purpose of carrying out the transmission of a communication over an electronic communications network.
Preferences
The technical storage or access is necessary for the legitimate purpose of storing preferences that are not requested by the subscriber or user.
Statistics
The technical storage or access that is used exclusively for statistical purposes. The technical storage or access that is used exclusively for anonymous statistical purposes. Without a subpoena, voluntary compliance on the part of your Internet Service Provider, or additional records from a third party, information stored or retrieved for this purpose alone cannot usually be used to identify you.
Marketing
The technical storage or access is required to create user profiles to send advertising, or to track the user on a website or across several websites for similar marketing purposes.
Manage options Manage services Manage {vendor_count} vendors Read more about these purposes
Preferences
{title} {title} {title}