• Skip to primary navigation
  • Skip to main content
  • Skip to primary sidebar

A cook named Rebecca

  • Home
  • Favorite Cookbooks
  • Recipes
  • Travel
You are here: Home / Home

I love Flautas de Pollo Ahogadas En Salsa Verde!

February 1, 2025 by Becky Spoon

Flautas de Pollo Ahogadas En Salsa Verde
Please follow and like us:
onpost_follow
fb-share-icon
Tweet
Jump to Recipe
Flautas de Pollo Ahogadas En Salsa Verde

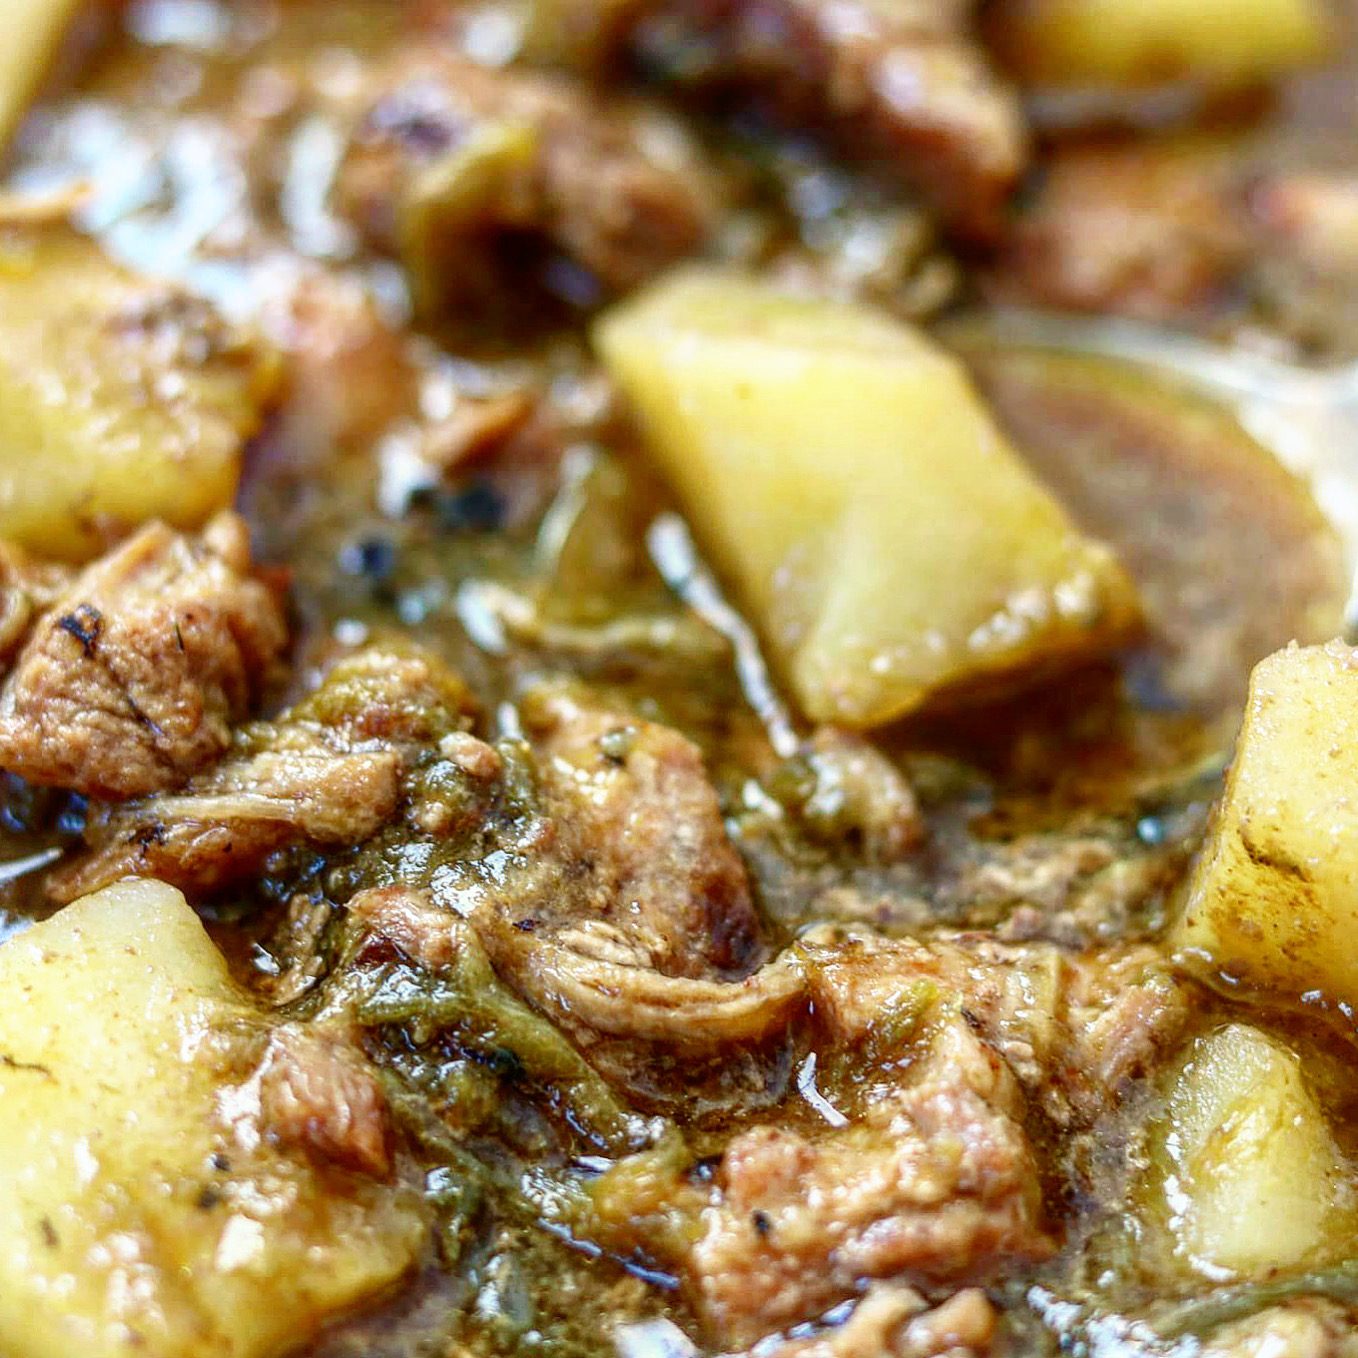
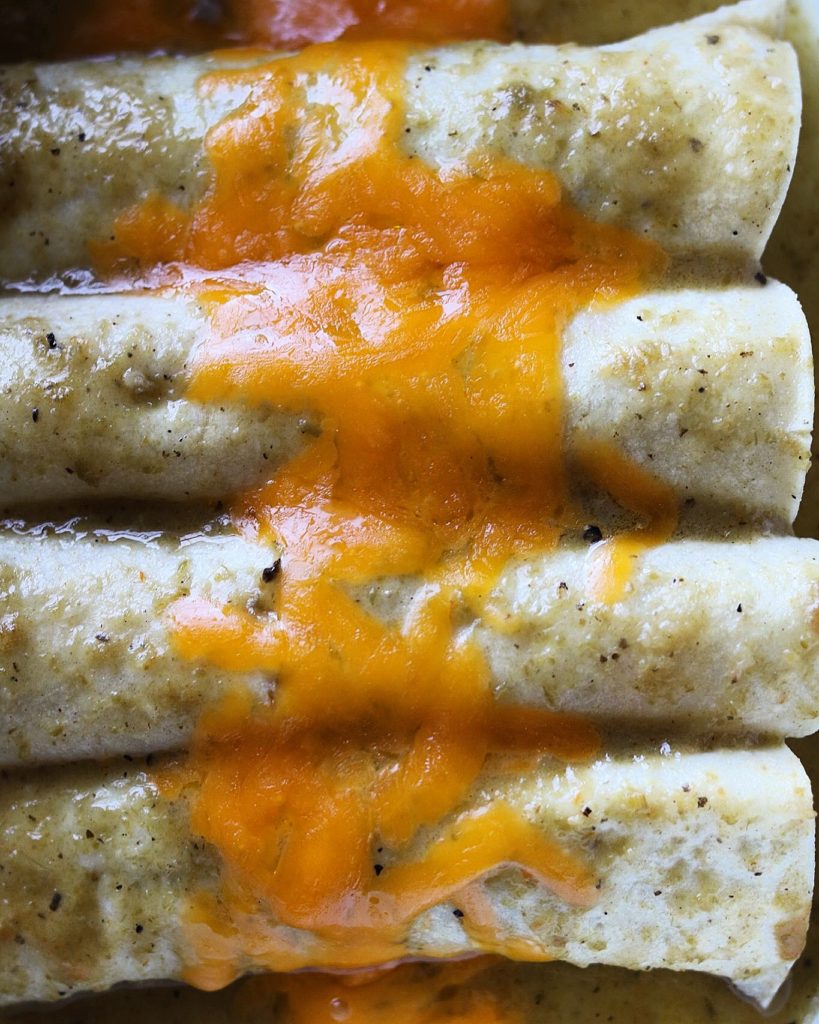
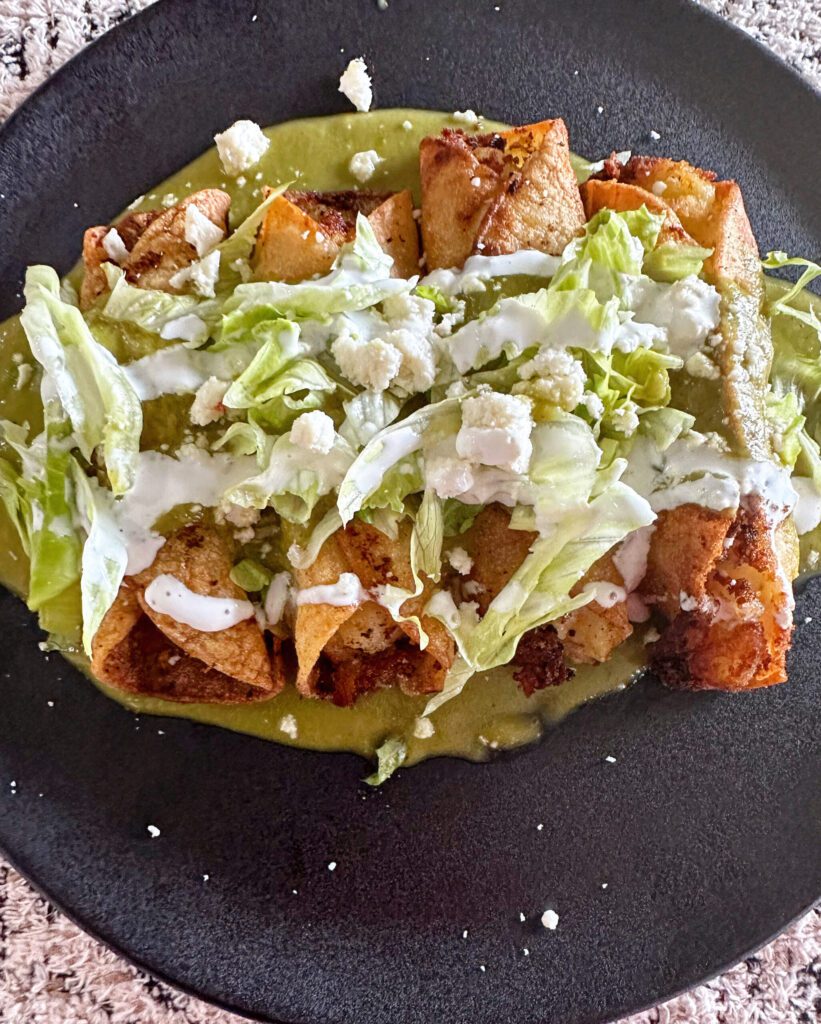
Chicken and Potato Flautas drowned in salsa Verde! Doesn’t this sound amazing? They are crunchy to the bite and the chicken that is mixed with soft mashed potatoes and cheese and seasonings as the filling is tender, so flavorful and absolutely mouth watering. All rolled up and quickly fried to a golden brown, these just hit the spot. They are then plated and covered with the delicious salsa Verde, lettuce, cheese and other topping of your choice These flautas stay crispy until the end and when you are finished you are looking forward to the next time you can eat them. Let’s get started with how to make these delicious flautas!

I had seen taquitos or flautas in I guess a TexMex way. I was happy when my friend that lives in Mexico taught me how to make these the right way, from Mexico. Even after her instructions I also watched several videos to make sure I was making them right. Now I do! I hope you will too!

They are not difficult, once you have your ingredients prepared. You can start the day before cooking the potato mixture with the chicken and cheese. You can make your salsa Verde a couple of days in advance and you can even roll your flautas ahead of time, safely store them covered well in your refrigerator. This will actually help them to hold together in the frying process.

Flautas de Pollo Ahogadas En Salsa Verde

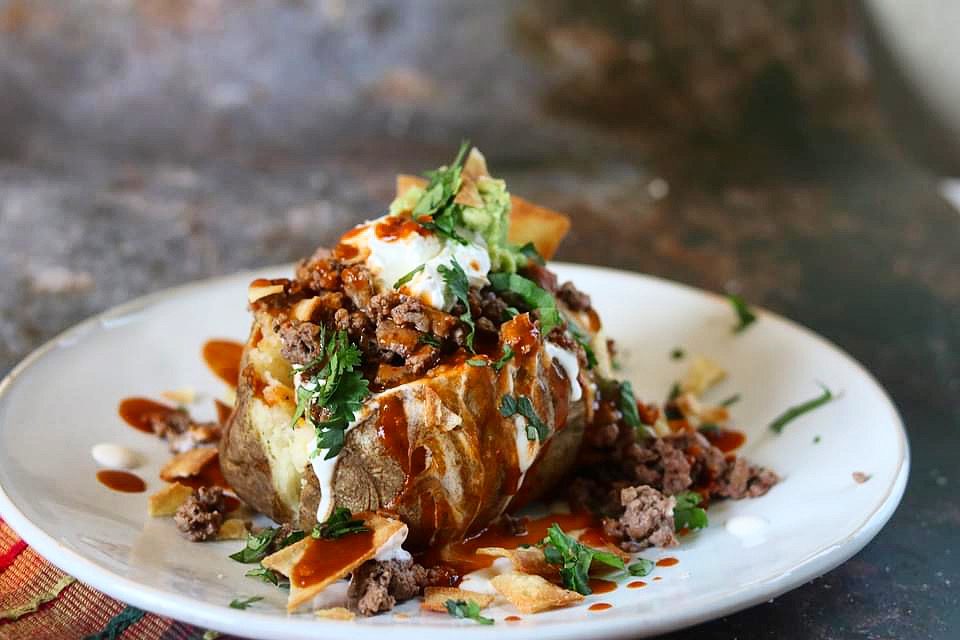
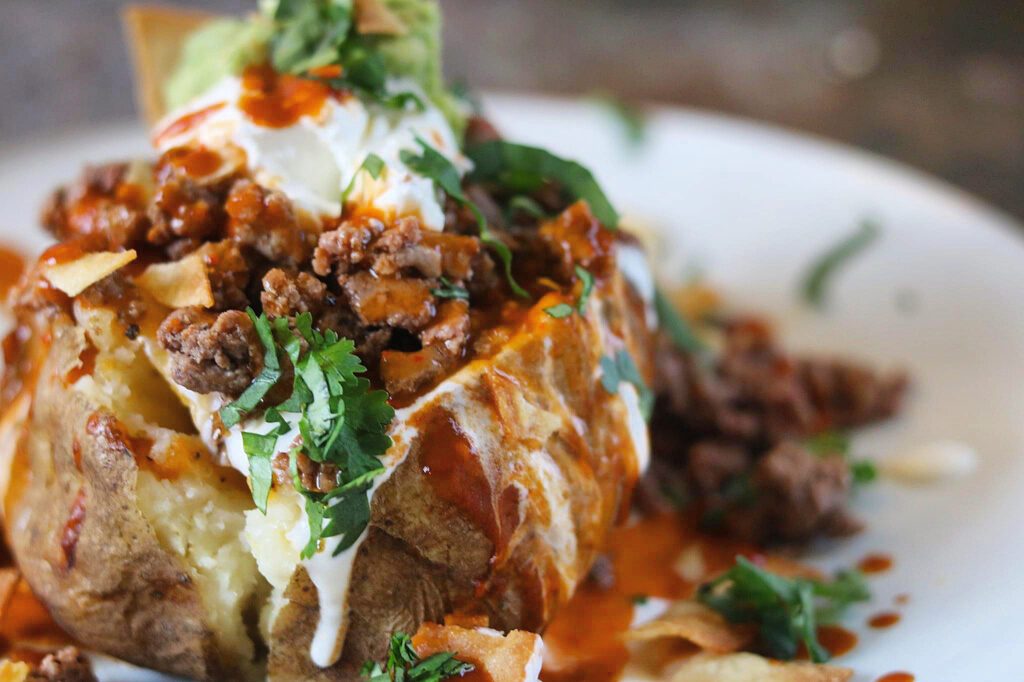
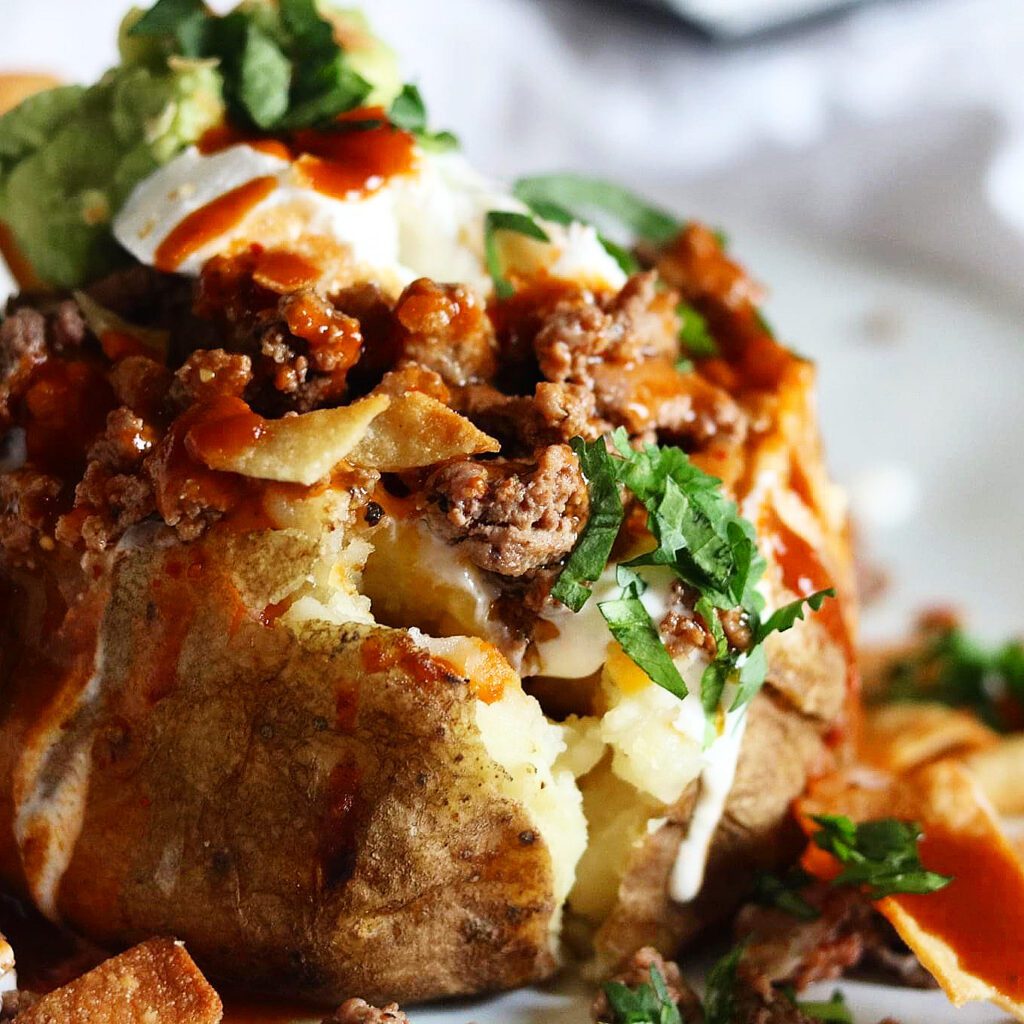
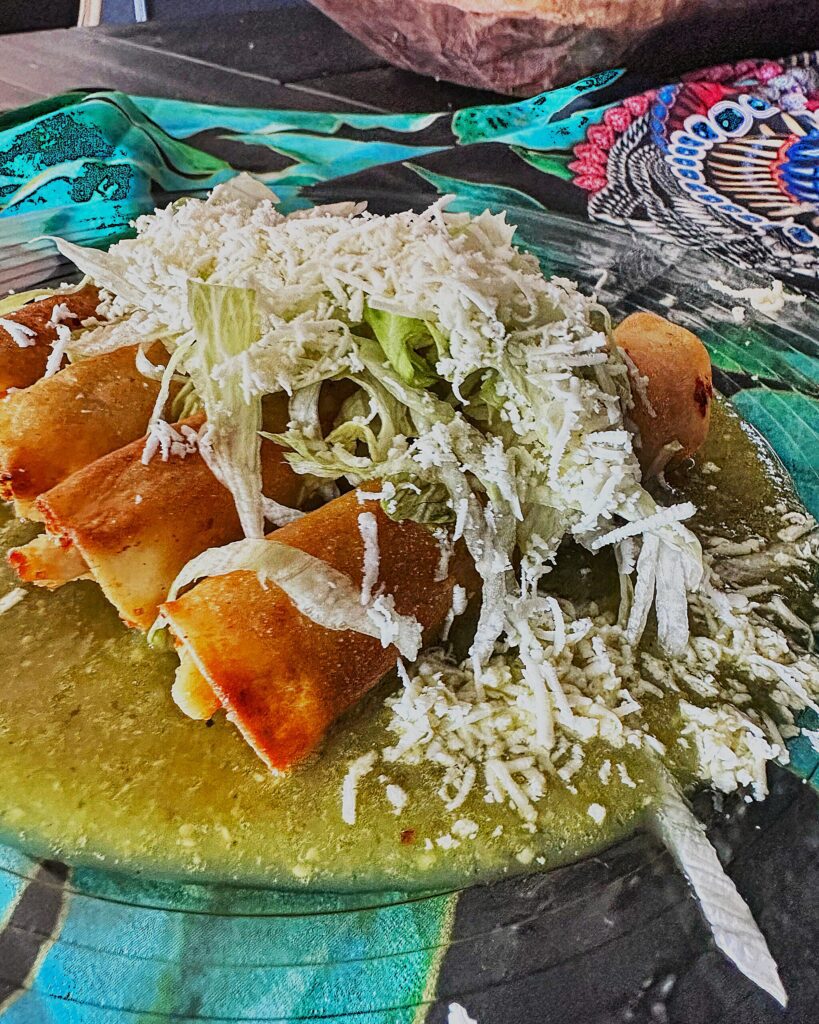
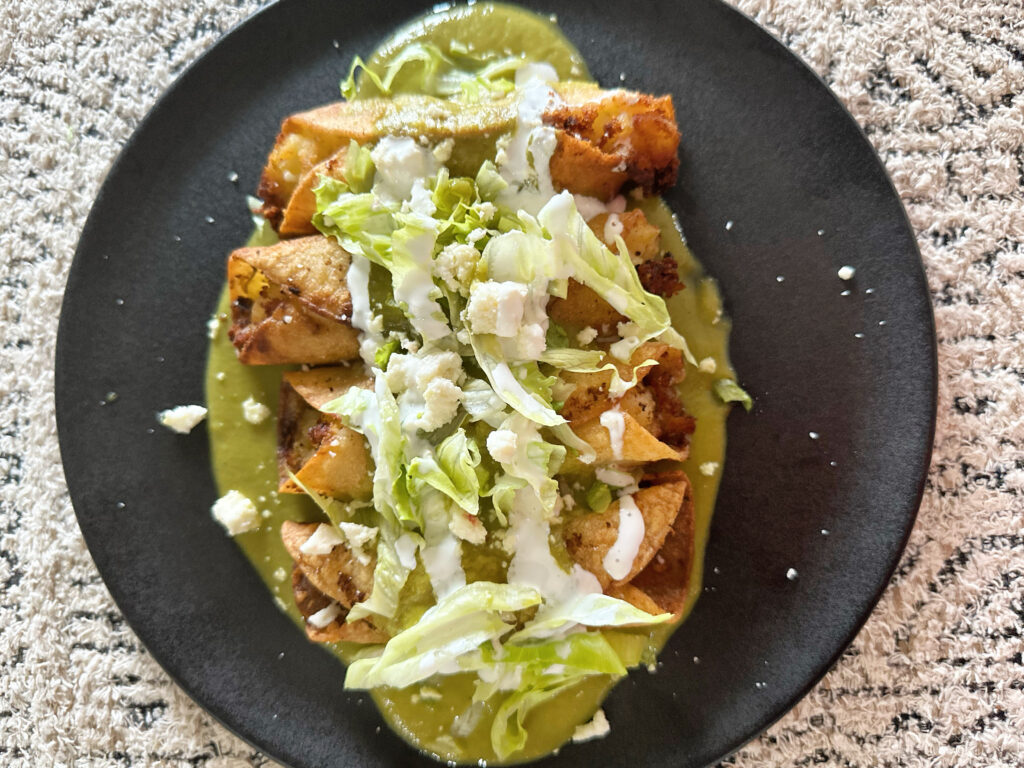
These Flautas de Pollo Ahogadas En Salsa Verde, or rolled tacos filled with chicken, potato and cheese, fried and covered in salsa verde, topped with cotija cheese and crispy lettuce, truly are an absolute favorite! They are crunchy, with a well seasoned filling, and a little kick is added my topping off with a little spicy salsa verde!

Flautas de Pollo Ahogadas En Salsa Verde

Flautas de Pollo Ahogadas En Salsa Verde

These flautas will be excellent for game days this fall! or a weeknight meal. You can make the flautas ahead of time and freeze them. You can make the salsa Verde ahead also and freeze in small containers. When you are reheating the flautas, heat them in an air fryer or in the oven so they will crisp up again. Thaw your salsa and heat in a sauce pan, then top with cheese of your choice (I like the more authentic cotija crumbles) and add the crispy shredded lettuce! Perfection!

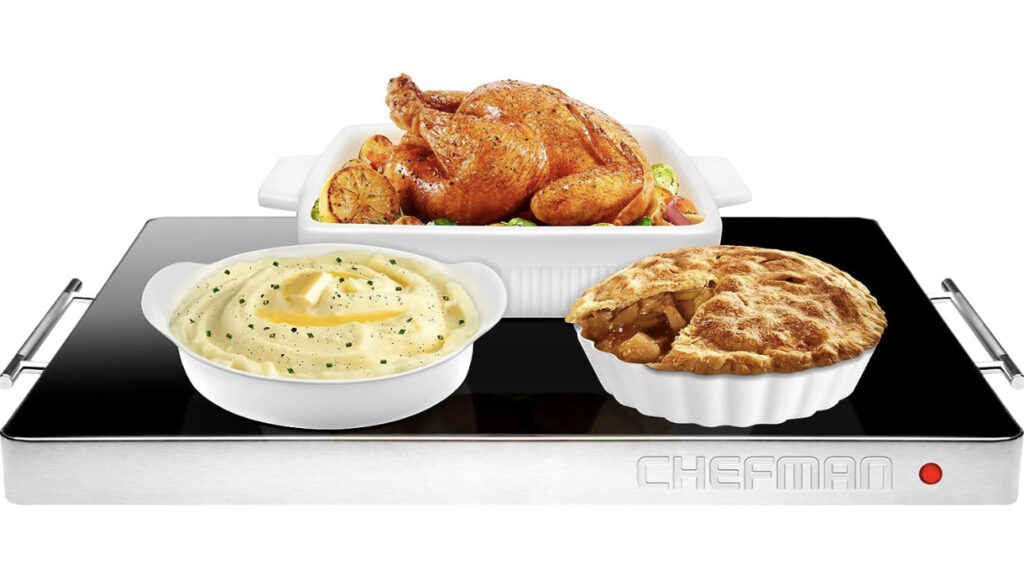
Game day, place them on a heating plate similar to this along with the salsa Verde. Have the cheese and shredded lettuce in a container on a bed of ice to keep it chilled, along with extra salsas you may want to have available. You could add chopped onions, cilantro, tomatoes and radishes as additional garnishes.

Your guest can build their own perfect Flautas. Here’s the link for the heating tray: https://amzn.to/3RKWxHh. By the way, this heating tray is on sale right now! I am a real stickler about my food being served hot!

Heating tray
Heating tray

What do you need to make these delicious flautas?

Flautus
Flautus

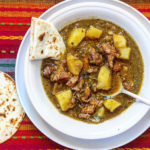
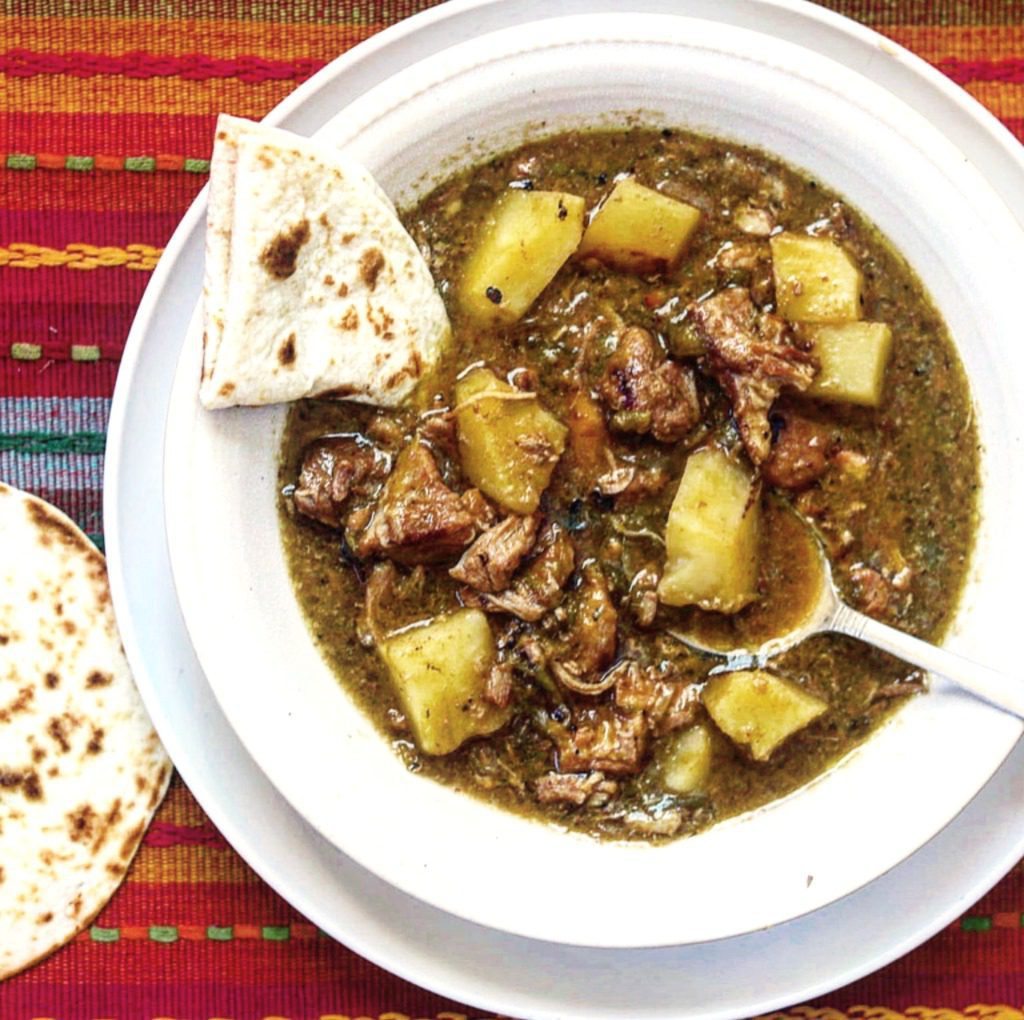
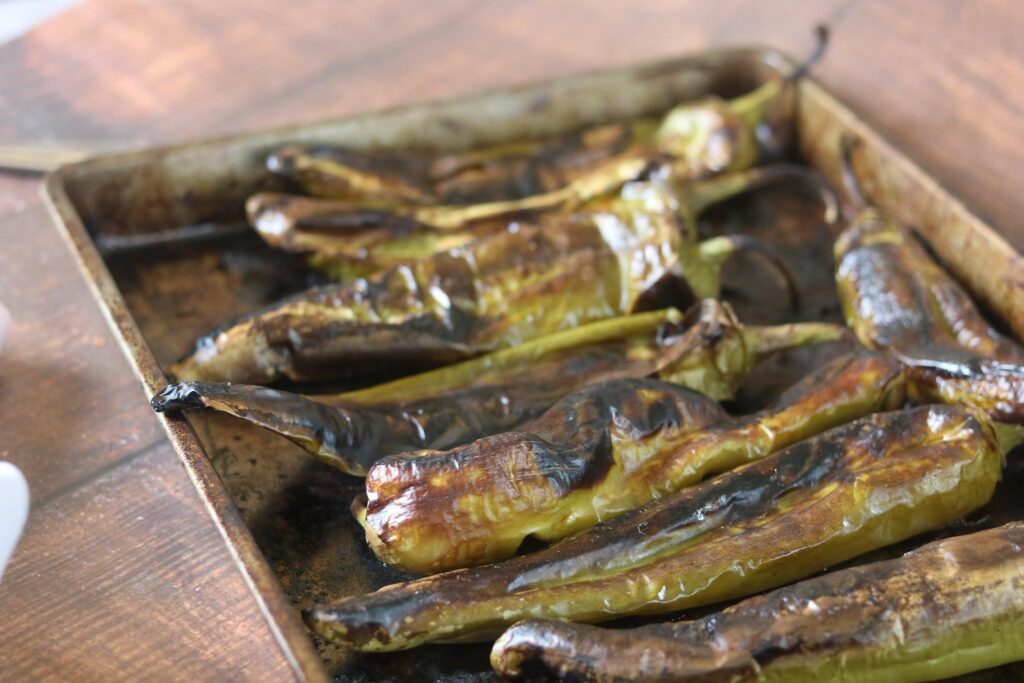
For the Salsa Verde:

  • Tomatillos
  • Poblano
  • White onion
  • Garlic
  • Jalapeno
  • Salt and Pepper
  • Oil

For the Filling:

  • Chicken
  • Potatoes
  • garlic
  • Onions
  • Muenster or Monterey Jack Cheese
  • Salt and Pepper

Garnishes:

There are a number of garnishes you can eat on flautas! Here’s a few you can chose from:

  • Thinly sliced radishes
  • Thinly sliced red onions or pickled red onions
  • Shredded lettuce.
  • More cheese, try cotija too

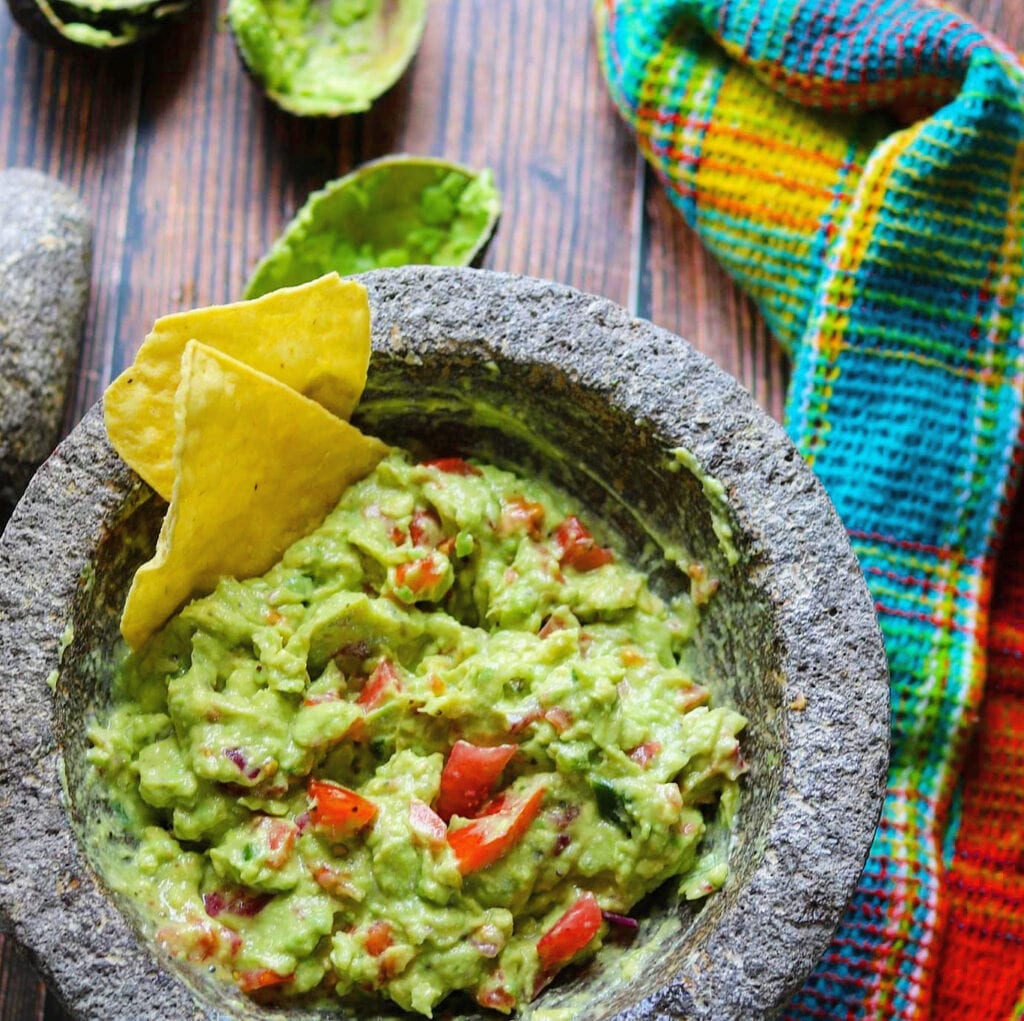
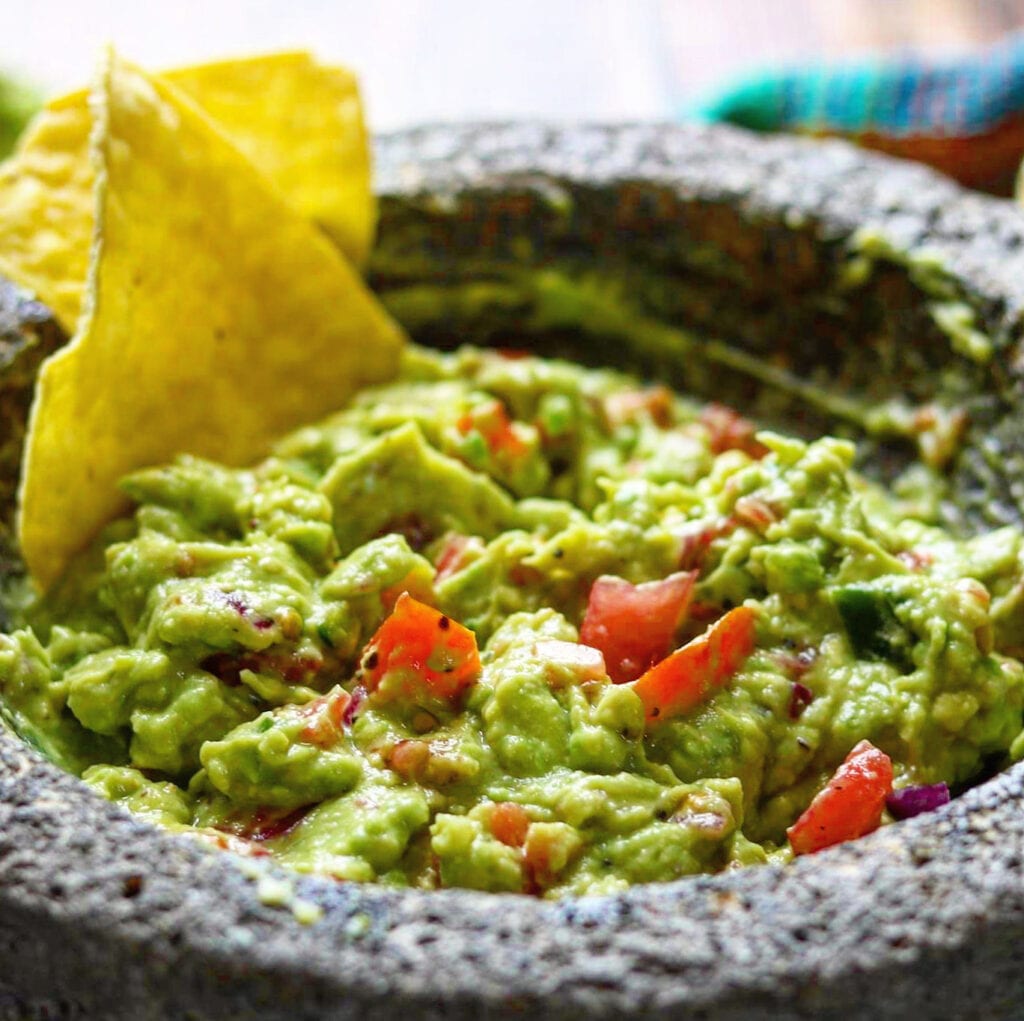
Need a guacamole recipe? Try this: #1 – delicious guacamole!

Guacamole
Guacamole

This recipe is small. Feel free to double or triple! Let me know what you think.

Flautas de Pollo Ahogadas En Salsa Verde

Print Recipe
Servings: 4 servings
Ingredients Method

Ingredients
  

For the Filling
  • 1.5 lbs chicken breast
  • 1/2 white onion
  • 1 head of garlic
  • 2 bay leaves
  • salt and pepper
  • 2-4 medium potatoes, skin on
  • shredded muenster cheese
Salsa Verde
  • 1 lb tomatillos
  • 4 cloves garlic
  • 1-2 whole jalapeno peppers, stems removed
  • 1/4 white onion
  • 1 whole poblano pepper
  • 1/2 cup cooking water
  • 1 tsp oregano
  • small bunch of cilantro
  • salt to taste
  • oil
To assemble
  • 12-16 corn tortillas softened in oil or microwave
  • shredded lettuce
  • Cotija Cheese
  • oil for frying the flautus

Method
 

For the filling
  1. PLace the chicken along with the other ingredients and cover with water. Bring to a boil and cook until tender. Boneless chicken breast will cook in 12-15 minutes, bone in will take a little longer.
    Remove from heat when done and allow to cool so you can shred it.
  2. Add the unpeeled potatoes to a pot of salted water and cook until tender. When done, remove from the heat and allow to cool. When you are able to handle, peel the potatoes.
  3. Shred the chicken and add to a bowl. In another bowl, roughly mash the potatoes. Combine the chicken and the potatoes along with the grated muenster cheese. Salt and pepper to taste. Set aside
To assemble
  1. Heat a skillet with a little oil. Heat to medium high and one at a time add the corn tortillas to soften and quickly remove them.
    Fill each tortilla with the chicken mixture until all are complete. Heat a skillet and fill with enough oil to fry the flautas. Heat to medium high and continually turn them to prevent burning.
    Drain on a wire rack or paper towels.
    To assemble:
    Spoon some of the Salsa verde onto the plate, Place 3 or 4 flautas on top. Ladle more sauce on top. Add shredded lettuce, Cotija cheese. Enjoy,
    Additional garnishes can be thinly sliced onions or pickled onions. Crema would be great. Guacamole or sour cream, yum.
  • Click to share on Pinterest (Opens in new window) Pinterest
  • Click to share on Facebook (Opens in new window) Facebook
  • Click to email a link to a friend (Opens in new window) Email
  • Click to print (Opens in new window) Print
  • Click to share on X (Opens in new window) X
  • Click to share on Tumblr (Opens in new window) Tumblr
  • More
  • Click to share on Reddit (Opens in new window) Reddit

Filed Under: Dishes of Mexico, Tex Mex and New Mexico Red and Green Chile, Poultry Tagged With: chicken, flautus, mexican food, salsa verde

Heavenly Chicago Italian Beef sandwiches! You will love these!

January 29, 2025 by Becky Spoon

Chicago Italian Beef
Please follow and like us:
onpost_follow
fb-share-icon
Tweet
Jump to Recipe
Chicago Italian Beef

Consider these delectable Chicago Italian Beef sandwiches for really any occasion! They’ll elevate your weeknight dinners and delight your holiday guests. Whether cooked in a crock pot, oven, or Instant Pot, these sandwiches offer versatility. You can even prepare them ahead of time, reheating  then only the assembly left before you entertain. And let’s not forget, these sandwiches are simply irresistible!

I melted provolone cheese on top of toasted buns and briefly broiled them. To prepare for your gathering or party, have a crock pot with beef, heated Au jus, and halved buns ready. Fill the buns with cheese, meat, and peppers. Serve with hot Au jus for dipping, along with bell peppers and giardiniera.

Chicago Italian Beef

What you need to prepare these:

  • boneless beef chuck roast
  • salt and pepper
  • vegetable oil
  • medium onion
  • dried Italian Seasoning
  • crushed red pepper
  • 6 cloves garlic
  • dry red wine
  • beef stock
  • fresh thyme
  • For the Sweet Peppers
  • green bell peppers
  • granulated garlic
  • salt and pepper
  • Sandwich Build
  • hoagie rolls
  • Hot Giardiniera

I purchased a boneless chuck roast that had exceptional marbling. The end result was remarkably tender! I utilized my Instant Pot to cook it, setting the timer for an hour. The Au jus is incredibly tasty! It possesses a spicy twist reminiscent of a French dip, elevated by the inclusion of the essential Giardiniera – a traditional Italian blend of pickled vegetables.

I bought my Giardiniera from Vienna Beef Company in Chicago. Here’s the link: https://www.viennabeef.com/shop-category/condiments/.

You can also get this from Amazon. Here’s the link for Amazon: https://amzn.to/37LRRXT.

Chicago Italian Beef

I’ll add a recipe for the Giardiniera but i find it easier to buy. I’ve even seen it at Sams Club and HEB.

need more sandwich recipes?

Check out this link for another delicious make ahead sandwich option. It’s my Muffuletta recipe! You can find it here: https://the2spoons.com/love-a-new-orleans-muffuletta/. Plus, the Muffuletta can also be prepared in advance.

New Orleans Muffuletta

Amazing Chicago Italian Beef (Pot Roast Style)

Chicago Italian Beef

Here’s the recipe for these game day sandwiches!

Chicago Italian Beef

Print Recipe
Course: Appetizer, dinner, Lunch, Main Course
Cuisine: American, Italian
Ingredients Method

Ingredients
  

  • 1 3 lb boneless beef chuck roast
  • salt and pepper
  • 2 tbsp vegetable oil
  • 1 medium onion, chopped
  • 2 tbsp dried Italian Seasoning
  • 1 tsp crushed red pepper
  • 6 cloves garlic, roughly chopped
  • 1/2 cup dry red wine
  • 3 cups beef stock
  • 2 sprigs fresh thyme
For the Sweet Peppers
  • 4 green bell peppers, seeded and cut into strips
  • 2 tbsp olive oil
  • 1 tsp granulated garlic
  • salt and pepper
Sandwich Build
  • 6 soft, hinged sub or hoagie rolls
  • Hot Giardiniera, recipe follows if you want to make
Homemade Hot Giardiniera
  • 1/4 cup table salt
  • 1 cup small diced carrots
  • 1 cup tiny cauliflower florets
  • 4-8 Serrano peppers, sliced 1/4 inch
  • 2 cloves garlic, minced
  • 1 stalk celery, diced small
  • 1 red bell pepper, diced small
  • 2 cups canola oil
  • 1 tbsp dried oregano
  • 1/2 tsp freshly ground pepper

Method
 

  1. For the pot roast: Position a rack in the middle position and preheat the oven to 300 degrees F.

  2. Liberally sprinkle the entire roast with salt and pepper. Heat the vegetable oil in a Dutch oven over medium-high heat. Brown the roast on all sides until golden and caramelized; reduce the heat if the fat begins to smoke. Transfer the roast to a plate and reduce the heat to medium. Add in the onions and saute, stirring occasionally, until just beginning to brown, 8 to 10 minutes. Add the Italian seasoning and crushed red pepper and saute until fragrant, another minute. Add the garlic and saute until fragrant, about 30 seconds. Deglaze with the red wine and cook until reduced by half. Add in the stock and thyme and bring to a simmer. Adjust the seasoning of the jus. Place the roast back into the pot with any accumulated juices and place in the oven. Cook the roast, turning every 30 minutes, until very tender, 3 3 1/2 to 4 hours. Increase the oven heat to 350 degrees F.

  3. Transfer the roast to a cutting board and tent with foil. Strain the jus through a fine mesh strainer into a bowl and return back to the pot. Bring to a simmer and adjust the seasoning if necessary. Once cooled a bit, pull the meat into smaller chunks, return to the reduced jus and reserve until ready to build the sandwiches.

  4. For the sweet peppers: Toss the pepper strips with the olive oil, granulated garlic and some salt and pepper on a baking sheet. Bake, stirring halfway through, until lighter in color and soft, about 20 minutes.

  5. For the sandwich build: If you like, open the bun and toast it in a little butter in a skillet. Remove from the skillet and add provolone cheese and place under the broiler. Remove and place some beef on the roll, then some sweet peppers and then some Hot Giardiniera. Pour a small dish of reduced jus. Take the whole sandwich and quickly dunk in hot jus or serve with a bowl to each person.
    If you are serving these for a crowd, you can omit the toasting and just lay out the ingredients for everyone to build their own sandwich.
  6. Day One: Combine 2 cups water and the salt in a glass or non- reactive bowl. Mix until the salt is dissolved. Add the carrots, cauliflower, serranos, garlic, celery and bell peppers to the salt water and stir to combine. Cover and refrigerate overnight.

  7. Day Two: Drain and rinse the vegetables. In a clean bowl, mix together the canola oil with the oregano and pepper. Add the vegetables and mix to combine. Cover and refrigerate overnight. Giardiniera will only get better with time. After 2 days at the most in the bowl, you can place in air-tight Mason jars and keep in the fridge for at least 2 to 3 weeks. Makes 3 to 4 cups.

  • Click to share on Pinterest (Opens in new window) Pinterest
  • Click to share on Facebook (Opens in new window) Facebook
  • Click to email a link to a friend (Opens in new window) Email
  • Click to print (Opens in new window) Print
  • Click to share on X (Opens in new window) X
  • Click to share on Tumblr (Opens in new window) Tumblr
  • More
  • Click to share on Reddit (Opens in new window) Reddit

Filed Under: Sandwiches/Burgers/Hot Dogs Tagged With: Chicago Italian Beef, Game Day, game day food, Italian Beef

these are perfect for game day! easy tandoori chicken wings.

January 28, 2025 by Becky Spoon

Tandoori Chicken Wings
Please follow and like us:
onpost_follow
fb-share-icon
Tweet
Jump to Recipe
Tandoori Chicken Wings

44444

Tandoori Chicken Wings

what are the spices in these Tandoori Chicken Wings?

I love the Indian spices in this dish. The recipe calls for 2 tablespoons garam masala which is a blend of ground spices used extensively in Indian cuisine. The spices for garam masala are usually toasted to bring out more flavor and aroma, and then ground. The word masala simply means “spices,” and garam means “hot.” However, garam masala doesn’t necessarily constitute a particularly spicy blend. The powdered form is typically gluten-free, vegan, and vegetarian, while you will need to check the label for garam masala paste to see what is included.

I couldn’t find garam masala at my local grocery store so I bought it online from Amazon. Maybe you can find it at your store. I’m rural and I can’t always find spices that aren’t the usual spices. Here’s a link for it: https://amzn.to/37KdHuQ.

What ingredients will you need for this recipe:

  • chicken wings, drumettes and flats separated
  • Kosher salt
  • Fresno chilies
  • ginger
  • garlic cloves
  • garam masala
  • smoked paprika
  • cilantro
  • plain whole-milk yogurt
  • fresh lemon juice
  • vegetable oil
  • lemon wedges for serving

These wings are delicious dipped in the delicious yogurt sauce that I made for these chicken wings and you definitely will want to add these to your Game Day spread with these wings!

Tandoori Chicken Wings

Need a simple original wing recipe? Try this simple recipe!

these are perfect for game day! easy tandoori chicken wings.

Frank’s RedHot Buffalo Wings

Here you go! The recipe for these Tandoori Chicken Wings! Enjoy!

Tandoori Chicken Wings

Tandoori Chicken Wings

I love the Indian spices in this dish. The recipe calls for 2 tablespoons garam masala which is a blend of ground spices used extensively in Indian cuisine. The spices for garam masala are usually toasted to bring out more flavor and aroma, and then ground. The word masala simply means "spices," and garam means "hot." However, garam masala doesn't necessarily constitute a particularly spicy blend. The powdered form is typically gluten-free, vegan, and vegetarian, while you will need to check the label for garam masala paste to see what is included.
Print Recipe Pin Recipe
Course: Appetizer, dinner, Lunch, Main Course
Cuisine: Indian
Ingredients Method

Ingredients
  

  • 3 lbs chicken wings, drumettes and flats separated
  • Kosher salt
  • 4 medium Fresno chilies, stems removed, coarsely chopped (substitute 1 or 2 jalapenos if you can't find Fresno)
  • 1 3 " piece ginger, peeled, finely grated
  • 4 garlic cloves
  • 2 tbsp garam masala
  • 1 tbsp plus 1 1/2 tsp smoked paprika
  • 2 1/4 cups cilantro leaves with tender stems, divided
  • 3/4 cup plain whole-milk yogurt
  • 1/4 cup fresh lemon juice
  • vegetable oil
  • lemon wedges for serving

Method
 

  1. Season chicken wings generously with salt and place in a one-gallon resealable plastic bag.

  2. Pulse chiles, ginger, garlic, garam masala, paprika, and 2 cups cilantro in a food processor until finely chopped. Add yogurt and lemon juice and pulse, scraping down sides as necessary, until smooth and well combined. Pour marinade into bag with chicken. Seal bag and turn to evenly coat chicken with marinade. Chill at least 2 hours and up to 8.

  3. Let chicken sit at room temperature 1 hour before grilling.

  4. Prepare a grill for medium heat; oil grate. Remove chicken from marinade, letting excess drip back into bag, and grill, turning every 3–4 minutes, until charred in spots and cooked through, 10–12 minutes total. Transfer to a platter and let rest 5 minutes.

  5. Chop remaining ¼ cup cilantro and sprinkle over wings. Serve with lemon wedges alongside.

  • Click to share on Pinterest (Opens in new window) Pinterest
  • Click to share on Facebook (Opens in new window) Facebook
  • Click to email a link to a friend (Opens in new window) Email
  • Click to print (Opens in new window) Print
  • Click to share on X (Opens in new window) X
  • Click to share on Tumblr (Opens in new window) Tumblr
  • More
  • Click to share on Reddit (Opens in new window) Reddit

Filed Under: Appetizer Tagged With: chicken, grilling

love this extravagant taco meat loaded baked potato.

January 23, 2025 by Becky Spoon

Taco Meat Loaded Baked Potato
Please follow and like us:
onpost_follow
fb-share-icon
Tweet
Jump to Recipe
Taco Meat Loaded Baked Potato

This taco meat loaded baked potato is right up my ally. I love a baked potato. To add another of my favorite foods…Mexican food that takes it over the top.

I see loaded baked potatoes with bbq, vegetables, all kinds of different things. Why not loaded with taco meat, enchilada sauce, Mexican Crema, sour cream and guacamole?

Taco Meat Loaded Baked Potato

Baked potatoes are my go to when I don’t feel well, or I don’t want to cook or I just want the ultimate comfort food….a baked potato. It’s the perfect vessel to stuff a pretty complete meal into.

love this extravagant taco meat loaded baked potato.

So what’s in this loaded baked potato?

  • Butter
  • Sour Cream
  • Ground beef seasoned with your favorite taco seasoning
  • Red Chile enchilada sauce
  • Mexican Crema
  • Guacamole
  • Cilantro
  • Fried corn tortilla strips (optional)

I made the red chile sauce which is the same as I use for beef enchiladas. Here is the recipe: hatch red chile

You can use a store bought enchilada sauce, any will work. One of my favorites is Hatch Red Enchilada sauce.

Here’s my guacamole recipe if you decide to make it from scratch: #1 – delicious guacamole!

Guacamole
Guacamole

Here is a similar molcajete if you don’t have one. Honestly, it is the best thing to make homemade guacamole.https://amzn.to/3LYaE8g.

love this extravagant taco meat loaded baked potato.

Taco Meat Loaded Baked Potato

Might as well post those red chile enchiladas I was talking about. We Love New Mexico Hatch Red Chile Beef Enchiladas Too!

New Mexico Hatch Red Chile Beef Enchiladas

Here’s the recipe for the loaded baked potatoes!!

Taco Meat Loaded Baked Potato

Taco Meat Loaded Baked potato

Print Recipe Pin Recipe
Servings: 4 servings
Course: dinner, Lunch, Main Course
Cuisine: American
Ingredients Method

Ingredients
  

  • 4 large baking potatoes
  • 1 lb ground beef
  • 1 package of your favorite taco seasoning mix
  • 2 corn tortillas cut into strips
  • oil for frying your tortilla strips
  • butter
  • sour cream
  • red chile enchilada sauce
  • Mexican crema
  • shredded cheese like cheddar
  • sour cream
  • guamole (either homemade or store bought)
  • fresh chopped cilantro
  • salt and pepper

Method
 

  1. Wash your potatoes and wrap them in foil. Set the oven to 400 degrees and cook the potatoes until they are fork tender.
  2. While the potatoes are cooking cook your meat according to your taco seasoning instructions.
  3. Prepare your guacamole if making from scratch.
  4. When your potatoes are done remove them from the oven and slice an opening down the middle, without going all the way through. Push from each side to break up a little.
  5. Add the desired amount of butter to each potato along with salt and pepper to taste. Add your shredded cheese.
  6. Top with your taco meat. Add more cheese if you like. Drizzle back and forth with the enchilada sauce and the Mexican Crema.
  7. Top with sour cream, guacamole, your fried tortilla chips and fresh chopped cilantro.
  • Click to share on Pinterest (Opens in new window) Pinterest
  • Click to share on Facebook (Opens in new window) Facebook
  • Click to email a link to a friend (Opens in new window) Email
  • Click to print (Opens in new window) Print
  • Click to share on X (Opens in new window) X
  • Click to share on Tumblr (Opens in new window) Tumblr
  • More
  • Click to share on Reddit (Opens in new window) Reddit

Filed Under: Dishes of Mexico, Tex Mex and New Mexico Red and Green Chile Tagged With: baked potato, extravagant, loaded baked potatoes, mexican food, potato, red chile, taco meat

We Love this #1 Hatch Green Chile Stew

January 20, 2025 by Becky Spoon

Traditional Hatch Green Chile Stew
Please follow and like us:
onpost_follow
fb-share-icon
Tweet
Jump to Recipe
We Love Traditional Hatch Green Chile Stew

Traditional Hatch Green Chile Stew has been a family favorite for years. I mean WE really love Traditional Hatch Green Chile Stew! It is loaded with tender pork, some potatoes, a beautiful gravy created from long and slow simmering, and of course the Hatch Green Chile.

Traditional Hatch Green Chile Stew

This is just one of those stews that you may not be familiar with unless you have traveled to New Mexico. The Hatch green and red chile are unique to the area and they are amazing in taste, both of them, and we absolutely love both. You can get mild, medium or hot. I tend to use a combination of mild with a medium or a hot. We like a little kick, but not too hot to eat!

The harvest of the green Chile is seasonal. When you are in New Mexico, and even now in Texas you will find fresh green chilies and they will roast them for you. I store them in individual bags in the freezer for future use. You have to try them if you haven’t already! One of our favorite uses of the frozen green Chile in the freezer throughout the year is the Hatch Green Chile Stew! I’ve ordered them online when I have missed the harvest.

Roasted Hath Green Chile
Roasted Hatch Green Chile

I’ve ordered them form Hatch Chile Store many times. You can get them fresh or roasted, you can get them peeled and chopped, frozen which I prefer these days.

Green chile, just like Red chile is available in mild, medium, or hot. If you aren’t familiar with these chiles, I’d start with mild and medium. I have used Hot before and have not been able to eat it because it was fire. So I usually buy mild and medium and depending on the heat of the medium, I’ll add some medium because a little heat is good. You may be able to handle a lot of heat. My husband could…..but I can’t do too hot.

You can actually get 505 Southwestern brand from Amazon. https://amzn.to/4h5svb4. I think you can get these also from HEB also and I have used this brand often.

We Love Traditional Hatch Green Chile Stew

I make a lot of recipes with New Mexico Hatch Green Chile. Another recipe I have on the blog is my green chile enchiladas. Here’s the link. We Love New Mexico Hatch Green Chile Beef Enchiladas

New Mexico Hatch Green Chile Beef Enchiladas

I like both recipes. They are both absolutely delicious. You need nothing to serve with this stew except for some flour or corn tortillas. You’ll need a lot of tortillas to sop up the ever last bite of this Chile goodness!

We Love Traditional Hatch Green Chile Stew

What do you need for this dish?

  • olive oil or vegetable oil
  • pork shoulder
  • onion
  • garlic
  • flour (if you are gluten free a masa slurry will work)
  • fresh tomatoes
  • Hatch green chiles
  • jalapeno
  • salt
  • pepper
  • sugar
  • chicken or beef broth
  • *Potatoes are optional…they are not traditional, but I love the addition of potatoes

Here’s the recipe! Let me know what you think!

We Love Traditional Hatch Green Chile Stew

Traditional New Mexico Green Chile Stew

Print Recipe Pin Recipe
Servings: 6 Servings
Course: dinner, Lunch, Main Course
Cuisine: Mexican, new mexico
Ingredients Method

Ingredients
  

  • 2 tbsp olive oil or vegetable oil
  • 2 lbs pork, cut into 1-inch pieces (I use pork butt, shoulder)
  • 1/2 Cup onions, chopped
  • 1 clove Garlic, minced
  • 1/4 cup Flour (if you are gluten free a masa slurry will work perfectly after the pork is tender and your stew has completed)
  • 2 cups fresh tomatoes, peeled and chopped
  • 2 Cups fresh green chiles, roasted, peeled and chopped or 2 cups frozen green chiles (or good quality in a Jar like 505 Southwestern)
  • 1 fresh jalapeno pepper, chopped
  • 1 tsp salt
  • 1 tsp freshly ground black pepper
  • 1 tsp sugar
  • 1 cup Chicken or beef broth (more if needed)
  • 2-3 large russet potatoes, cut into the size of your choice The potatoes are optional…they are not Original, but I like my stew with potatoes

Method
 

  1. Heat olive oil in 4-quart Dutch oven with cover. Add pork and cook until lightly browned. Add onion and garlic and stir with meat. Add flour and stir 1-2 minutes. Add tomatoes, green chiles, jalapeno (if using), salt, pepper and sugar. Mix to incorporate. Add broth. Lower heat. Cover pot and simmer for 1- 1 1/2 hours until meat is tender. Serve with flour tortillas, or corn if you prefer.

  • Click to share on Pinterest (Opens in new window) Pinterest
  • Click to share on Facebook (Opens in new window) Facebook
  • Click to email a link to a friend (Opens in new window) Email
  • Click to print (Opens in new window) Print
  • Click to share on X (Opens in new window) X
  • Click to share on Tumblr (Opens in new window) Tumblr
  • More
  • Click to share on Reddit (Opens in new window) Reddit

Filed Under: Dishes of Mexico, Tex Mex and New Mexico Red and Green Chile, Pork Tagged With: Green Chile, hatch green chile, New Mexico Green Chile Stew, Pork, Stew

chicken cacciatore – comfort food at it’s best

January 18, 2025 by Becky Spoon

Chicken Cacciatore
Please follow and like us:
onpost_follow
fb-share-icon
Tweet
Jump to Recipe
Chicken Cacciatore
Chicken Cacciatore

Chicken Cacciatore is a favorite and I’ve made it this way forever it seems. This dish is my ultimate comfort food. I have so many but this is one that I just crave and have to make. Chicken that has been seared on the outside, then braised in tomatoes, garlic, bell peppers and seasonings very slowly until it falls off the bone …..I have no words.

I like to serve it in a bowl like in the photo with pasta and some kind of white bean like Navy Beans, Great Northern Beans or Cannellini Beans. The combined flavors of all ingredients are magic. Add a piece of garlic bread or just a chunk of fresh french bread and you’re set.

What you need to make this…

  • 4 pieces chicken, like 2 thighs and 2 legs
  • 2 tbsp extra virgin olive oil
  • 3-4 garlic cloves, minced
  • 1/2 onion, sliced
  • 1/2 green bell pepper, sliced
  • 1/2 red bell pepper, sliced
  • 1 14.5 oz. can diced tomatoes
  • 1 cup chicken stock
  • 1/2 tsp dried oregano
  • 1/2 tsp Italian Seasoning
  • fresh basil for serving
  • parmesan cheese for serving
Chicken Cacciatore

I served this in white bowls that I absolutely love! I actually love to serve entrees in bowls many times rather than on a plate. Here’s the link for these bowls: https://amzn.to/3hFHFEK

About the ingredients….

Chicken Cacciatore

I like to use an Italian tomato in this recipe, or really any recipe that’s Italian that I’m making a sauce. Usually I use Cento Whole Italian tomatoes or other brands of San Marzano. Here’s a link if you are not familiar. Here’s a link if you aren’t familiar with this brand. https://amzn.to/2Y8S5pJ

Here’s another brand that I love: https://amzn.to/4hnbyIE

What could I serve with this?

If you wanted to serve an appetizer before this meal I would suggest a salad, an antipasti or some stuffed mushrooms. Here’s a couple of my recipes: stuffed mushrooms

Stuffed Mushrooms
You’ll love these stuffed mushrooms!
Chicken Cacciatore

Chicken Cacciatore

5 from 1 vote
Print Recipe Pin Recipe
Servings: 2 Servings
Course: dinner, Lunch, Main Course
Cuisine: Italian
Ingredients Method

Ingredients
  

  • 4 pieces chicken, like 2 thighs and 2 legs
  • 2 tbsp extra virgin olive oil
  • 3-4 garlic cloves, minced
  • 1/2 onion, sliced
  • 1/2 green bell pepper, sliced
  • 1/2 red bell pepper, sliced
  • 1 14.5 oz. can diced tomatoes
  • 1 cup chicken stock
  • 1/2 tsp dried oregano
  • 1/2 tsp Italian Seasoning
  • fresh basil for serving
  • parmesan cheese for serving
  • for a little kick add a little Calabrian Chile!

Method
 

  1. Season the chicken on both sides with salt and pepper.
  2. Heat a large skillet and add the olive oil. When heated add your chicken pieces skin side down and cook until golden grown. Turn the chicken and brown the other side.
  3. When both sides have browned, remove the chicken to a plate.
  4. Add the onions and garlic to the skillet and cook on medium heat for about 5 minutes until the vegetables have softened. Add the garlic and cook until it is aromatic.
  5. Add the chicken stock and the tomatoes to the skillet, Scrape up the bits in the bottom of the pan. Add the oregano, a pinch of sugar if your tomatoes are bitter and a little salt and pepper if needed. Bring to a simmer, place a lid on the pan and cook for about 20 minutes.
  6. Add your chicken and the juices to the tomato and vegetable mixture. Then, bring to a simmer, cover the pan and cook another 20 minutes until your chicken is cooked through. Remove the lid and check for doneness. The Internal temperature should be at 165 degrees and the meat will start to fall of the bone. If you need to cook a little longer, add the lid and continue cooking for another minutes. At this time if the chicken is at the desired temperature, remove the lid, increase the heat and allow your sauce to cook down a little.
  7. Serve with polenta or pasta! I served this time with Polenta but many times I serve over a bowl of spaghetti! Bon Appetit!
  • Click to share on Pinterest (Opens in new window) Pinterest
  • Click to share on Facebook (Opens in new window) Facebook
  • Click to email a link to a friend (Opens in new window) Email
  • Click to print (Opens in new window) Print
  • Click to share on X (Opens in new window) X
  • Click to share on Tumblr (Opens in new window) Tumblr
  • More
  • Click to share on Reddit (Opens in new window) Reddit

Filed Under: Poultry Tagged With: chicken, chicken cacciatore, italian

  • « Go to Previous Page
  • Page 1
  • Page 2
  • Page 3
  • Page 4
  • Page 5
  • Interim pages omitted …
  • Page 67
  • Go to Next Page »

Primary Sidebar

Categories

  • Appetizer
  • Beans, Lentils, Grains, Rice
  • Beef
  • Bread
  • Breakfast/Brunch
  • Cocktails
  • Dessert
  • Dishes of Mexico, Tex Mex and New Mexico Red and Green Chile
  • Fish/Seafood
  • Ice Cream
  • Pasta
  • Pizza
  • Pork
  • Poultry
  • Salad Dressings
  • Salads
  • Salsas
  • Sandwiches/Burgers/Hot Dogs
  • Sauces, Compound Butters, Condiments
  • Side dish
  • Soups/Stews/Gumbo//Chili
  • Stocks, Broths, Gravies
  • Vegetables

Copyright © 2025 The 2 Spoons on the Foodie Pro Theme

Manage Cookie Consent
We use cookies to optimize our website and our service.
Functional Always active
The technical storage or access is strictly necessary for the legitimate purpose of enabling the use of a specific service explicitly requested by the subscriber or user, or for the sole purpose of carrying out the transmission of a communication over an electronic communications network.
Preferences
The technical storage or access is necessary for the legitimate purpose of storing preferences that are not requested by the subscriber or user.
Statistics
The technical storage or access that is used exclusively for statistical purposes. The technical storage or access that is used exclusively for anonymous statistical purposes. Without a subpoena, voluntary compliance on the part of your Internet Service Provider, or additional records from a third party, information stored or retrieved for this purpose alone cannot usually be used to identify you.
Marketing
The technical storage or access is required to create user profiles to send advertising, or to track the user on a website or across several websites for similar marketing purposes.
Manage options Manage services Manage {vendor_count} vendors Read more about these purposes
Preferences
{title} {title} {title}