• Skip to primary navigation
  • Skip to main content
  • Skip to primary sidebar

A cook named Rebecca

  • Home
  • Favorite Cookbooks
  • Recipes
  • Travel
You are here: Home / Home

Corn & Summer Tomato Salad with Grilled Chicken, Fresh & Delicious!

August 15, 2019 by Becky Spoon

Fresh Corn & Summer Tomato Salad with Grilled Chicken, Creamy Cilantro Lime DressingJump to Recipe

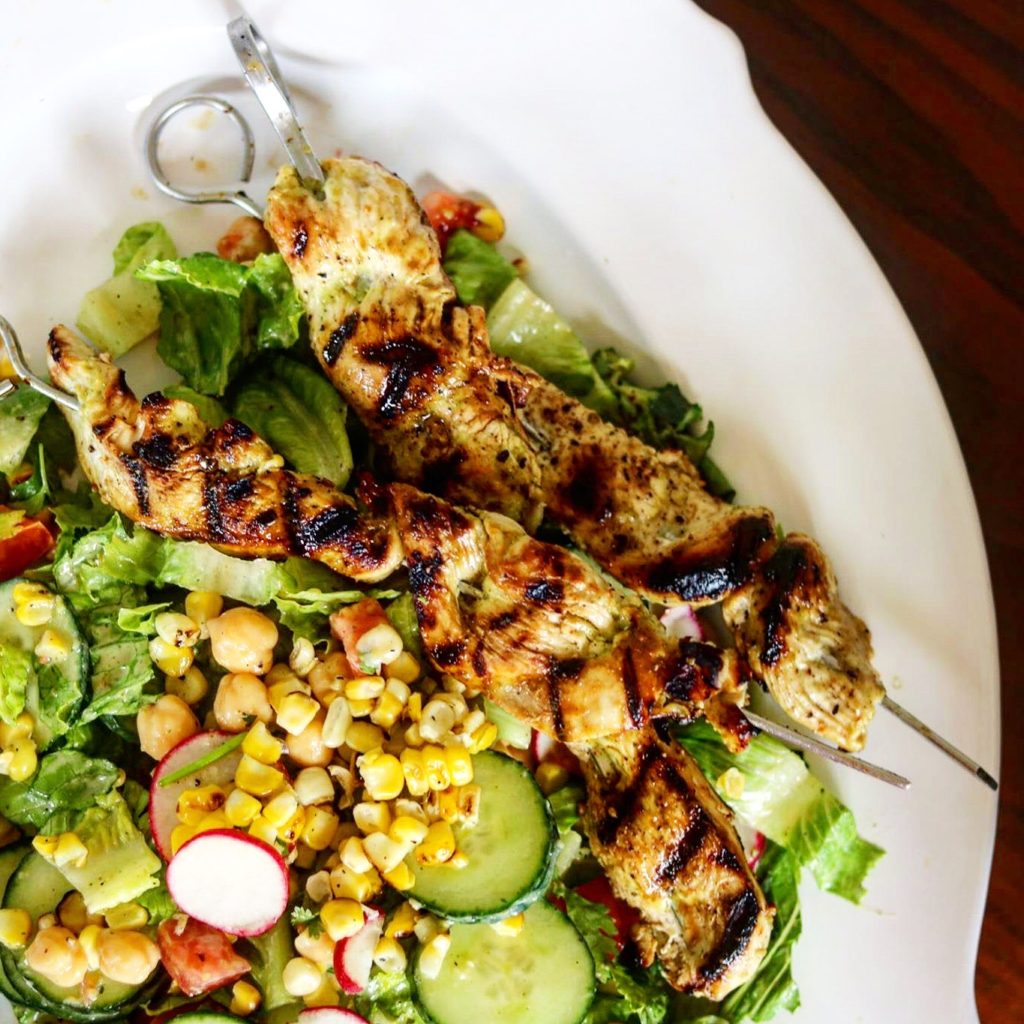
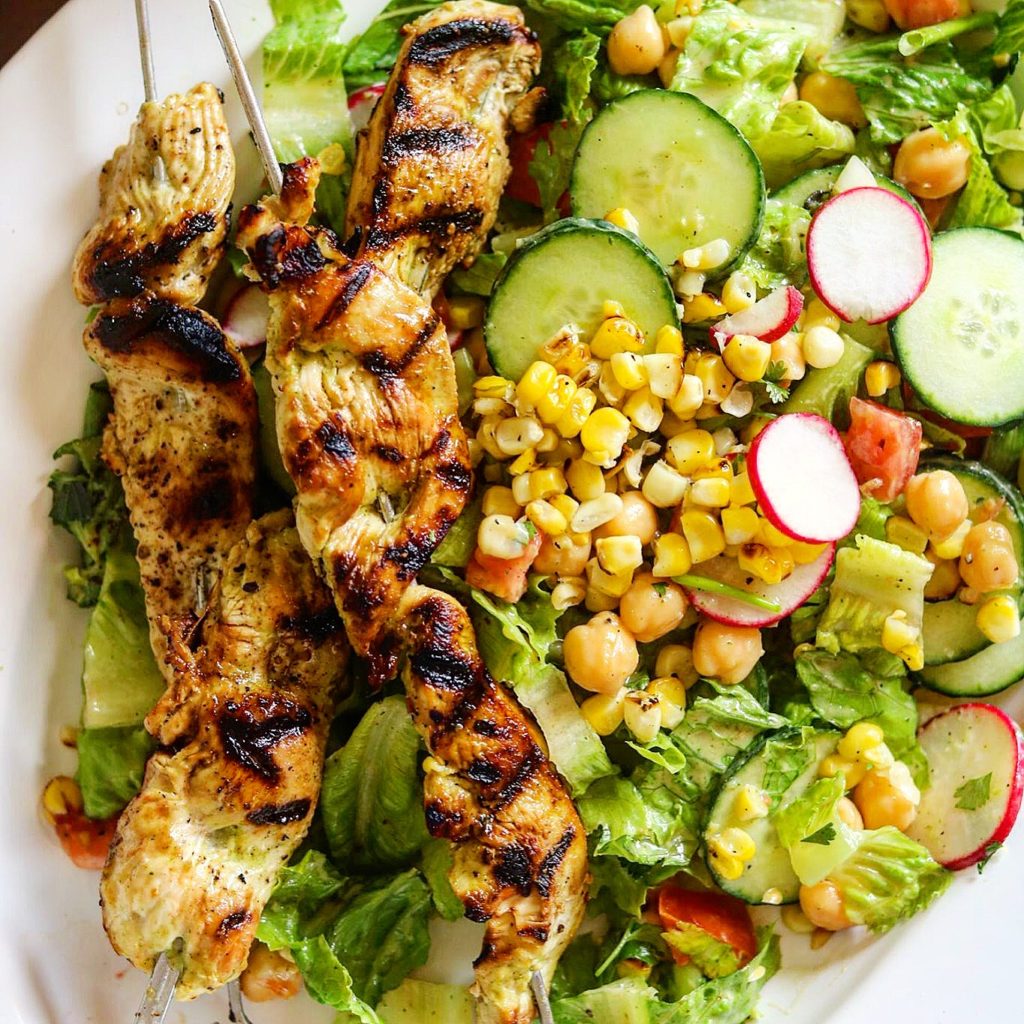
This Corn & Summer Tomato Salad with Grilled Chicken is loaded with fresh summer vegetables and the Creamy Cilantro Lime Dressing is a little spicy from a little fresh jalapeno with some tartness from lime juice! Oh, and the cilantro in the dressing just makes it!

Fresh Corn & Summer Tomato Salad with Grilled Chicken, Creamy Cilantro Lime Dressing

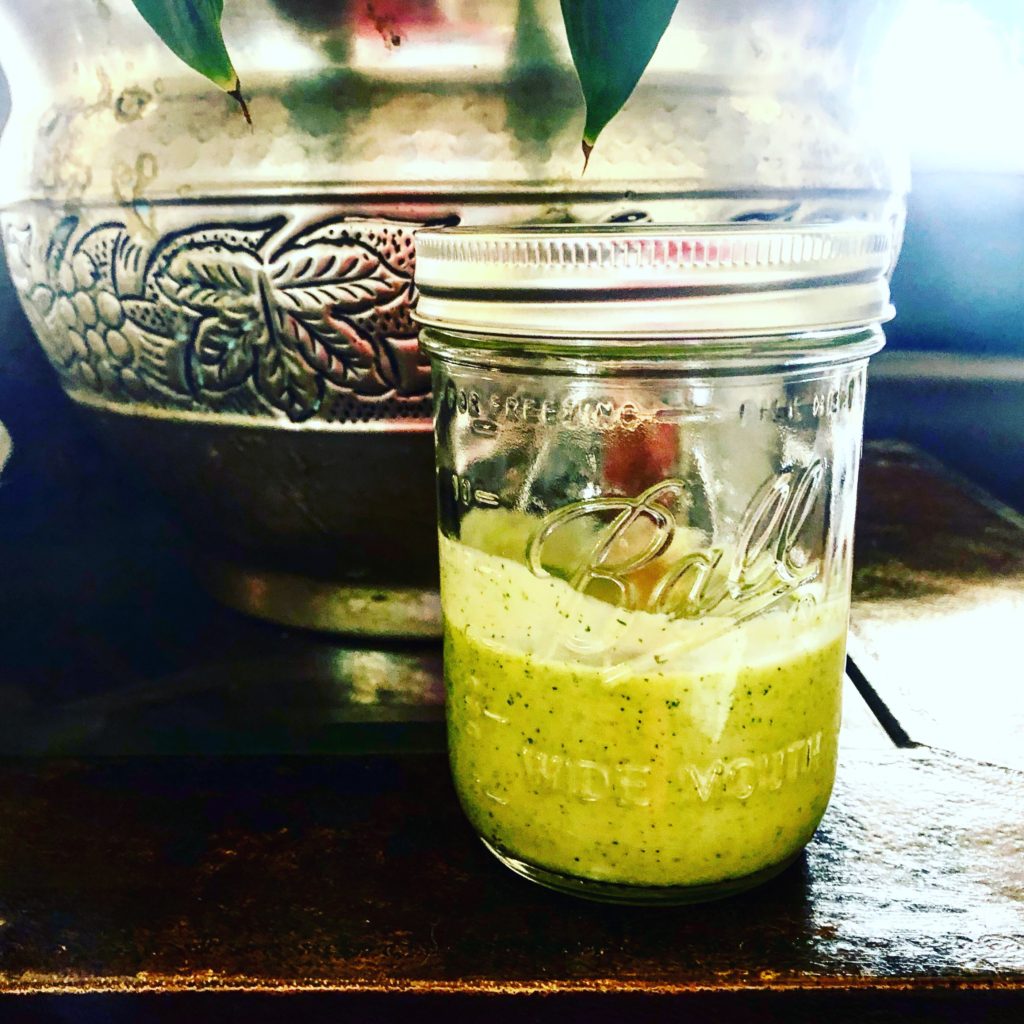
The dressing takes minutes to make. I make it in my food processor allowing it to emulsify. The base of the dressing is yogurt which gets you away from a mayonnaise-based dressing. I’m not knocking mayonnaise-based dressings, love them, but you know trying to cut a few calories, so this yogurt-based healthy–ish dressing was perfect. Even my husband loved it and yes, there was no mention of the yogurt! Lol!

Creamy Cilantro Lime Dressing

Corn & Summer Tomato Salad with Grilled Chicken

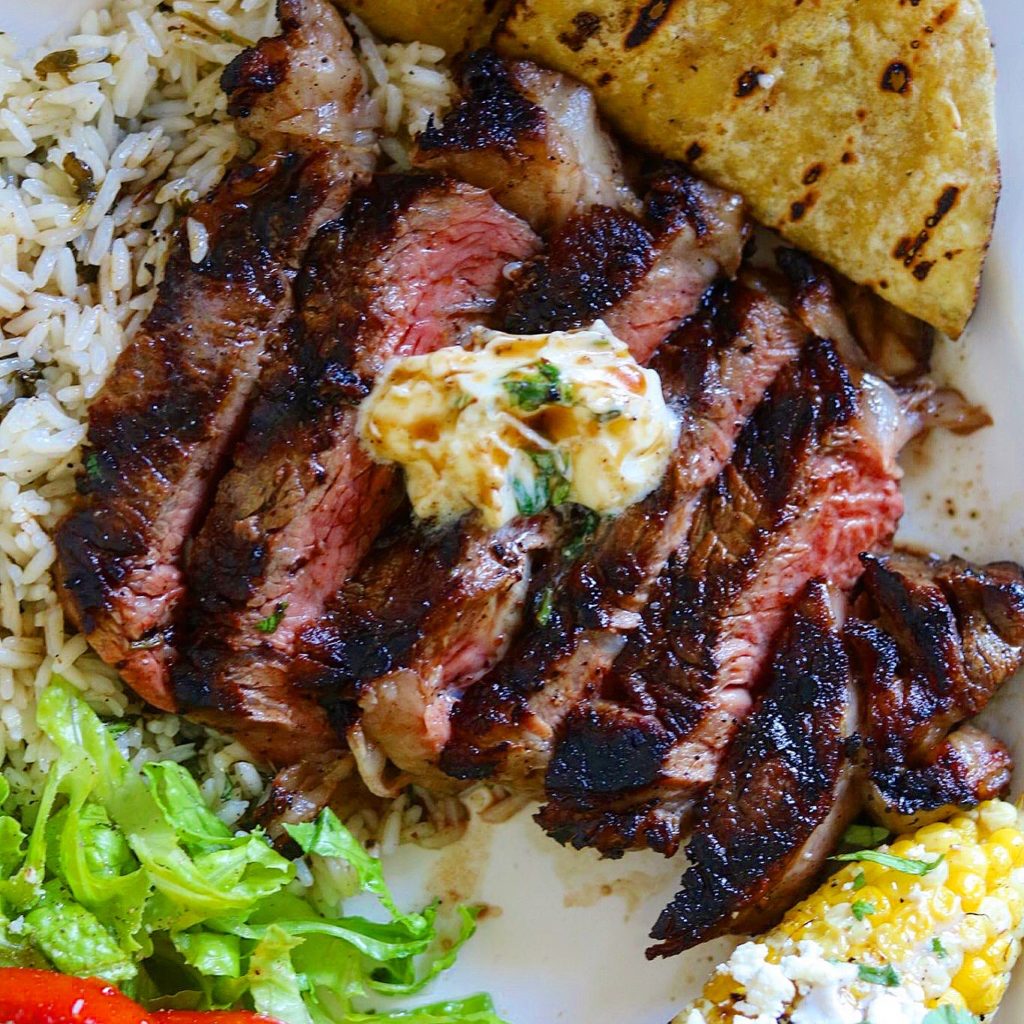
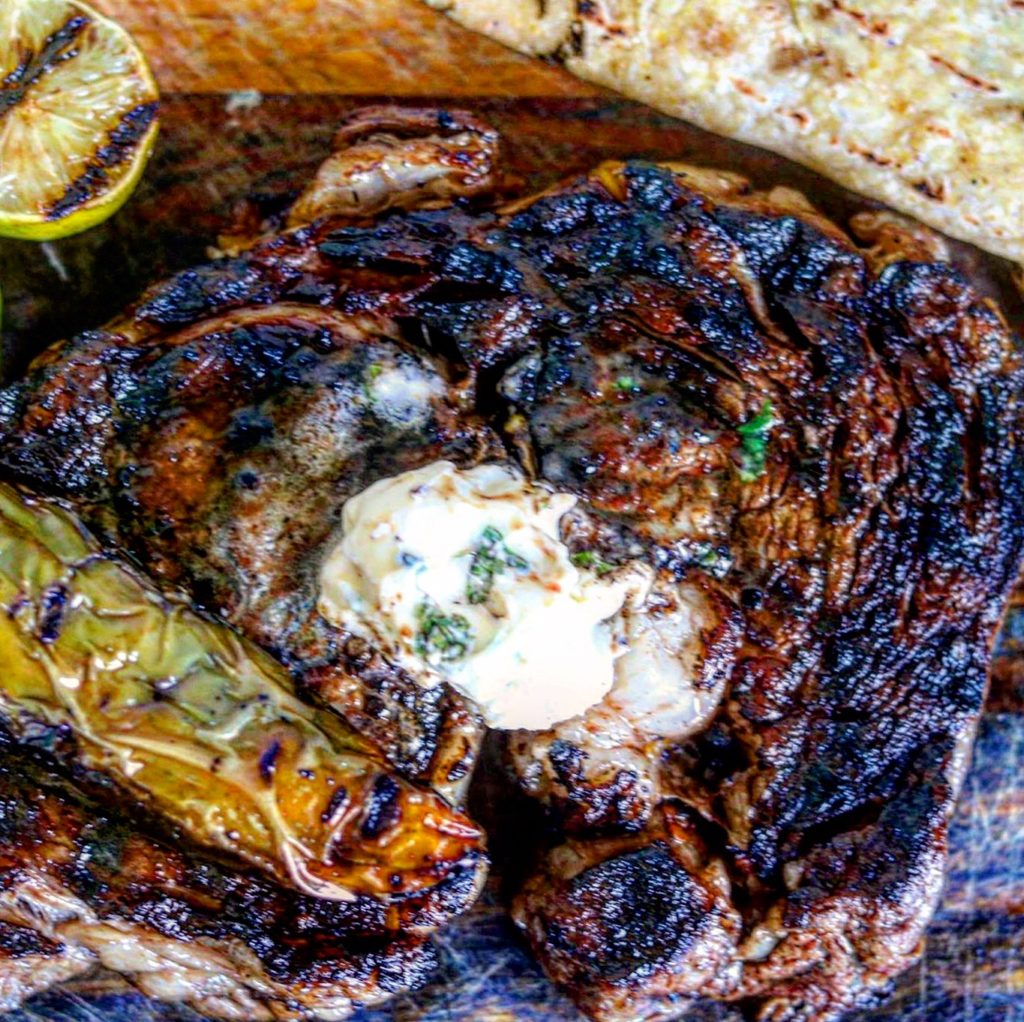
I marinated the chicken strips in the dressing before grilling for about an hour in the refrigerator. I allowed the chicken to come to room temperature before placing on the grill. Honestly, the chicken makes the dish! It is so delicious, loaded with flavor from the marinade and the charring from grilling. I used a whole milk yogurt, but there are so many great yogurts, so choose your favorite! I used HEB Organics Whole Milk yogurt. Here’s the link: https://www.heb.com/product-detail/h-e-b-organics-whole-milk-plain-yogurt/2088234.

Fresh Corn & Summer Tomato Salad with Grilled Chicken

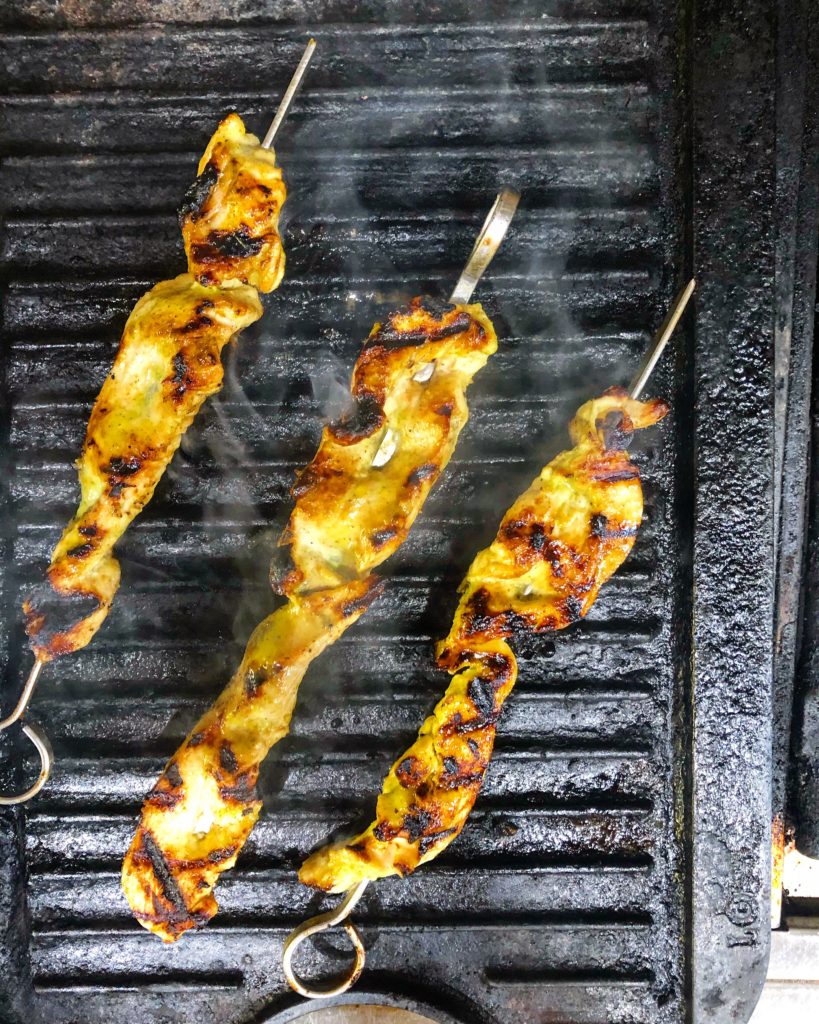
I used metal skewers for the chicken. I cut a large chicken breast into strips, then threaded it onto the skewers. Wood skewers are fine, just remember to soak them in water before you place them on the grill.

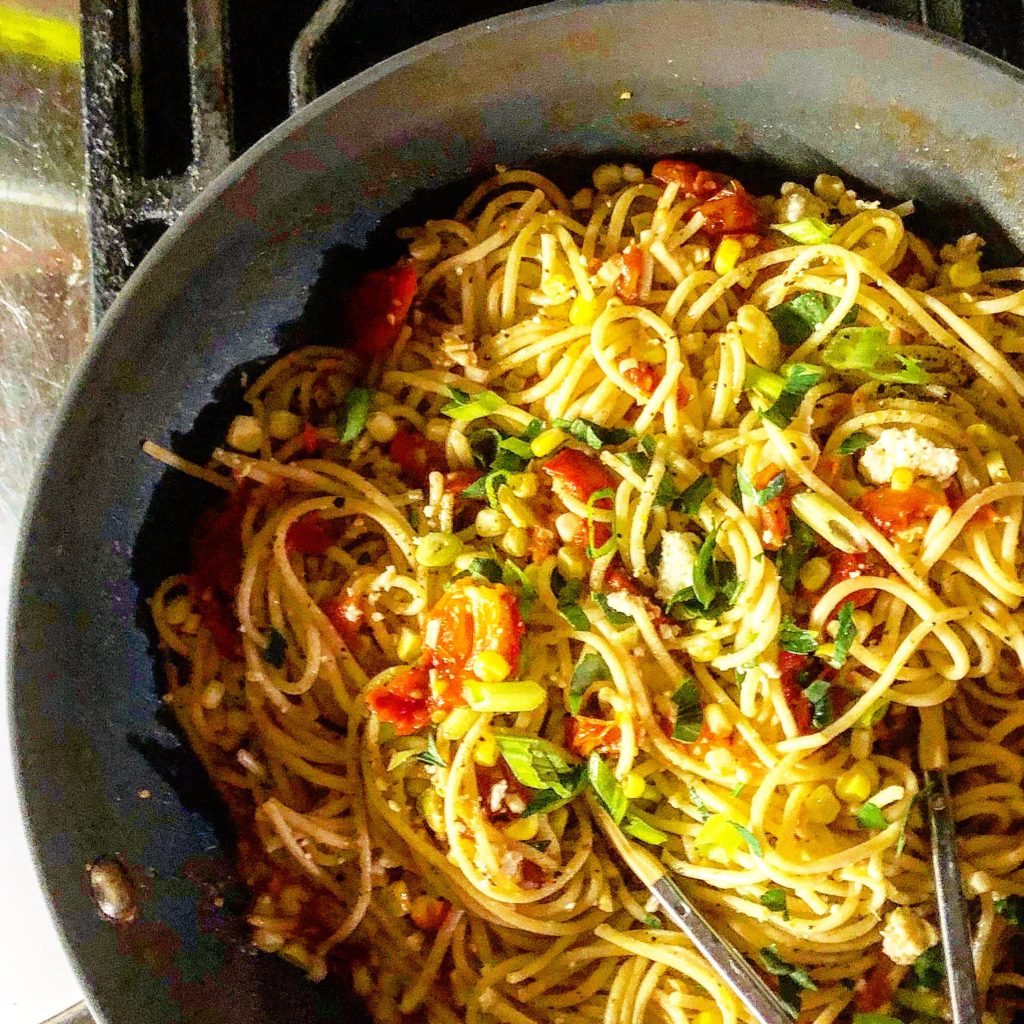
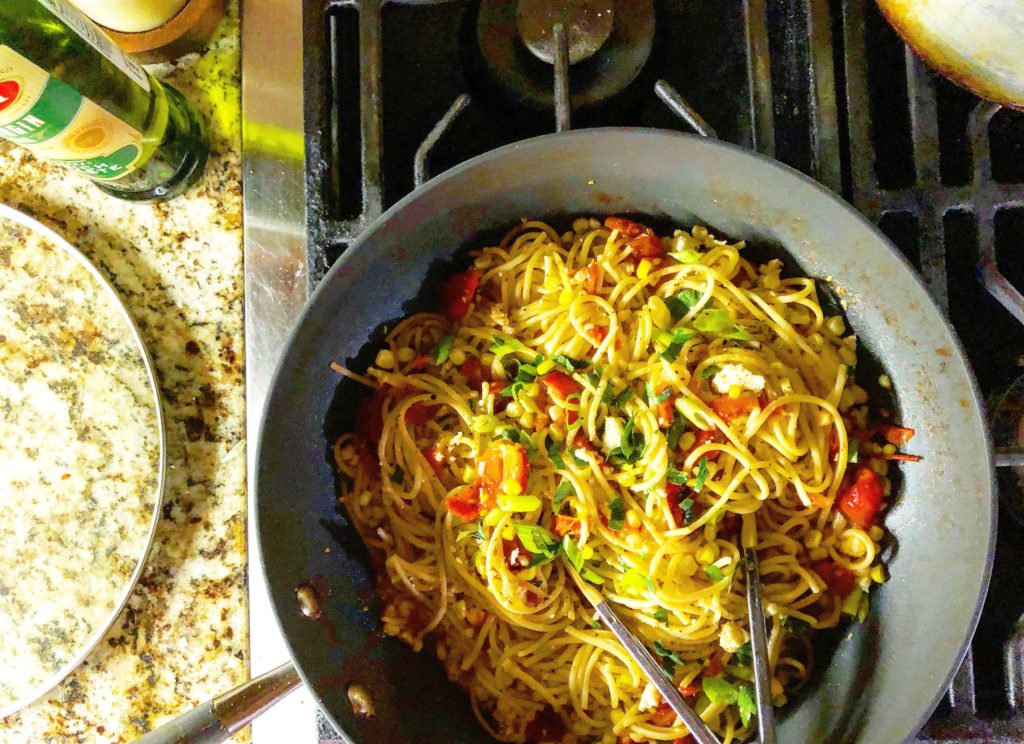
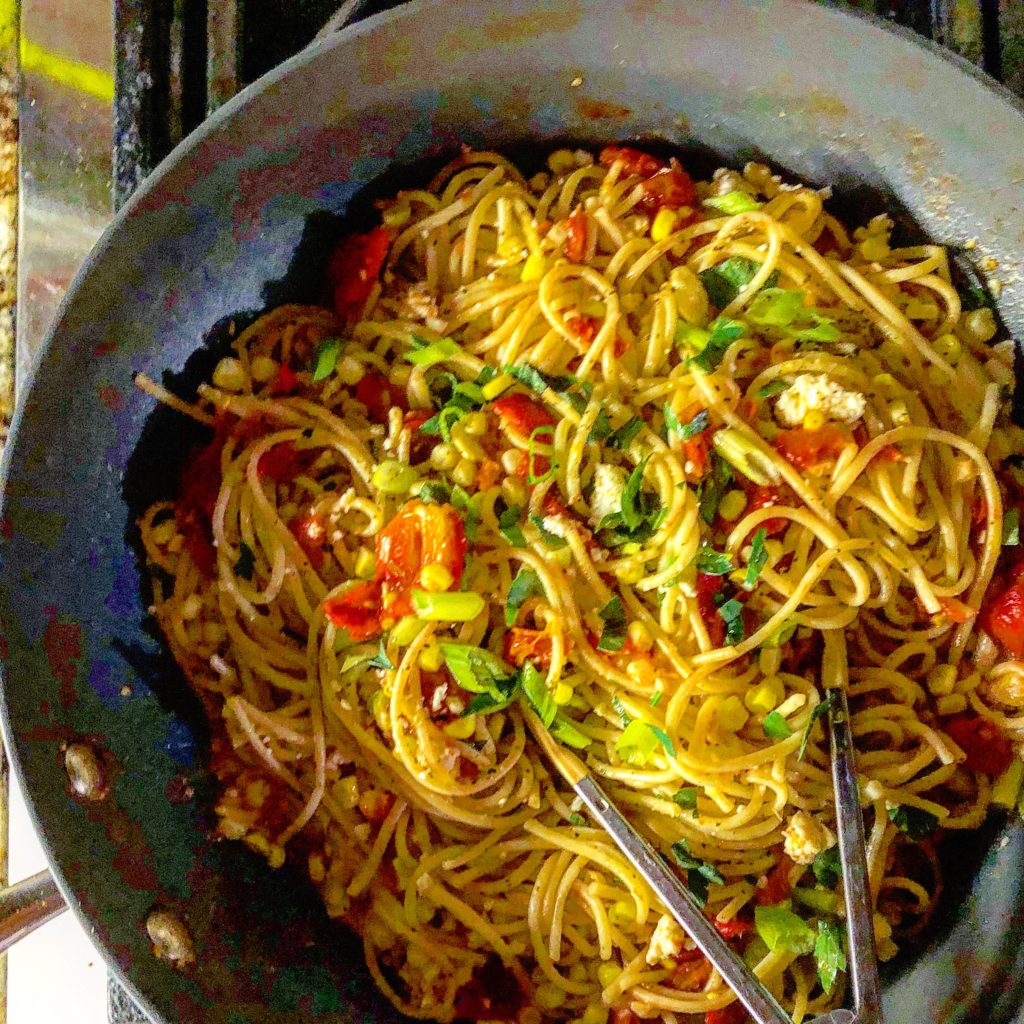
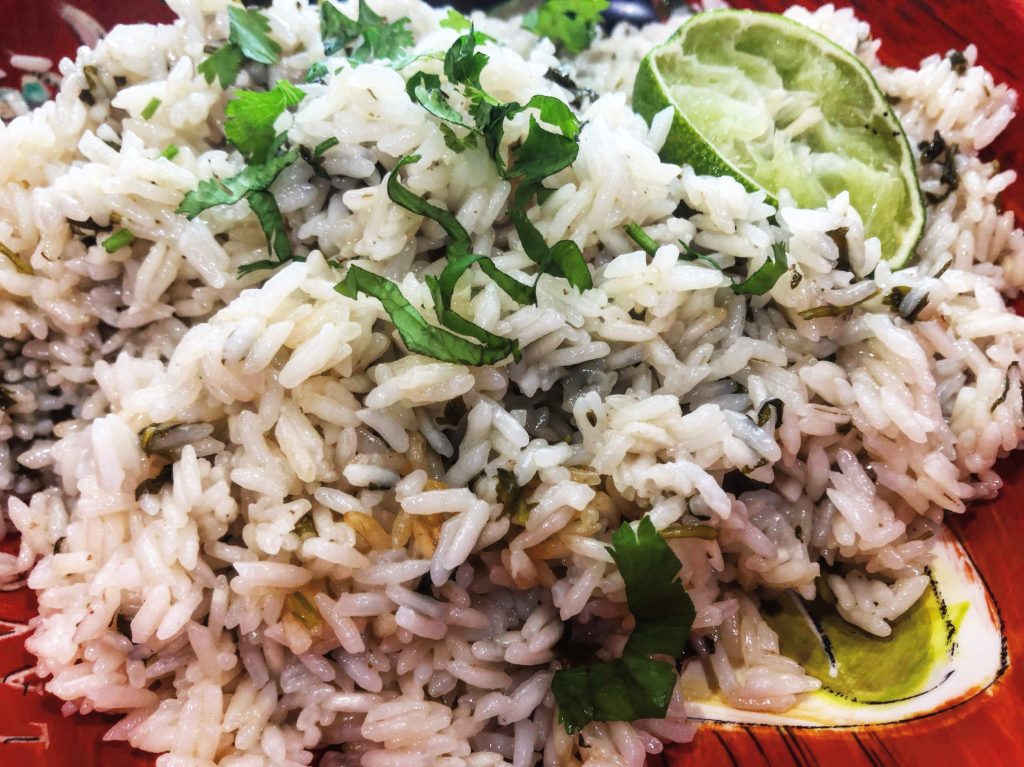
Summer is the perfect time of the year to use fresh corn. I posted a recipe yesterday “Summer Pasta with Fresh Corn, Roasted Red Peppers and Cherry Tomatoes” that was absolutely delicious! Here is the link for that recipe” Ihttps://the2spoons.com/summer-pasta-with-fresh-corn-roasted-red-peppers/

Corn & Summer Tomato Salad with Grilled Chicken

Hope you try this recipe!! Even though cutting calories is the idea for this recipe, the salad is absolutely so filling!!!

Corn & Summer Tomato Salad with Grilled Chicken

Print Recipe
Coursedinner, Lunch, Main Course, Salad
CuisineAmerican
KeywordCorn & Fresh Tomato Salad, Grilled Chicken, salad
Servings2 servings

Ingredients

  • 1-2 heads Romaine Lettuce, washed and chopped
  • 1/2 English Cucumber
  • 2 Ears of Corn, grilled
  • 1 large tomato, diced or 1/2 pint cherry tomatoes halved
  • 4-5 Radishes, thinly sliced
  • 1/2 15.5 oz can Chickpeas
  • Creamy Cilantro Lime Dressing
  • Grilled Chicken Skewers

For the Creamy Cilantro Lime Dressing

  • 1 large bunch of cilantro
  • 1/2 cup plain yogurt of your choice
  • 1 garlic clove
  • juice of two limes
  • 1-2 tsp honey
  • 1/2 tsp kosher salt
  • 1/3 cup extra virgin olive oil
  • 1/2 jalapeno, seeded and stem removed (optional)

For the Grilled Chicken

  • 1-2 chicken breast, sliced into strips
  • Creamy Cilantro Lime Dressing for Marinade
  • extra virgin olive oil
  • salt and pepper

Instructions

  • For the Creamy Cilantro Lime Dressing
  • Add the cilantro, yogurt, garlic, lime juice, honey, salt and jalapeno (if using) into a food processor or blender. Put the lid on and blend. With the motor running, slowly pour in the olive oil and blend until smooth. Stop and Taste, adjust with more salt or honey if desired.

For the Grilled Chicken

  • Place the chicken strips in a zip lock bag. Add a little extra virgin olive oil and coat with the dressing. Marinate for about an hour. Remove the chicken and alow to come to room temperature if you want. You don't have to do that, it just helps the chicken cook more eenly.
  • Before cooking, thread the chicken onto your skewers. Place on the grill and cook until cooked through. The chicken will cook fast since it is in strips.

To assemble the salad

  • Place the chopped lettuce and all other ingredients (except the chicken) in a large bowl. Add a little dressing at a time and toss. Layer a large platter with the salad and top with the Grilled Chicken Skewers. Serve Immediately!
Fresh Corn & Summer Tomato Salad with Grilled Chicken, Creamy Cilantro Lime Dressing
Summer Pasta with Fresh Corn, Roasted Red Peppers, and Cherry Tomatoes

Filed Under: Poultry Tagged With: dinner, salad

Summer Pasta with Fresh Corn, Roasted Red Peppers, and Cherry Tomatoes

August 14, 2019 by Becky Spoon

Summer Pasta with Fresh Corn, Roasted Red Peppers, and Cherry TomatoesJump to Recipe
Summer Pasta with Fresh Corn, Roasted Red Peppers, and Cherry Tomatoes

This Summer Pasta with Fresh Corn, Roasted Red Peppers, and Cherry Tomatoes literally came together in the time it took to boil the pasta! This is a perfect dish for your family when you need to throw together a fast meal. If you wanted to add protein, sliced grilled chicken breast added to the finished dish would be wonderful, or you could add Italian sausage at the beginning of cooking the dish by browning it before you add the garlic and red pepper flakes.

Summer Pasta with Fresh Corn, Roasted Red Peppers, and Cherry Tomatoes

Loaded with fresh corn, roasted red pepper, ripe cherry tomatoes, green onions, lots of garlic and finished with cotija cheese, this pasta dish is absolutely delicious. Cotija Cheese may be a surprising addition but it is the Parmesan of Mexican Dairy. This aged cheese (grilled corn fame) is for sprinkling with abandon for a salty, creamy topping to salads, tostadas, enchiladas, pasta, and more. You know how good it is on grilled corn; it is equally exceptional with the fresh corn in this pasta recipe. I purchased the HEB brand of Queso Cotija https://www.heb.com/product-detail/h-e-b-queso-cotija/606238, however, there are many brands.

Summer Pasta with Fresh Corn, Roasted Red Peppers, and Cherry Tomatoes

If you want to add a side dish my Sautéed Spinach would be a great addition! https://the2spoons.com/garlicky-sauteed-spinach-red-pepper-flakes/.

I hope you try this dish soon! Easy and so flavorful. I honestly couldn’t stop eating it was so good! Bon Appetite!

Summer Pasta

Print Recipe
Coursedinner, Lunch, Main Course, pasta
CuisineItalian
KeywordItalian, pasta, summer pasta, Summer Pasta with Fresh Corn and Cherry Tomatoes
Servings2 servings

Ingredients

  • 1/2 lb long pasta such as spaghetti or linguine
  • extra virgin olive oil
  • 5 large cloves of garlic, chopped
  • 1 pint cherry tomatoes, halved
  • 1/2 cup roasted red peppers (I used jarred Mezetta Roasted Bell Peppers)
  • 2 ears fresh corn
  • 3 green onions
  • 1/3 cup Cotija cheese plus more for serving
  • 1/2 tsp red pepper flakes (optional)

Instructions

  • Bring a large pot of generously salted water to a boil.
  • When the water comes to a boil add the corn and cook for 3 or 4 minutes . Remove and set aside.
  • Add the pasta to the water and cook to your desired doneness. I like my pasta cooked for more time than al dente, so that is your personal choice.
  • Trim the corn off the cob and slice the tomatoes in half. -While the pasta is cooking heat a large skillet and add a little olive oil to the pan.
  • Add the garlic and red pepper flakes. Cook on medium until the garlic becomes aromatic. Add the tomatoes and cook until they have released their juices, about 5 minutes. Add the red pepper and combine. Add the corn that you trimmed from the cob and toss to combine.
  • With tongs add the cooked pasta to the cooked vegetables adding additional pasta water to create a sauce. Add the cotija cheese and combine, heating through so that it becomes part of your sauce.
  • Remove the pasta from the heat, top with the green onions and additional cheese for serving!
Summer Pasta with Fresh Corn, Roasted Red Peppers, and Cherry Tomatoes
Sautéed Spinach
Garlicky Sautéed Spinach with Red Pepper Flakrs

Filed Under: Pasta Tagged With: italian, pasta, summer pasta with fresh corn

Delicious, Easy Shrimp Fried Rice

August 13, 2019 by Becky Spoon

Shrimp Fried RiceJump to Recipe
Shrimp Fried Rice
Shrimp Fried Rice

Ooh! I love this Shrimp Fried Rice! Honestly, what’s not to love about it? It is garlicky, loaded with fresh ginger and green onions, along with shrimp, eggs, and peas!

Shrimp Fried Rice
Shrimp Fried Rice

This is a great meal to have any time of the day, even breakfast! I love this for breakfast. Not only is it delicious, but it is so easy and fast.

Shrimp Fried Rice
Shrimp Fried Rice

I like to use leftover rice or rice that I have cooked at least the day before that I have stored in the refrigerator.

Fried rice is at its most delicious when it’s fluffy and not too sticky. It should have distinct, individual grains. Here are tips to help you make fried rice that tastes as good as it does at your favorite restaurant. This link gives you details on the Best rice and method for cooking if you want to review: https://www.thespruceeats.com/making-rice-for-fried-rice-695035.

I have found that what works really well for me is to cook a cup of long grain rice in two cups of water. When the rice and water come to a boil, I place a lid on the pan, reduce the heat to simmer and cook until the water has absorbed. I then turn the burner off, fluff the rice with a fork, spread it out on a sheet pan until it has cooled, then store it in the refrigerator overnight at least for use the next day or so. One cup uncooked rice yields about 3 cups cooked. Double the recipe if you need more.

Delicious, Easy Shrimp Fried Rice

If you want another rice recipe, here’s a link to my Rice Pilaf. https://the2spoons.com/yummy-rice-pilaf-perfect-side-dish/.

Hope you try this Shrimp Fried Rice soon! I love to keep these take out containers that I get on Amazon.com. This is a really fun dish served in the containers with chopsticks on hand. it’s a great way to teach the kiddos how to use them and it’s just fun having this take-out at home!!

Here’s a link: https://www.amazon.com/Containers-Bamboo-Chopsticks-Avant-Recyclable/dp/B07D18TRMW/ref=sr_1_15?hvadid=77927953825524&hvbmt=be&hvdev=c&hvqmt=e&keywords=chinese+take-out+containers&qid=1565722191&s=gateway&sr=8-15

Shrimp Fried Rice

Print Recipe

Ingredients

  • 3 cups cooked long grain rice, chilled
  • 2 eggs, beaten
  • 1/2 lb peeled and deveined shrimp, halved or in thirds
  • 2 tsp fresh ginger, peeled and chopped
  • 1 tsp minced garlic
  • vegetable oil
  • 2 green onions, tops and bottom, diced.
  • 1/2 cup frozen peas
  • 2 tbsp soy sauce, plus more for serving

Instructions

  • Heat a wok or large non stick skillet to hot. Beat the eggs in a bowl. Add a thin layer of oil to the wok or skillet. Add the eggs and move around quickly to soft scramble the eggs. Remove from the pan and set aside.
  • Add the shrimp to the hot wok or skillet and cook quickly, moving around with a spatula until pink. Remove from the pan and set aside.
  • Add a little oil to the pan if needed. Add the ginger and garlic, stir fry fast for just about a minute, then immediately add the rice. Cook the rice with the ginger and garlic, tossing and stirring with a spatula until the rice is completely coated with the oil and heated through. Add the frozen peas and soy sauce, continuing to stir fry about two minutes. Turn the heat off and add the eggs and shrimp back in along with the green onions and soy sauce. Toss to combine. Serve immediately with chopsticks if you want!! Have extra soy sauce on hand. Enjoy!
Shrimp Fried Rice
Shrimp Fried Rice
Shrimp Fried Rice
Shrimp Fried Rice

Filed Under: Fish/Seafood Tagged With: shrimp fried rice, stir fry

Love this New Orleans Barbecue Shrimp!

August 9, 2019 by Becky Spoon

Barbecue ShrimpJump to Recipe
Barbecue Shrimp

I love this New Orleans Barbecue Shrimp! This is a recipe from John Besh’s Cookbook “My New Orleans” which by the way, is a great cookbook! Here’s a link for the book: https://www.amazon.com/My-New-Orleans-Cookbook-John/dp/0740784137.

Barbecue Shrimp

I buy head on, unpeeled shrimp because I want the heads and shells to make the base for the fish. I find them at my HEB fish market and they are half the price of regular shrimp. They are cooked with Creole spices and other ingredients resulting in an amazing finished base.

This shrimp is a little spicy, not too much, just right and it’s in the creamiest most delicious sauce for dipping French bread!

Barbecue Shrimp

For the sauce you start with peeling your shrimp reserving the shells and heads then sauté them for about 5 minutes in a little oil. Then creole spices are added along with lemon, Worcestershire sauce, cloves and bay leaves and the base sauce is simmered until a lucious smell and delicious tasting sauce is created! You can almost drink it!

Barbecue Shrimp

Love This Barbecue Shrimp!

If you want to make the shrimp more as an entree add my Louisiana white rice. Here’s the link for that recipe: https://the2spoons.com/shrimp-creole-with-louisiana-white-rice/

Shrimp Creole
Shrimp Creole

Or try this gumbo! https://the2spoons.com/delicious-louisiana-seafood-gumbo/. Both of these recipes were from John Besh’s cookbook.

Seafood Gumbo
Seafood Gumbo

Love This Barbecue Shrimp!

Here is the recipe for this post! Let me hear from you when you make this dish! Hope you love it as much as we do!

Barbecue Shrimp

Print Recipe
Servings4 Servings

Ingredients

For the Sauce Base

  • 2 tbsp Olive oil
  • 2 cups shrim heads and shells
  • 1/2 cup Worcestershire
  • 2 tbsp cracked black pepper
  • 2 tbsp Basic Creole Spices (recipe below)
  • 1/2 tsp whole cloves
  • 2 bay leaves
  • juice of one lemon

Basic Creole Spices (1/2 cup)

  • 2 tbsp celery salt 
    tbsp celery salt
  • 1 tbsp sweet paprika
  • 1 tbsp coarse sea salt
  • 1 tbsp coarsley ground black pepper
  • 1 tbsp garlic powder
  • 1 tbsp onion powder
  • 2 tsp cayenne pepper
  • 1/2 tsp ground allspice

For the Shrimp

  • 2 lbs jumbo shrimp peeled and deveined
  • salt
  • pepper
  • 1 cup sauce
  • 1 cup heavy cream
  • 1 cup butter

Instructions

  • • For the sauce base, heat the olive oil in a medium saucepan over high heat, add the shrimp heads and shells, and cook, stirring often, for 5 minutes. • Add the Worcestershire, black pepper, Creole Spices, cloves, bay leaves, and lemon juice along with 2 cups water and bring to a boil. Once the liquid is boiling, reduce heat to moderate and simmer until it has reduced by half. Strain and reserve. • For the shrimp, season the shrimp with a little salt and lots of pepper. Put the shrimp and the sauce base, cream, and butter in a large cast-iron skillet over high heat. Bring the sauce to a boil and cook for 5 minutes. • Remove the shrimp from the skillet and arrange on a platter or in individual bowls. Reduce the sauce by half, about 5 minutes. Pour the sauce over the shrimp and serve with hot, toasted French bread.

Filed Under: Fish/Seafood Tagged With: Barbecue, bbq, bbq shrimp, New Orleans, New Orleans Barbecue Shrimp

So Easy, Instant Pot Cilantro Lime Rice

July 14, 2019 by Becky Spoon

Cilantro Lime RiceJump to Recipe
Cilantro Lime Rice
Cilantro Lime Rice

This Instant Pot Cilantro Lime Rice is so easy! I set the Instant Pot on the rice mode and the dish was finished in 12 minutes. I have the 6 quart Duo Instant Pot that has a rice mode: Here’s a link to that particular model: https://instantpot.com/portfolio-item/duo-6-quart

Cilantro Lime Rice
Cilantro Lime Rice

This rice is an excellent side dish to any Mexican food main course. I made it as a side dish for my Chipotle Ribeye Steaks the other night. It was the perfect side dish for the steak! Here’s the link if you want to try the steak too: https://the2spoons.com/tender-grilled-chipotle-glazed-ribeye-steak/.

Chipotle Glazed Ribeye Steak

So Easy, Instant Pot Cilantro Lime Rice

I think this dish would be great with a fish dish, chicken, a side dish for enchiladas, there are so many uses and it is so good. Here’s my simple recipe! Enjoy!

Instant Pot Cilantro Lime Rice

Print Recipe
Courseeasy side dish, mexican, Side Dish
CuisineAmerican, Mexican
KeywordCilantro Lilme Rice, Instant Pot, Instant Pot Rice, rice

Equipment

  • Instant Pot, Pressure Cooker

Ingredients

  • 1 cup rice
  • canola oil
  • juice of one lime and the lime
  • handful of fresh chopped cilantro
  • 1 cup water
  • couple pinches of salt

Instructions

  • Select the sauté mode on the Instant Pot and cook the rice until it smells a little nutty and begins to slightly brown. Add the water, the lime juice and the whole lime to the pot. Set the Instant Pot on the Rice mode. I use the 12 minute, but there are less times. When complete, the steam has released, toss with a fork and add the cilantro tossing again. Check for salt. Serve immediately.
Cilantro Lime Rice
Cilantro Lime Rice
Chipotle Glazed Ribeye Steak

Filed Under: Beans, Lentils, Grains, Rice Tagged With: cilantro lime rice, Rice

Heavenly Homemade Smashburgers

July 12, 2019 by Becky Spoon

Smashburgers
Smashburgers
Smashburgers

You probably wonder why I’m posting a recipe for Smashburgers, but the truth is there is a technique to making the perfect one!

I mean you can’t just cook a piece of ground meat, you have to do it the right way and you have to have the right fat to lean ratio. Most common is 80/20 but there is 75/25 which has even more fat. You have to have the fat. If you insist on any leaner like 90/10, it will not be a good burger! A good burger has juice that drips down your arms!! A burger that takes a dozen napkins!! Yes!! Here’s a link about the fat to lean ratios: https://schweidandsons.com/blog/lean-vs-fat-perfect-burger-ratio/

Heavenly Homemade Smashburgers

I’ve mentioned before that my Granny had a cafe in Central Texas! She made the best burgers ever and yes, they were Smashburgers! This is not a new concept, that’s how diners, cafes, Mom and Pop operations made them, on a hot griddle with fresh meat! My youngest sister and I spent most summers with her and days that we didn’t want to hang out at the cafe, she’d pack us up with cheeseburgers and fries. Remember when hamburger buns came in a cardboard carton? Well she’d stuff the carton with our burger and load the rest with hand cut French fries! No frozen fries there! They’d cut them daily with a French Fry cutter.

Heavenly Homemade Smashburgers

So the first thing is the size. You want a thin patty. You don’t want less than 4 patties to a pound of beef. Granny would make balls of meat every morning and store them in the refrigerator on a platter until she made the next burger! No frozen patties, only fresh ground!

You want a hot griddle. I set my griddle at about 375 degrees. I’m such a fanatic about my burgers that when we build our house I had a 48 inch range installed with 4 burners, a grill and a griddle. Boy, do I use that griddle. How can you have a griddle like a restaurant in your home and not make smashburgers at least a week?

Starting with a hot griddle throw a couple of the beef balls on, let them sit a few minutes to brown and get that crust started before you turn and smash. Then turn like the picture below, and smash with a spatula!

If you don’t have a griddle built in an iron skillet works well and there are great griddle/grill pans you can purchase fir not a lot of money. I have one that is cast iron, it covers two burners and has a flat griddle on one side and a grill on the other when you want some grill marks.

Smashburgers
Smashburgers
Smashburgers
Smashburgers
Smashburgers
Smashburgers

Cook them on the side you turned to for a few minutes, salt and pepper, turn and immediately add the cheese to the other side if you want a cheeseburger. Top with a lid and cook only until the cheese is melted! You don’t want to overcook. So, have your buns and condiments ready because this takes minutes!

Smashburgers
Smashburgers

Yum!! So delicious! Serve with chips, French Fries or Onion Rings or even a good potato salad which I do a lot. Here’s my potato salad if you need a recipe!! https://the2spoons.com/super-good-southern-potato-salad/.

We like to switch it up and sometimes we’ll have yellow mustard, mayonnaise, ketchup or special sauce like I did this time! These have lettuce, tomatoes from my garden (literally makes the burger) pickles and shredded lettuce, and of course American Cheese! Sometimes I’ll have just a party with cheese, pickles and mustard and ketchup!

So go make a smashburger this weekend!

Print Recipe
Coursedinner, Lunch, Main Course, Sandwiches
CuisineAmerican
Keywordcheeseburgers, hamburgers, sandwiches, smashburgers

Ingredients

  • 1 lb 80/20 or 75/25 ground beef, formed into 4 balls salt and pepper
  • 4 hamburger buns of your choice
  • 4-8 slices American Cheese or cheese of your choice
  • dill pickles
  • shredded lettuce
  • 1-2 Ripe tomatoes, sliced
  • 1 onion, thinly sliced
  • mustard, mayonnaise or special sauce

Special Sauce

  • 1/2 cup mayonnaise
  • 1/2 cup ketchup
  • 1/2 cup dill relish or chopped dill pickles
  • 1 tsp garlic powder
  • 1/2 tsp black pepper

Instructions

  • Heat your griddle to 375 degrees. Place the balls of ground beef on the griddle and allow to sear and start a crust to form before turning and smashing. Flip over, smack with a wide spatula and salt and pepper. Place your buns on the griddle with a little oil or butter to brown. Remove the buns when a little brown and start by spreading your spread..like the special sauce, mayonnaise or mustard. Top with your condiments.
    When your. patty has browned on that side, flip and immediately add the cheese, cover with a lid if you can and only cook until the cheeee has melted .
    Top each bun with the condiments with the beef and cheese patty!
    Pass the napkins!!

Special Sauce

  • Stir together the mayonnaise, ketchup, pickles, garlic powder, and pepper in a bowl, and place a dollop on your hamburger!
Smashburgers
Smashburgers
Southern Potato Salad

Filed Under: Sandwiches/Burgers/Hot Dogs Tagged With: cheeseburgers, homemade cheeseburgers, homemade smashburgwrs, Smashburgers

  • « Go to Previous Page
  • Page 1
  • Interim pages omitted …
  • Page 38
  • Page 39
  • Page 40
  • Page 41
  • Page 42
  • Interim pages omitted …
  • Page 65
  • Go to Next Page »

Primary Sidebar

Categories

  • Appetizer
  • Beans, Lentils, Grains, Rice
  • Beef
  • Bread
  • Breakfast/Brunch
  • Cocktails
  • Dessert
  • Dishes of Mexico, Tex Mex and New Mexico Red and Green Chile
  • Fish/Seafood
  • Ice Cream
  • Pasta
  • Pizza
  • Pork
  • Poultry
  • Salad Dressings
  • Salads
  • Salsas
  • Sandwiches/Burgers/Hot Dogs
  • Sauces, Compound Butters, Condiments
  • Side dish
  • Soups/Stews/Gumbo//Chili
  • Stocks, Broths, Gravies
  • Vegetables

Copyright © 2026 The 2 Spoons on the Foodie Pro Theme

Rate This Recipe

Your vote:


A rating is required
A name is required
An email is required