• Skip to primary navigation
  • Skip to main content
  • Skip to primary sidebar

A cook named Rebecca

  • Home
  • Favorite Cookbooks
  • Recipes
  • Travel
You are here: Home / Home

Super Southern Fried Okra with Creamy Buttermilk Dip

July 5, 2019 by Becky Spoon

Southern Fried Okra
Please follow and like us:
onpost_follow
fb-share-icon
Tweet
Southern Fried Okra
Southern Fried Okra

Do ya’ll like Fried Okra? Yes I said ya’ll! I guess posting this Southern recipe really brings out the “South” in me! LOL! I saw this recipe in one of Emeril’s cookbooks and I’ve made it many times!

I love the foods of the South I grew up eating. I love this okra! It’s crispy and the buttermilk dressing is so yummy and it can be used for so many other fried things or even for a crudité platter! Salad Dressing? Yes, it’d be great! Oh, and it’d be a great dip for potato chips!

Southern Fried Okra
Southern Fried Okra

I like to just spit the okra down the middle for presentation purposes, but I think most are more familiar with the sliced in about a 1/2 inch thick round. So, either way works, whatever is your particular preference.

I have a few different ways I fry okra. For one, you can just toss in some seasoned flour and fry. Another way I cook fried okra is to have a batter station set up with flour, beaten eggs, then seasoned cornmeal. I coat each piece in flour, then the beaten eggs and then seasoned cornmeal. It’s really good, very similar to this, but this recipe has fewer steps and is really easy.

Super Southern Fried Okra with Creamy Buttermilk Dip

Before I start the recipe let’s talk ingredients, specifically the buttermilk. I have made this buttermilk dressing with a low-fat readily available brand, but it just seemed so thin, resulting in a watery consistency. I want thicker buttermilk for this dip. I mean, it’s a dip! You don’t want a thin coating from a watery dip, you want a dollop of dip!

With all that said, use whole buttermilk, not low-fat. I only use whole milk even if it’s not buttermilk. It’s like using the real thing, like butter. The real thing is healthier in the long run because it is more natural, it doesn’t have a lot of “stuff” to change its character. My philosophy is always “everything in moderation”. And, honestly, how can the “real” stuff as it is intended to be, be bad for you? I don’t want to lead you wrong so here’s a link that will give you certain health benefits of both. https://healthyeating.sfgate.com/whole-vs-lowfat-buttermilk-1947.html.

I just love Fried Okra. I guess I just love okra! I love okra as in Okra and Tomatoes. I love okra fried with potatoes and onions. Oh, and in Gumbo. Absolutely one of my favorite uses for okra! So, the other day my have to have meat hubby was gone so I made Macaroni and tomatoes from my garden and I made this along with it. Here’s that link because you need that recipe too! https://the2spoons.com/macaroni-with-fresh-tomatoes/.

Super Southern Fried Okra with Creamy Buttermilk Dip

Here’s the super easy recipe! Hope you try this!

Southern Fried Okra

Print Recipe
CourseAppetizer, Side Dish
CuisineAmerican
Keywordappetizer, easy side dish, fried okra, okra, side dish, southern food, southern fried okra
Servings4 servngs

Ingredients

For the Okra

  • vegetable oil for frying
  • 1 cup buttermilk
  • 1 egg
  • 2 tbsp Louisiana hot sauce or your favorite
  • 1 cup all purpose flour
  • 1 cup yellow cornmeal
  • 2 tsp. cayenne pepper (omit if you don't like the heat or reduce the amount)
  • 2 tsp garlic powder or granulated garlic
  • 1 tbsp salt plus more for seasoning
  • 1 tsp black pepper
  • 2 lbs okra, either sliced into 1/2 inch thick rounds or sliced down the middle like I did)

For the Buttermilk Dip

  • 3/4 cup buttermilk, not low fat
  • 1/2 cup mayonaise
  • 1/4 cup sour cream
  • 1/2 tsp cayenne pepper (optional)
  • 1 tsp minced garlic
  • 1 tbsp green onion tops
  • salt to taste

Instructions

For the Okra

  • Heat the oil in a deep-fryer to 360°F or in a heavy iron dutch oven, or similar.


  • In a small bowl, whisk the buttermilk, egg, and hot sauce to combine. In a second bowl, combine the flour, cornmeal, cayenne, granulated garlic, the 1 tablespoon salt, and the black pepper.
  • Working in batches, dredge the okra first in the buttermilk mixture, allowing any excess to drip off, then in the flour mixture. Shake to remove any extra breading. Repeat until all of the okra is breaded.
  • Fry the okra, in batches, in the hot oil, turning it as necessary, until lightly golden, about 5 minutes. Transfer the fried okra to paper towels to drain, and season lightly with salt. Repeat with the remaining okra.
  • Serve the okra hot, with the Creamy Buttermilk Dip on the side for dipping.

For the Buttermilk Dip

  • Combine the buttermilk, mayonnaise, sour cream, cayenne, garlic, and chives in a small bowl, and stir to mix well. Add salt to taste. Serve immediately, or cover and refrigerate until ready to serve (up to 1 day in advance).
  • Southern Fried Okra
    Southern Fried Okra
  • Macaroni and Tomatoes
    Macaroni and Tomatoes
  • Share on Pinterest (Opens in new window) Pinterest
  • Share on Facebook (Opens in new window) Facebook
  • Email a link to a friend (Opens in new window) Email
  • Print (Opens in new window) Print
  • Share on X (Opens in new window) X
  • Share on Tumblr (Opens in new window) Tumblr
  • More
  • Share on Reddit (Opens in new window) Reddit

Filed Under: Appetizer, Side dish, Vegetables Tagged With: appetizer, fried okra, okra, side dish, southern, southern fried okra

Dear to my heart, My Grandmother’s Fried Chicken.

July 2, 2019 by Becky Spoon

Southern Fried Chicken
Please follow and like us:
onpost_follow
fb-share-icon
Tweet
Jump to Recipe
Southern Fried Chicken
Southern Fried Chicken you cook yourself is the best! My mother was an only child and we spent a lot of time with her mother, my grandmother or Granny as we called her. We’d go for the weekend to stay with her and almost every Saturday night before we went to bed Granny and Mom would make sure the kitchen was spotless and then they would cut chickens up and put them in salted water and into the refrigerator to brine overnight for Sunday lunch.
Southern Fried Chicken

Southern Fried Chicken you cook yourself is the best! My mother was an only child and we spent a lot of time with her mother, my grandmother or Granny as we called her. We’d go for the weekend to stay with her and almost every Saturday night before we went to bed Granny and Mom would make sure the kitchen was spotless and then they would cut chickens up and put them in salted water and into the refrigerator to brine overnight for Sunday lunch.

The next day the house smelled amazing of fried chicken! I remember a table full of fried chicken, mashed potatoes and cream gravy, maybe some fresh Blackeyed peas, corn on the cob, cornbread, sliced tomatoes, all the delicious foods you may find on a Southern table.

Southern Fried Chicken

What I do…

Southern Fried Chicken

I buy a whole chicken and cut it up myself. Not only is this less expensive but I’m getting all the pieces from the same chicken. I also don’t want a too big chicken but about a 3 to 3 1/2 pound chicken. Then I cut it up, legs and thighs first, then the wings and then remove the breast. I fry every part of the chicken which includes the back which by the way has some delicious meat on them. If you don’t know how to cut up a chicken, here’s a short video of instructions: https://www.youtube.com/embed/GEwRmG2HEuM?autoplay=1&FORM=VIRE6&PC=EMMX06.

I like to buy a natural chicken like the H-E-B Natural Chickens I buy from my local Store. Whole Foods, Costco, Central Market, Sams Club, other groceries will offer a natural chicken.

Granny’s Essential Southern Fried Chicken

I like to serve this with different sides. Probably the most favorite for most is mashed potatoes. Here’s my mashed potatoes recipe also: delicious buttery mashed potatoes!!

Granny’s Essential Southern Fried Chicken

Print Recipe
Coursedinner, Lunch, Main Course
CuisineAmerican
Keywordchicken, fried chicken, southern food, southern fried chicken

Ingredients

  • 1 3 – 3 1/2 lb chicken, cut into pieces
  • 4-5 cups All purpose flour
  • 1/4 tsp baking soda
  • 1/2 tsp salt
  • 1/2 tsp pepper
  • a little more salt and pepper to lightly season your flour
  • 3-4 eggs, beaten
  • canola or vegetable oil for frying

Instructions

  • Cut a whole chicken up and place in a bowl of salted water. Cover with plastic wrap and place in the refrigerator the night before.
  • Beat three eggs completely in a medium bowl. I like to use a hand held blender because I like the eggs a little frothy.
  • In another bowl add your flour and lightly salt and pepper, add the baking soda and whisk together.
  • Pat your chicken pieces dry and season the entire chicken with the 1/2 tsp salt and pepper. I let it sit for a minute or so to allow it to so it will adhere to your chicken.
  • Place each peace of chicken in the flour, then the eggs, then the flour again covering completely and shaking off the excess. Place on a sheet pan and continue until all pieces are battered.
  • Add oil to a heavy skillet to 350. Add chicken in batches making sure not to crowd. I like to maintain a heat between 325 and 350 otherwise your chicken will be brown and raw in the middle. Another tip is that I like to brown the chicken lightly on all sides, then reduce the heat to about 325 to allow it to cook through, turning occasionally.
  • When the first side browns, turn and allow the other side to completely brown. Then I turn a few more times from side to side to make sure the inside is fine. I always check each piece with a thermometer because nothing’s worse than a raw chicken. You want the internal temperature to be 165 degrees for the breast and for the thighs and legs 175 degrees will render a better texture. I drain on a rack placed over a sheet pan to insure the chicken remains crispy! Enjoy!
Southern Fried Chicken
Garlic Mashed Potatoes
Mashed Potatoes
Creamy and Buttery Mashed Potatoes with Fried Shallots
  • Share on Pinterest (Opens in new window) Pinterest
  • Share on Facebook (Opens in new window) Facebook
  • Email a link to a friend (Opens in new window) Email
  • Print (Opens in new window) Print
  • Share on X (Opens in new window) X
  • Share on Tumblr (Opens in new window) Tumblr
  • More
  • Share on Reddit (Opens in new window) Reddit

Filed Under: Poultry Tagged With: chicken, fried chicken, southern fried chicken

Always a Favorite – My Southern Pimiento Cheese

July 2, 2019 by Becky Spoon

Southern Pimiento Cheese
Please follow and like us:
onpost_follow
fb-share-icon
Tweet
Southern Pimiento Cheese

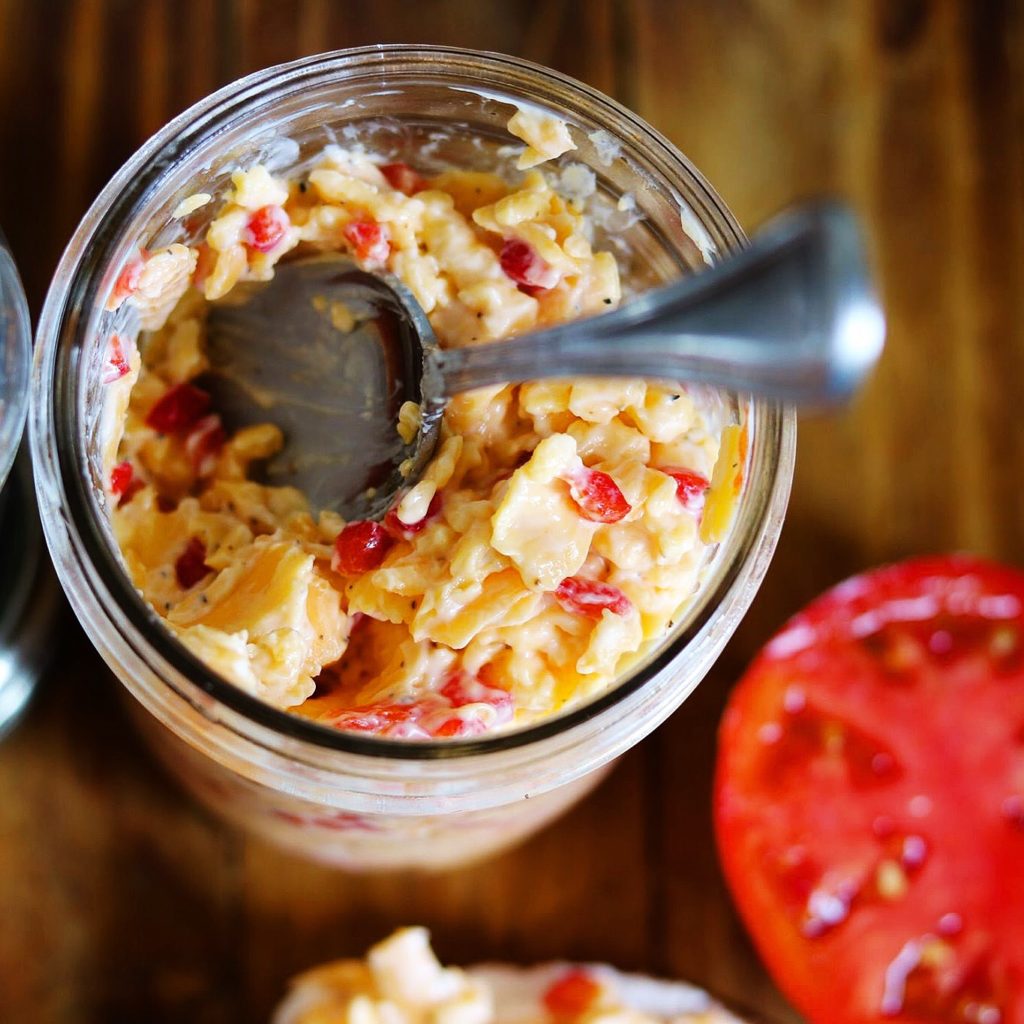
What better way to enjoy a tomato you grew than Southern Pimiento Cheese? I woke up craving this pimiento Cheese. I’d guess you’d say I had this for brunch because I hadn’t had breakfast and it was a little early for lunch!

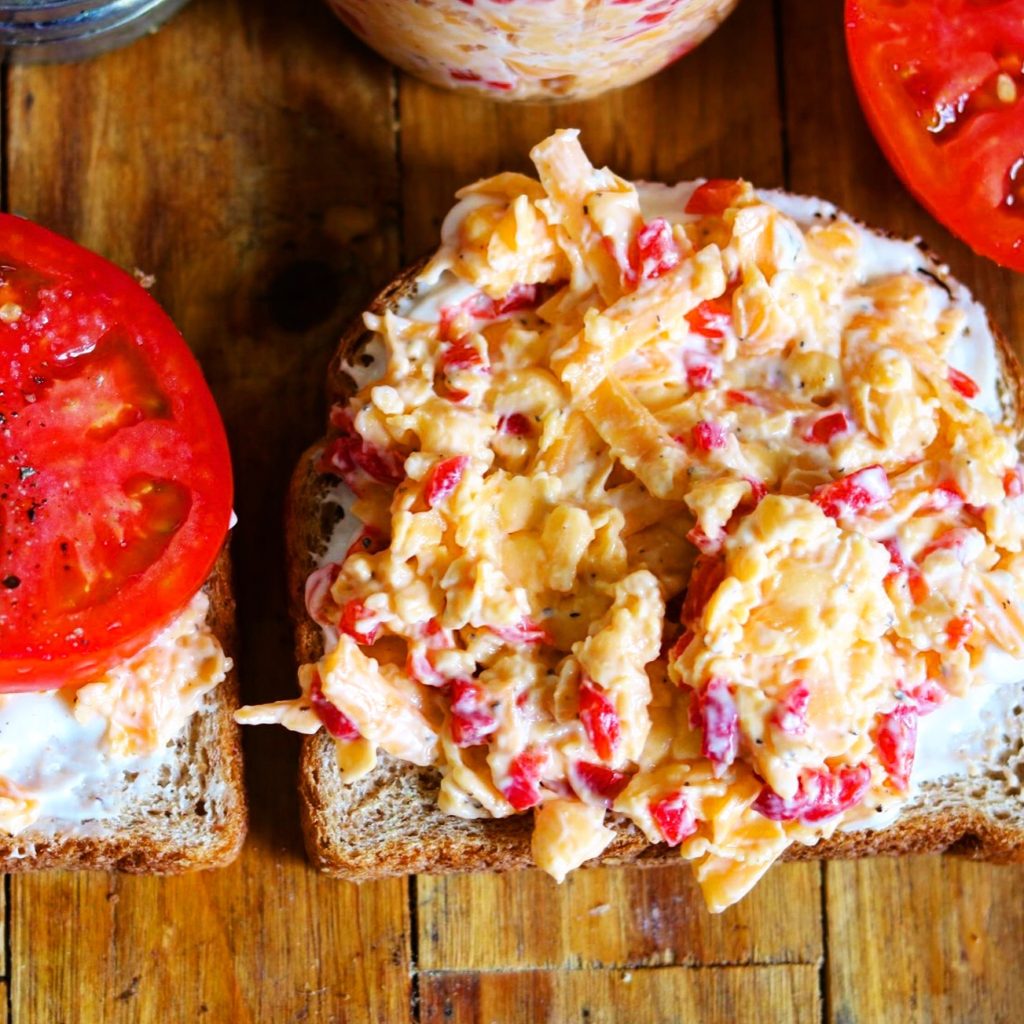
Mom always had Pimiento Cheese when we were growing up. She used to spread it on a piece of bread and stick it under the broiler! Delicious! I honestly can’t say I’ve ever bought prepared Pimiento Cheese Spread. There was a drug store where I grew up that had the best Pimiento Cheese Sandwiches ever! Always on toasted bread, with lettuce and tomatoes!!

Southern Pimiento Cheese

I have plans for this pimiento cheese other than this amazing sandwich I made on soft fresh wheat bread layered with those tomato slices I picked from my garden! I’m thinking a grilled burger with this would be delicious! Pimiento Cheese deviled eggs? A stuffed tomato? Here’s 13 ways from Southern Living website: https://www.southernliving.com/food/how-to/pimiento-cheese-recipes

Southern Pimiento Cheese

Always a Favorite – My Southern Pimiento Cheese

I’ve used Hellman’s and Miracle Whip in this recipe! I really prefer Miracle Whip because it adds a little sweetness that mayonnaise does not add. Sometimes I add cayenne pepper for a little kick. This time I used Sharp Cheddar but you could use a mild or medium cheddar. My Southern recipe always has grated Velveeta Cheese. Don’t forget the pimientos! There’s many different brands of them but it seems these are available at most grocery stores. https://www.walmart.com/ip/Dromedary-Diced-Pimientos-4-Oz/10318559

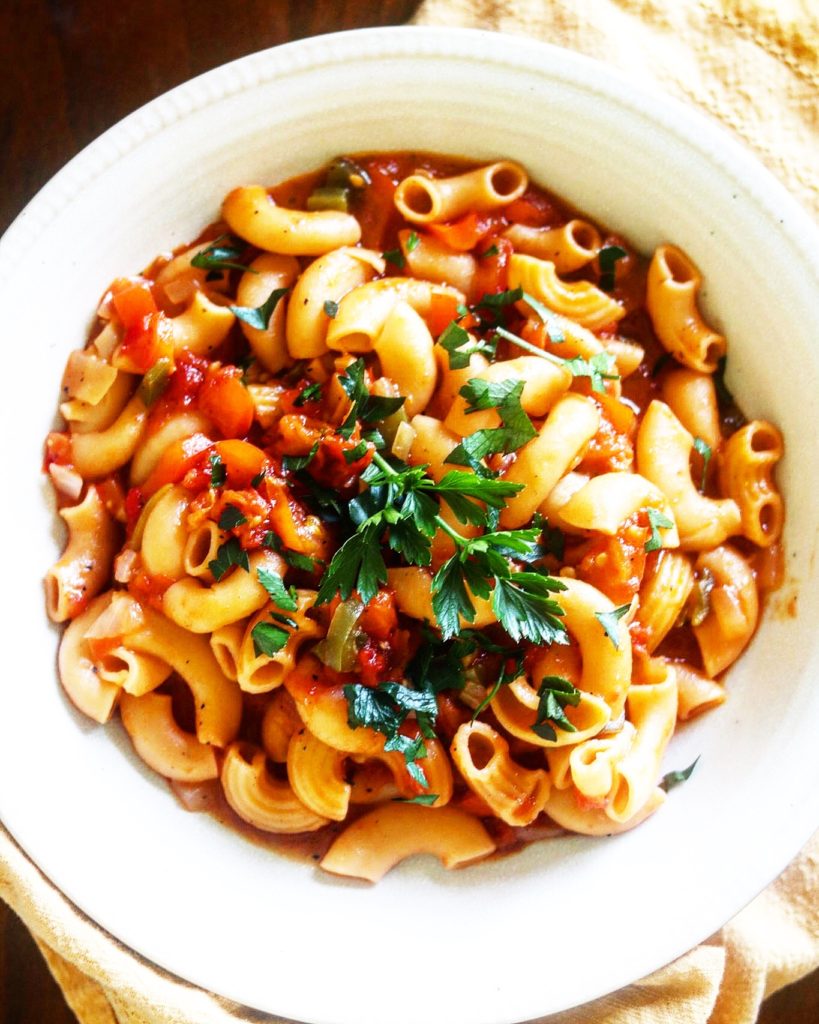
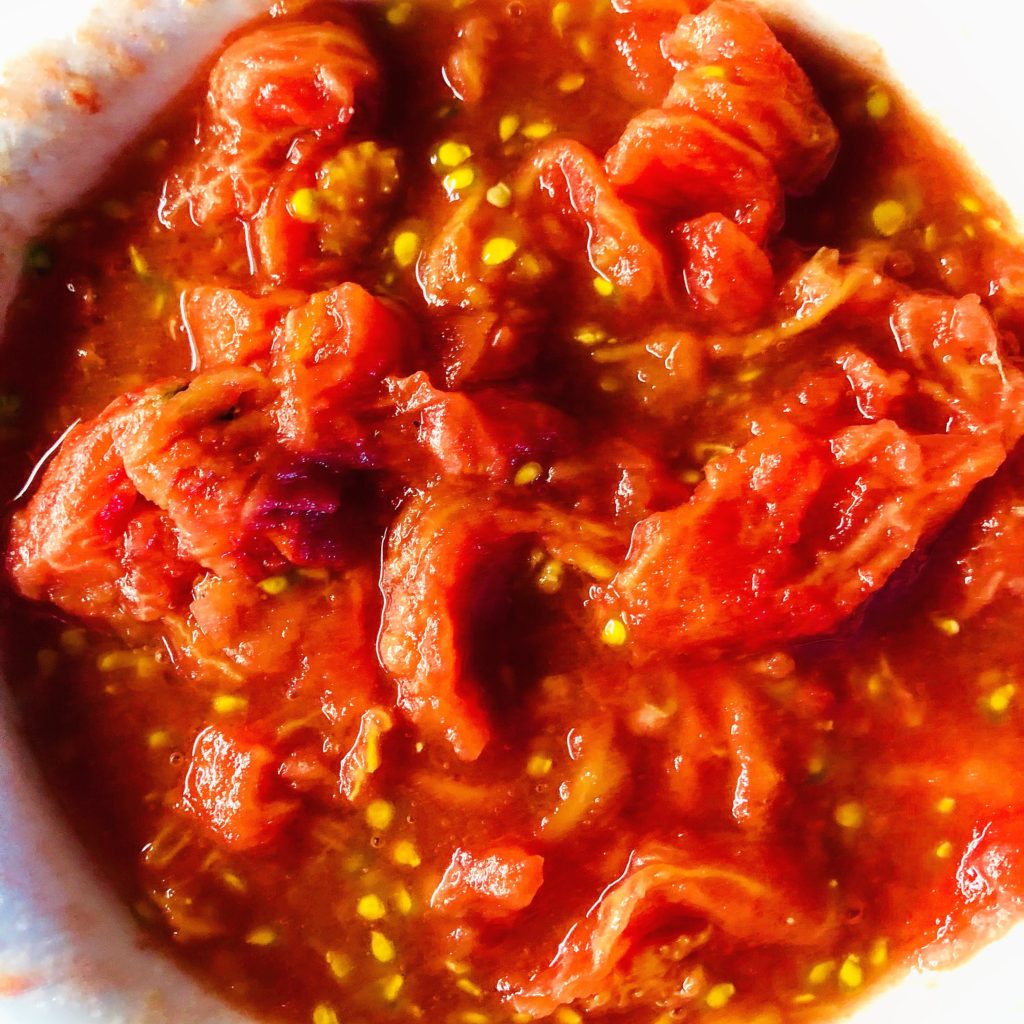
A perfect addition to this sandwich would be my Homemade Tomato Soup. Here’s the link: https://the2spoons.com/tomato-soup/. You’ll love this soup!

Always a Favorite – My Southern Pimiento Cheese

Here’s the recipe! Hope you love it as much as I do!

Southern Pimiento Cheese

Print Recipe
CourseLunch, Snack
CuisineAmerican
Keywordpimento, pimentocheese, sandwiches, southern pimiento cheese

Ingredients

  • 2 1/2 Cups Velveeta cheese, grated
  • 1 1/2 Cups Sharp Cheddar, grated I used sharp, but you can use mild or medium
  • 4 Oz Pimiento (small jar)
  • 1/4 Tsp Salt
  • 1 Tsp Black pepper
  • 1/2 Cup Miracle whip

Instructions

  • Before you grate the velveeta cheese, place it in the freezer for about 30 minutes because it will help grate it easier. 
  • Grate the cheeses into a large bowl.  Toss a little before adding the Miracle Whip.
  • Combine the Miracle Whip with the salt and pepper. Add to your grated cheese and thoroughly combine.
  • Share on Pinterest (Opens in new window) Pinterest
  • Share on Facebook (Opens in new window) Facebook
  • Email a link to a friend (Opens in new window) Email
  • Print (Opens in new window) Print
  • Share on X (Opens in new window) X
  • Share on Tumblr (Opens in new window) Tumblr
  • More
  • Share on Reddit (Opens in new window) Reddit

Filed Under: Sandwiches/Burgers/Hot Dogs Tagged With: cheese, pimiento, pimiento cheese, sandwich topping

Simple Spaghetti with Fresh Tomatoes from the Garden

July 2, 2019 by Becky Spoon

Spaghetti with Fresh Tomatoes from the Garden
Please follow and like us:
onpost_follow
fb-share-icon
Tweet
Jump to Recipe
Spaghetti with Fresh Tomatoes from the Garden

This Spaghetti with Fresh Tomatoes from the Garden literally has 6 ingredients. Extra virgin olive oil, garlic, fresh tomatoes from the garden, parmigiana- reggiano, the pasta and some fresh basil. It is seasoned simply with a little salt and pepper, then a little pasta water to bring everything together! I honestly wanted to keep eating it!!

Spaghetti with Fresh Tomatoes from the Garden

The tomatoes I used were Sun Gold cherry tomatoes, but you can use any of the small tomatoes. There’s champagne tomatoes, grape tomatoes, any of these will work in this recipe. If you decide to add some of these delicious cherry tomatoes to your garden here’s a link to give you names for the best types: http://www.veggiegardener.com/best-cherry …

Simple Spaghetti with Fresh Tomatoes from the Garden

I started with a little extra virgin olive oil and garlic, then added the tomatoes and cooked them until they were busting.

Spaghetti with Fresh Tomatoes from the Garden

Finishing with pasta water helps make this delicious sauce! Add the spaghetti to the pan, toss a few times and you’re finished! Simple!

Spaghetti with Fresh Tomatoes from the Garden

Eating this dish alone with a piece of good garlic bread or French bread is enough! However, if you want a salad, try my Caesar salad. Here’s a link for that: https://the2spoons.com/a-classic-beautiful-caesar-salad/

Hope you enjoy this simple recipe! The recipe is for two, however, just double or triple and the delicious flavors will remain the same!

Spaghetti with Fresh Tomatoes

Print Recipe
Coursedinner, Lunch, Main Course
CuisineItalian
Keywordcherry tomatoes, spaghetti, spaghetti with fresh tomatoes, sun gold tomatoes, tomatoes
Servings2 Servings

Ingredients

  • 2 Cups cups whole cherry tomatoes (I used Sun Gold)
  • 2 garlic cloves, minced
  • 3 tbsp extra virgin olive oil, plus more to drizzle on finished dish
  • 1/4 cup Parmigiana Reggiana Cheese finely, Parmesan or Pecorino Romano grated plus more for finishing the dish
  • salt and pepper to taste
  • pasta water
  • fresh basil, torn
  • 8-16 oz spaghetti

Instructions

  • Bring a pot of water that has been salted to a boil. Cook your pasta to your desired firmness! I actually like mine softer than al dente.
  • While your pasta is cooking, wash and pat dry your tomatoes. Heat the olive oil in a large skillet. Add the garlic and cook until fragrant but don’t burn. Add your tomatoes and cook until they have burst and a sauce begins to form. Shake the pan while cooking to insure all sides are cooking.
  • When your tomatoes have burst and your sauce begins to make add a little salt and pepper to taste.
  • Don’t drain your pasta, but remove your pasta with a spider or tongs from the pasta water into your skillet with the sauce. Add a ladle of pasta water and combine your pasta with the sauce and cook for a minute or two. Add the grated Parmesan cheese and combine gently adding more pasta water if needed. Turn the heat off and toss in some torn basil leaves.
  • Plate your spaghetti and spoon over the remaining sauce. Add some Parmesan strips, drizzle with extra virgin olive oil, and more basil if desired. Bon Appetite!
  • Share on Pinterest (Opens in new window) Pinterest
  • Share on Facebook (Opens in new window) Facebook
  • Email a link to a friend (Opens in new window) Email
  • Print (Opens in new window) Print
  • Share on X (Opens in new window) X
  • Share on Tumblr (Opens in new window) Tumblr
  • More
  • Share on Reddit (Opens in new window) Reddit

Filed Under: Pasta Tagged With: cherry tomatoes, fresh tomatoes, pasta, Spaghetti, spaghetti with fresh tomatoes from the garden, sun gold tomatoes, tomatoes from the garden

Really Easy Chocolate and Coffee Cake

July 1, 2019 by Becky Spoon

Chocolate and Coffee Cake
Please follow and like us:
onpost_follow
fb-share-icon
Tweet
Jump to Recipe
Chocolate and Coffee Cake

Best Chocolate and Coffee Cake ever! Loaded with chocolate, filled with layers of cream cheese, with a strong coffee flavor! This recipe is so good. And when I say “really easy” it is just that!

Chocolate and Coffee Cake

Oh, I forgot to mention the chocolate ganache drizzled down the sides. This cake is almost fudge like. The layers are slathered with a cream cheese and coffee cream which keeps this cake soft and moist!

Chocolate and Coffee Cake

Really Easy Chocolate and Coffee Cake

I do like to use a quality chocolate. The cake layers are made with a Dutch processed cocoa powder and the ganache is with chocolate chips, heavy cream and a little Karo syrup. I use Ghirardelli brand chocolate that is really good. There is even better and they can get quite expensive, but I believe the higher quality of chocolate makes a huge difference. There are some high quality chocolates on the King Arthur Flour website. Here’s the link for the Ghirardelli brand that I used: https://www.ghirardelli.com. Most grocery stores will carry this brand.

Don’t forget to make some homemade vanilla ice cream to top this luscious cake or some homemade whipped cream. Here’s the link for my no-churn vanilla ice cream that is so easy! https://the2spoons.com/so-good-essential-no-churn-vanilla-ice-cream/

Here you go! Enjoy this easy recipe!

Chocolate and Coffee Cake

Print Recipe
CourseDessert
CuisineAmerican
Keywordcake, chocolate, chocolate and coffee cake, chocolate cake, dessert

Ingredients

Chocolate and Coffee Cake

  • 2 cups all purpose flour
  • 3/4 cup dutch processed cocoa powder
  • 1 1/2 cups sugar
  • 1 tbsp baking powder
  • 1 tsp salt
  • 2 tsp espresso powder
  • 1/2 cup canola or vegetable oil
  • 2 large eggs
  • 1/2 cup buttermilk
  • 1 tsp vanila extract or vanila paste (my preference)
  • 1 cup strong coffee

Coffee Cream Frosting

  • 2 1/2 cups cream cheese
  • 1 1/4 cups powdered sugar
  • 1/4 cup strong coffee, room temperature
  • 1/4 cup heavy cream

Chocolate Ganache

  • cup semi-sweet or milk chocolate, chopped into pieces
  • 1/2 cup heavy cream
  • 2 tbsp corn syrup

Instructions

  • Preheat oven to 350°F. Lightly grease and flour the bottom and sides of two 8" baking pans . Line the bottoms with parchment paper . Set aside.
    Chocolate coffee cake: In a medium bowl combine flour, cocoa, baking powder, salt, and espresso powder and stir to combine. Set aside. In a large mixing bowl with a stand or handheld mixer fitted with a whisk or paddle attachment, beat sugar, oil, eggs, buttermilk, and vanilla* just until combined. Stir in dry ingredients to combine. Slowly mix in hot coffee until combined. The batter will be very thin. Divide batter into the two prepared baking pans equally. Bake for 20-25 minutes or until a toothpick in the center comes out clean. Don't overbake. I baked mine for 20 minutes. Let cool in the pan for about 20 minutes. Then remove from pan and transfer to a cooling rack. Let cool to room temperature.
    Coffee cream frosting: In a large mixing bowl with a stand or handheld mixer fitted with a whisk or paddle attachment, beat the cream cheese until creamy. Sift in powdered sugar and mix until combined and sugar is dissolved. Add cooled coffee and stir until incorporated. Stir in heavy cream and mix until creamy. 
    Assemble the cake: Cut a thin layer off the tops of your cakes to create a flat surface. Then cut each cake in half horizontally. Place one cake layer on a cake stand, turner or serving plate. Spread 1/4 of the frosting over the cake later. Repeat two more times. Place last cake layer on top and lightly frost the outside and the sides of the cake with the remaining frosting. Chill at least 4 hours in the fridge or overnight.
    Chocolate glaze: Place chopped chocolate in a large heatproof bowl. Place heavy cream and corn syrup in another heatproof bowl and microwave until very hot, almost boiling for about 1-2 minutes or heat over the stovetop being careful not to scorch. Pour over chocolate and let stand 1-2 minutes. Whisk until smooth, and the chocolate is completely melted. Let stand for about 10-15 minutes. Test the consistency of the glaze down the side of the bowl. It should drip. The longer it stands, the thicker it gets. If it is too firm, re-warm it a few seconds in the microwave. Once it reached the desired consistency, it's ready to spoon on top of the cake.
    Remove cake from the fridge and spoon the glaze little by little around the sides and let it drip off the sided. Do this with a small spoon and do one drip at the time. Then spoon or pour the rest of the glaze on top of the cake (maybe you don't need all) and level with an offset spatula. Place cake in the fridge for 15 minutes or so to allow the glaze gets to get firm. Store leftovers in an airtight container.


  • Share on Pinterest (Opens in new window) Pinterest
  • Share on Facebook (Opens in new window) Facebook
  • Email a link to a friend (Opens in new window) Email
  • Print (Opens in new window) Print
  • Share on X (Opens in new window) X
  • Share on Tumblr (Opens in new window) Tumblr
  • More
  • Share on Reddit (Opens in new window) Reddit

Filed Under: Dessert Tagged With: Chocolate

Awesome Macaroni with Fresh Tomatoes from the Garden

June 29, 2019 by Becky Spoon

Macaroni and Fresh Tomatoes
Please follow and like us:
onpost_follow
fb-share-icon
Tweet
Jump to Recipe
Macaroni and Tomatoes

Macaroni with Fresh Tomatoes is another Southern recipe I grew up eating. My mother and grandmother both would make this dish. It is really good and comforting. I used fresh san marzano tomatoes from my garden that just made this recipe so much more satisfying. I did a quick hot bath on the tomatoes so that the skin would easily come off!

After I sauted bell peppers and onions, I added the fresh tomatoes to the mixture.

Macaroni with fresh tomatoes

This is really an easy recipe, but it is super satisfying. Honestly, I could just eat a bowl of this and a piece of cornbread and eat nothing else! The freshness of the tomatoes and the sauce they make with the vegetables is amazing. I always add the Knorr Tomato Bouillon with Chicken Flavor to enhance the liquid. Here’s a link if you aren’t familiar with this ingredient. It really makes a difference. http://www.samsclub.com/sams/knorr-tomato-bouillon-w-chicken-flavor-35-3-oz/160906.ip

I served this recipe with my Smothered Cabbage and it was the perfect addition. Here’s my smothered cabbage link: https://the2spoons.com/smothered-cabbage-with-potatoes-smoked-sausage/

Here you go! Enjoy!

Macaroni with Fresh Tomatoes from the Garden

Print Recipe

Ingredients

For the fresh tomatoes

  • 8-10 just picked san marzano tomatoes or 4 large fresh tomatoes
  • water to cover

For the Macaroni and tomatoes

  • 1/2 green bell pepper, diced
  • 1/2 red bell pepper, diced
  • 1/2 onion, diced
  • 2 cups fresh tomatoes (You can substitute for a can of a quality brand of diced tomatoes)
  • 1 1/2 cups macaroni
  • 1 1/2 cups water (more is needed as you cook)
  • 1 Knorr tomato bouillon with chicken flavor
  • 2 tbsp extra virgin olive oil
  • 1 tbsp butter
  • pinch of sugar if your tomatoes are too tart

Instructions

For the tomatoes

  • Cut an X in the top of each tomato to allow for easy peeling. Bring a pot of water to a boil. When at a rolling boil, add your tomatoes to the water and cook for a couple of minutes until you see the skin starting to release from the tomato. Remove from the heat and when they have cooled a little, peel them over a bowl to not lose any of the juices. .Then squeeze them to chop them up in chunks. You don't want to puree them, just use your hands to chop them up a little. You will need about 2 cups of the finished tomatoes.

For the Macaroni and Fresh Tomatoes from the Garden

  • Add the butter and extra virgin olive oil to a saucepan and sauté your peppers and onions until they have softened and the onions have become translucent. Add your tomatoes, the water and bouillon and cook for about 10 minutes. Then add the macaroni, stir to combine, lower heat and cover. Cook until your macaroni is tender, 15 to 20 minutes, adding water if needed. Enjoy!
Macaroni with Fresh Tomatoes
Smothered Cabbage
Smothered Cabbage
  • Share on Pinterest (Opens in new window) Pinterest
  • Share on Facebook (Opens in new window) Facebook
  • Email a link to a friend (Opens in new window) Email
  • Print (Opens in new window) Print
  • Share on X (Opens in new window) X
  • Share on Tumblr (Opens in new window) Tumblr
  • More
  • Share on Reddit (Opens in new window) Reddit

Filed Under: Pasta Tagged With: garden, macaroni, macaroni and tomatoes, tomatoes

  • « Go to Previous Page
  • Page 1
  • Interim pages omitted …
  • Page 41
  • Page 42
  • Page 43
  • Page 44
  • Page 45
  • Interim pages omitted …
  • Page 66
  • Go to Next Page »

Primary Sidebar

Categories

  • Appetizer
  • Beans, Lentils, Grains, Rice
  • Beef
  • Bread
  • Breakfast/Brunch
  • Cocktails
  • Dessert
  • Dishes of Mexico, Tex Mex and New Mexico Red and Green Chile
  • Fish/Seafood
  • Ice Cream
  • Pasta
  • Pizza
  • Pork
  • Poultry
  • Salad Dressings
  • Salads
  • Salsas
  • Sandwiches/Burgers/Hot Dogs
  • Sauces, Compound Butters, Condiments
  • Side dish
  • Soups/Stews/Gumbo//Chili
  • Stocks, Broths, Gravies
  • Vegetables

Copyright © 2026 The 2 Spoons on the Foodie Pro Theme

Rate This Recipe

Your vote:


A rating is required
A name is required
An email is required