• Skip to primary navigation
  • Skip to main content
  • Skip to primary sidebar

A cook named Rebecca

  • Home
  • Favorite Cookbooks
  • Recipes
  • Travel
You are here: Home / Archives for Poultry

Poultry

Easy Buttermilk and Franks Red Hot Sauce Marinated Chicken Tenders

February 18, 2020 by Becky Spoon

Buttermilk and Franks Red Hot Sauce Marinated Chicken TendersJump to Recipe
Buttermilk and Franks Red Hot Sauce Marinated Chicken Tenders
These easy buttermilk and Franks Red Hot Sauce marinated chicken tenders are so good! Doesn't everyone love chicken tenders? Honestly so tender and the best for making this kind of a recipe.  You could use chicken breast that you slice which I have done many times, but the tenders really are so good.
Buttermilk and Franks Red Hot Sauce Marinated Chicken Tenders

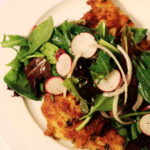
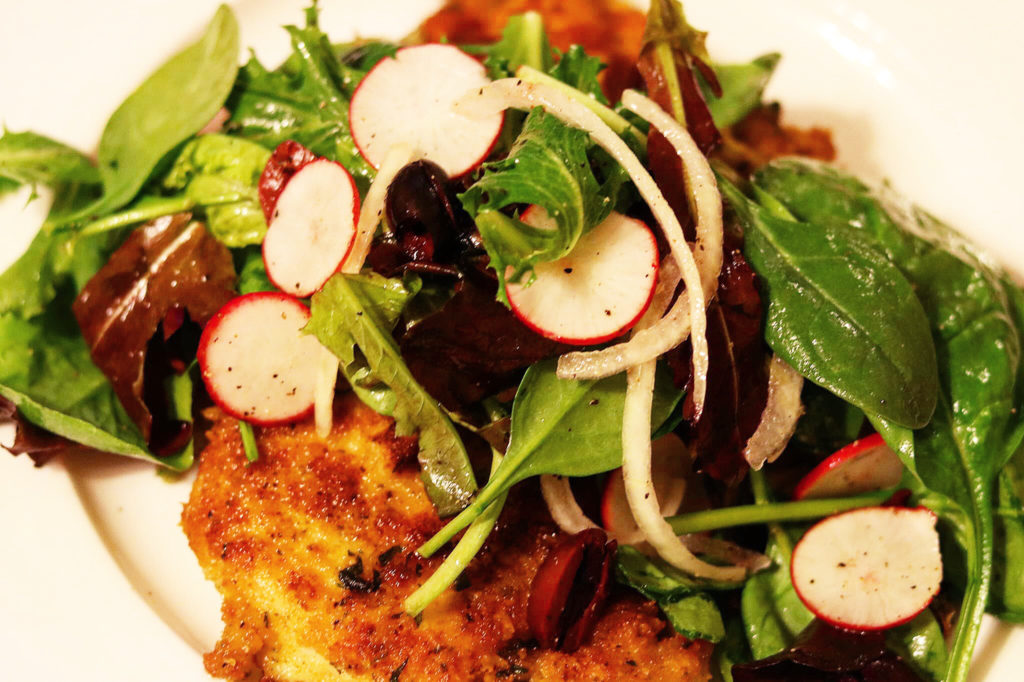
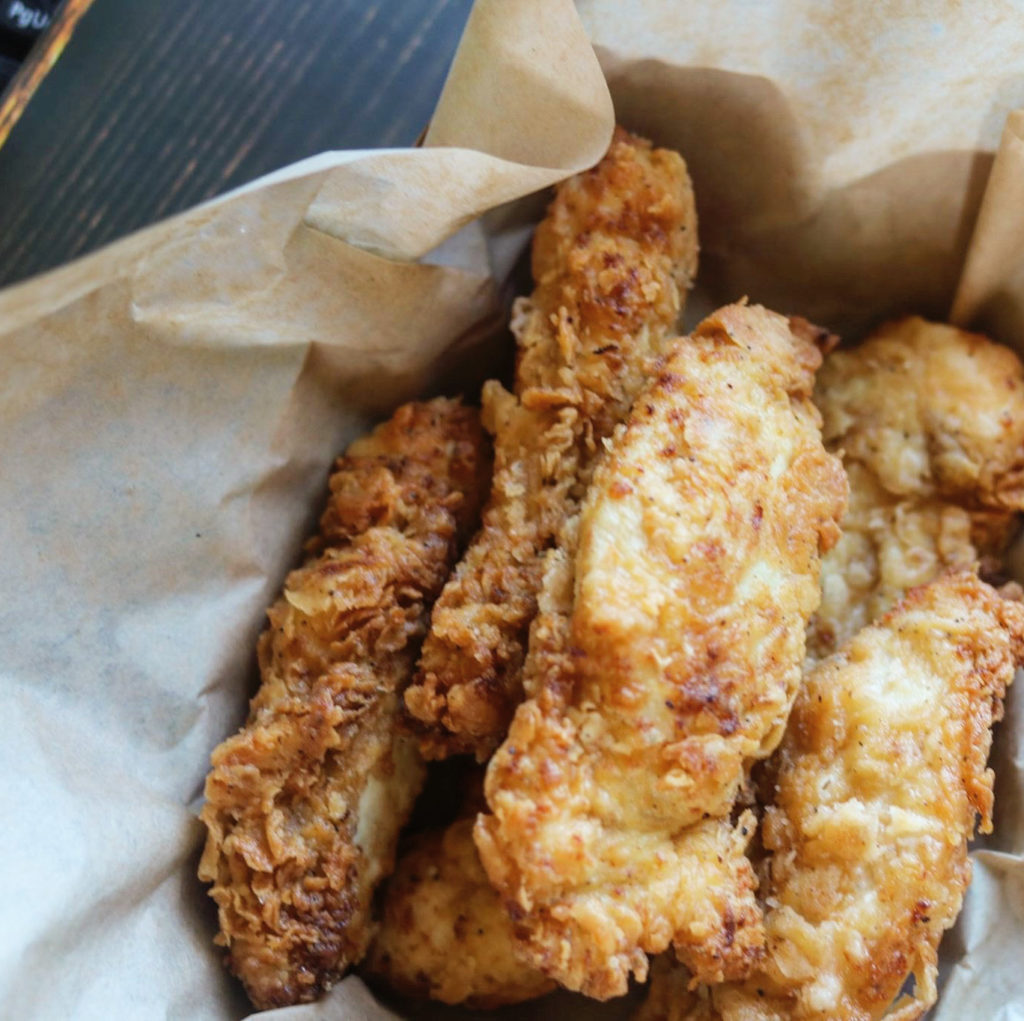
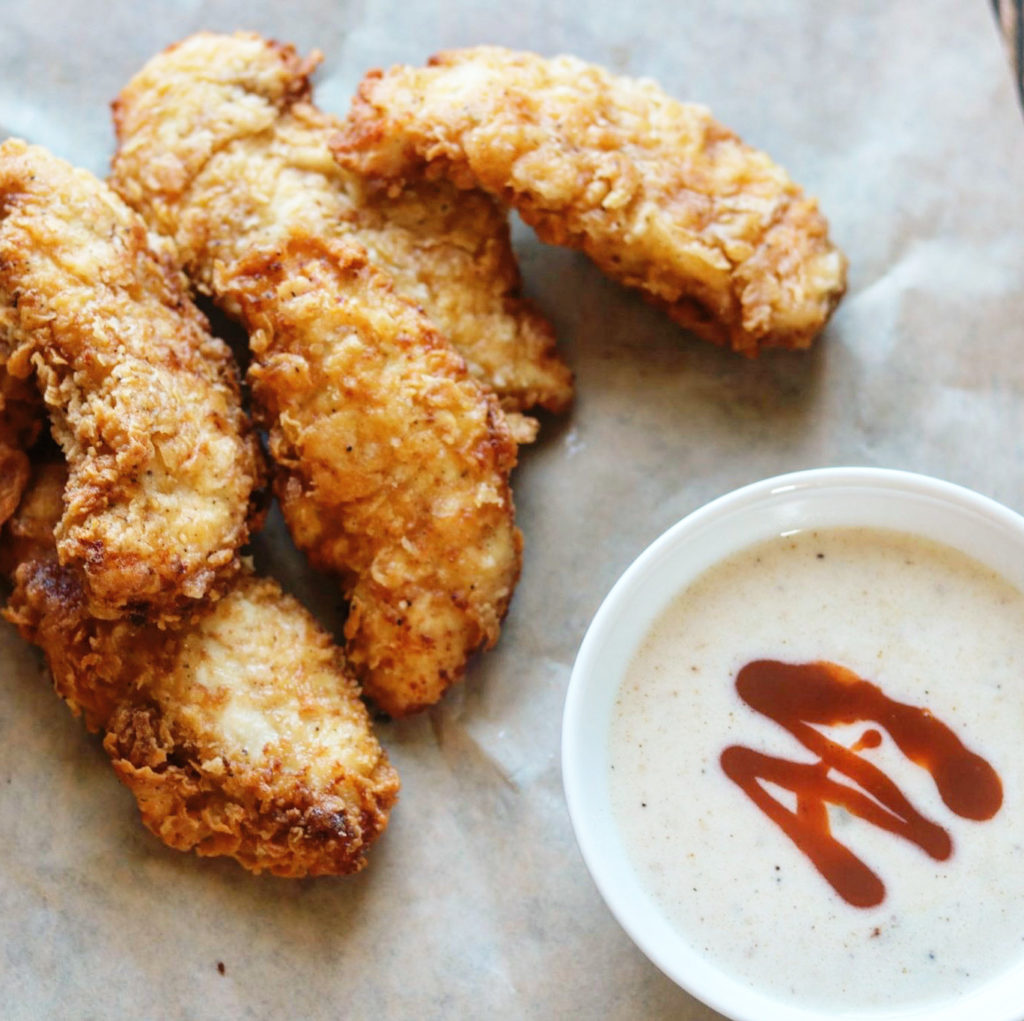
These easy buttermilk and Franks Red Hot Sauce marinated chicken tenders are so good! Doesn’t everyone love chicken tenders? Honestly so tender and the best for making this kind of a recipe. You could use chicken breast that you slice which I have done many times, but the tenders really are so good.

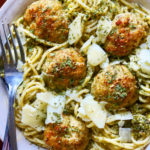
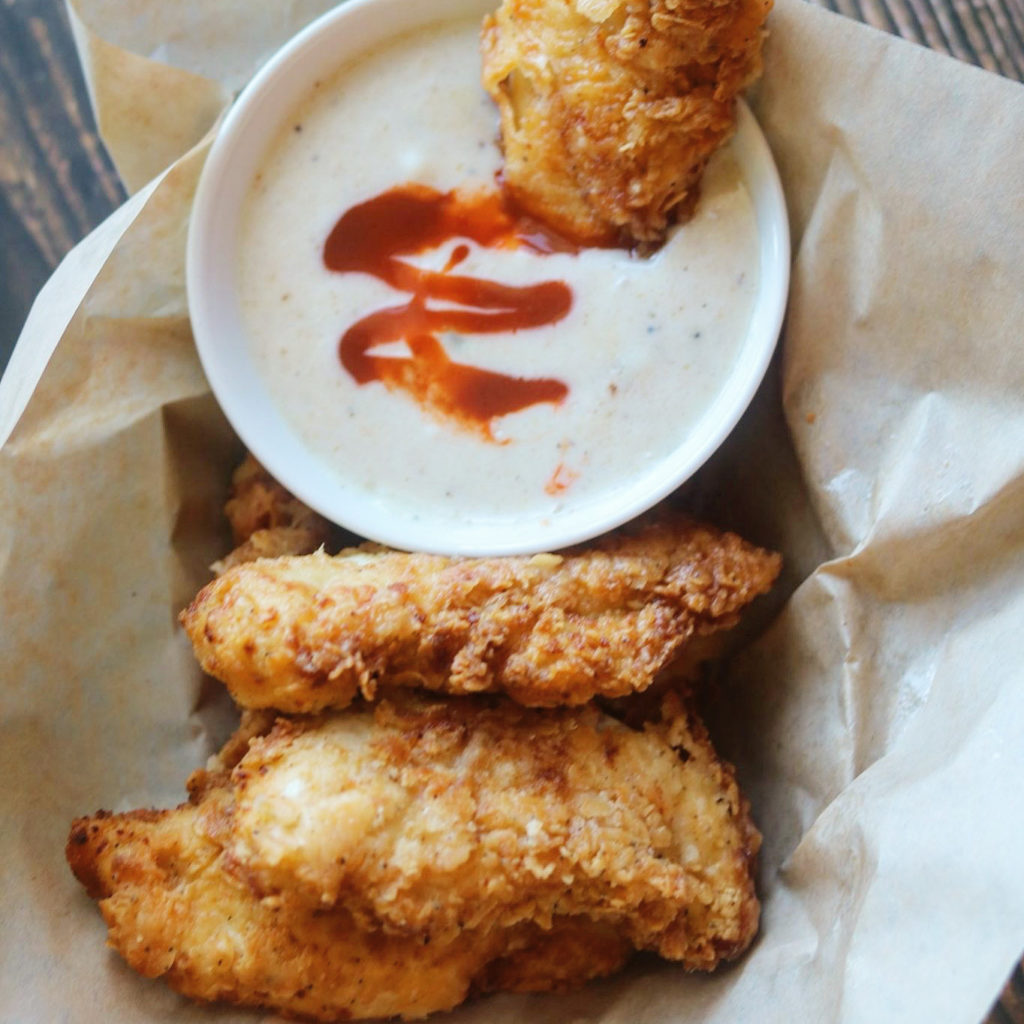
I served these with my cream gravy that I added a splash of Franks Red Hot sauce for dipping! These would be great with a ranch or blue cheese too. So, the Ranks Red Hot Sauce is not real hot and I used it in the marinade to add that delicious flavor. These are not hot. I could have easily tossed these in straight sauce after frying them, but I didn’t want that intense heat like in a wing, just the flavor. I don’t know I’m just fond of a creamy gravy with chicken, but you choose the sauce you prefer.

Buttermilk and Franks Red Hot Sauce Marinated Chicken Tenders

Buttermilk and Franks Red Hot Sauce Marinated Chicken Tenders

Buttermilk and Franks Red Hot Sauce Marinated Chicken Tenders

I love Frank’s Red Hot Sauce. This is the original. here’s a link if you aren’t familiar with this brand: https://amzn.to/37EpOIO. Frank’s has several different sauces but this is the cayenne sauce. I happen to love cayenne.

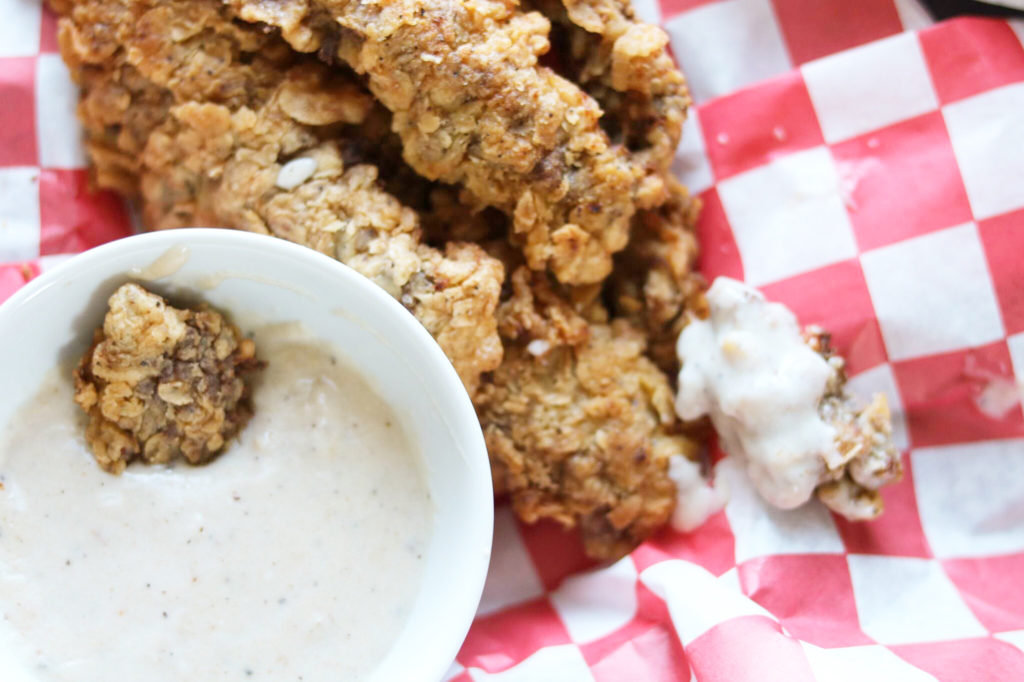
The other day I made steak fingers, similar to the tenders! Here’s the link for those: https://the2spoons.com/texas-chicken-fried-steak-fingers/.

Texas Chicken Fried Steak Strips

Easy Buttermilk and Franks Red Hot Sauce Marinated Chicken Tenders

To save time you can actually marinate these the night before. Just throw them in a zip lock with some buttermilk and Frank’s Hot Sauce and stick them in the fridge overnight. When you cook them all you’ll need to do is dredge them in some flour, fry them a couple of minutes in canola oil and you’re done. Make a quick gravy, some mashed potatoes and a side salad or a green vegetable and you have a great meal. Here’s a recipe for one of my mashed potato recipes: https://the2spoons.com/delicious-buttery-mashed-potatoes/.

Buttery Mashed Potatoes

Here’s the easy recipe! Enjoy!

Easy Buttermilk and Franks Red Hot Sauce Marinated Chicken Tenders

Print Recipe
Servings: 4 Servings
Course: dinner, Lunch, Main Course
Cuisine: American
Ingredients Method

Ingredients
  

  • 12-16 chicken tenders
  • 1 cup buttermilk (more if needed to cover the tenders)
  • 1-2 tbsp Frank's Red Hot Sauce (I used 2 tablespoons)
  • pinch of salt and pepper for the marinade
  • 2 cups all purpose flour
  • 1 tsp salt
  • 1/2 tsp black pepper
  • 3-4 cups oil for frying

Method
 

  1. Combine the buttermilk and the Frank's Red Hot Sauce in a zip lock bag. Add a pinch of salt and pepper. Allow the chicken to marinade at least 4 hours up to overnight.
  2. Place the flour with the salt and pepper in a dish large enough to bread your tenders and whisk together.
  3. Line a baking sheet with aluminum foil for easy cleanup. Remove the chicken tenders from the marinade a few at a time and toss into the breading mixture. Be sure to press the chicken firmly into the breading so clumps adhere to the meat. (It's a messy job: use one hand to remove the wet tenders from the bag and the other to toss in the breading.) Set breaded tenders on the prepared baking sheet.
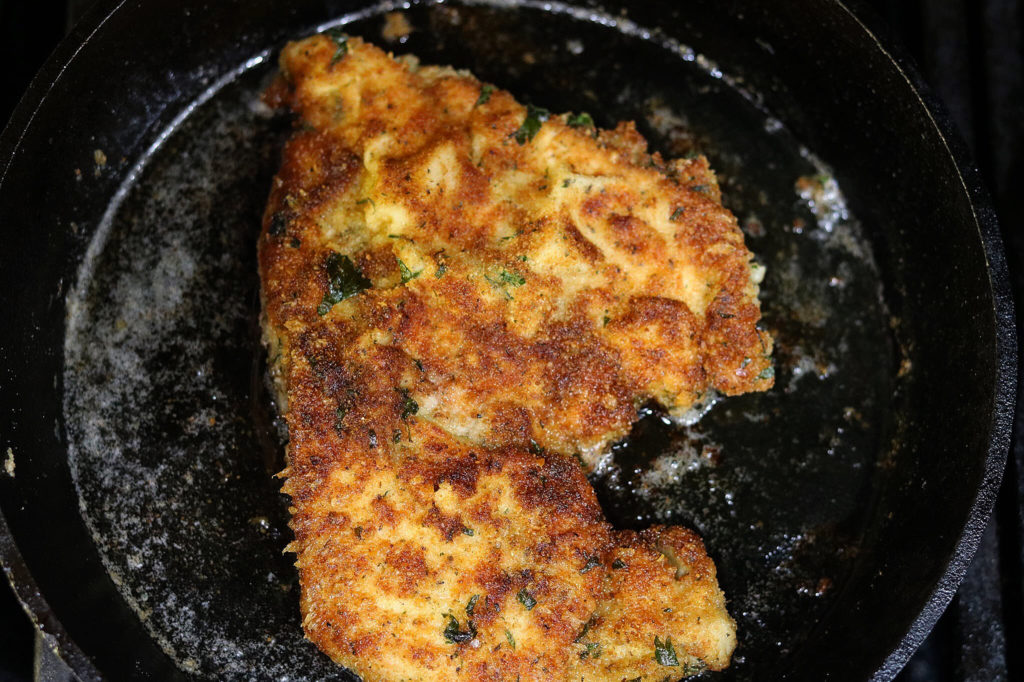
  4. When I'm frying more than a couple of pieces I like to put my oven on warm. I also take a sheet pan and line the bottom with paper towel then I place a wire rack on it so that any excess oil can drain onto the paper towels.
    Add oil to a large, high-sided pot until the level reaches about 3/4-inch. Heat over medium-high heat until oil is shimmering (about 350°). (If a cube of bread sizzles when you drop it in, it's ready.) Using tongs, place several chicken tenders in the hot oil without crowding the pan. Cook until golden brown on the bottom side, a few minutes, then flip and cook until the second side is also golden, a few minutes more. Set the cooked tenders on the wire rack to drain. Fry remaining tenders in batches adjusting the heat as necessary (if the tenders are browning too fast, lower the heat).
  5. Serve hot with cream gravy, a ranch dressing or blue cheese dressing! These are great!
  • Click to share on Pinterest (Opens in new window) Pinterest
  • Click to share on Facebook (Opens in new window) Facebook
  • Click to email a link to a friend (Opens in new window) Email
  • Click to print (Opens in new window) Print
  • Click to share on X (Opens in new window) X
  • Click to share on Tumblr (Opens in new window) Tumblr
  • More
  • Click to share on Reddit (Opens in new window) Reddit

Filed Under: Poultry Tagged With: chicken, chicken strips, chicken tender, chicken tenders, easy, franks red hot sauce

Amazing! The Best Ever Smoked Turkey Sandwiches

February 5, 2020 by Becky Spoon

Smoked Turkey SandwichJump to Recipe
Smoked Turkey Sandwich
Jump to Recipe

Remember the Smoked Turkey Breast I posted? Well, this Smoked Turkey Sandwich was my number 1 favorite use for it! A buttered and toasted bun, spread with barbecue sauce, over loaded with slices of the smoked turkey, more barbecue sauce, a creamy cole slaw, spicy bread and butter pickles! So, so good. Honestly, this is as good as a loaded smoked brisket sandwich. Well, almost as good!

Smoked Turkey Sandwich

Amazing! The Best Ever Smoked Turkey Sandwiches

I used a hamburger bun but a hoagie bun would work too. I like to butter and toast it because not serving on a cold bun adds so much. I also put a slice of provolone on the sandwich, but it’s not necessary. If you decide on cheese, a medium to sharp cheddar would be great too, even Swiss cheese.

I make my barbecue sauce from Aaron Franklin’s cookbook. He has his actual sauce recipe that he sells retail. His cookbook is a great instructional cookbook for smoking in the Texas style, especially smoking brisket. Here’s a link for his book: https://amzn.to/2vTVLjg.

Here’s a link for his barbecue sauce! All of his sauces are excellent! They are my favorites. https://amzn.to/2UswFSJ.

If you love smoking meats as much as we do, check out some of my other smoked meats. Here’s my smoked brisket recipe which is a favorite and we make it all of the time. https://the2spoons.com/the-best-awesome-smoked-brisket/

Smoked Brisket
Smoked Brisket

And, look at this smoked brisket sandwich!

Smoked Brisket
Smoked Brisket

If these photos don’t make you want to go smoke a turkey or brisket?? They make me so hungry!

Amazing! The Best Ever Smoked Turkey Sandwiches

Here’s the recipe! Enjoy!

Smoked Turkey

Print Recipe
Servings: 2 sandwiches
Course: dinner, Lunch, Main Course, Sandwiches
Cuisine: American
Ingredients Method

Ingredients
  

  • 1 turkey breast (Natural preferred)
  • 1 stick butter
  • 1 cup chicken broth
  • granulated garlic
  • black pepper
  • salt
  • olive oil
For the Cole Slaw
  • 1 cup store bought prepared cabbage with shredded carrots (cole slaw)
  • 3 tbsp mayonaise
  • pinch of sugar
  • 1/2 tsp red wine vinegar
  • salt and pepper to taste
To Build the Sandwich
  • 8-10 thin slices smoked turkey breast (you can substitute store bought smoked turkey if you don't have time to smoke:
  • cole slaw
  • Barbecue Sauce of your choice
  • 2 slices cheese of your choice, optional
  • 2 buns of your choice
  • butter for toasting the buns
  • dill pickles or a spicy bread and butter pickle

Method
 

  1. Prepare you smoker with desired wood or charcoal. I use a combination of a hardwood charcoal with wood. I used Pecan wood this time.
  2. Melt the butter and add the chicken stock. Add about 1/2 teaspoon granulated garlic. Allow to cool down, then inject the turkey a dozen or so times with the solution.
  3. After injecting, rub the turkey all over with a little olive oil and season with salt, pepper and granulated garlic.
  4. Cook at about 250-300 degrees until the internal temperature reaches 160. Remove from the heat and allow to rest for at least 30 minutes before slicing.
For the Cole Slaw
  1. Combine the mayonnaise and vinegar in a small bowl. Add a pinch of sugar and a little salt and pepper. Stir and adjust seasoning. Add to your cole slaw and combine.
To Build your Sandwich
  1. Have your barbecue sauce heated a little, being careful not to boil because it will separate. Heat your broiler. Place the sliced turkey in two piles on a sheet pan and top with the sliced cheese of your choice. Place under the broiler and cook until your cheese has melted.
  2. Heat a skillet or griddle. Butter the inside of the top and bottom of your bun. Place on the grill top side up until lightly browned. Flip and allow the top to brown for a couple of seconds. Yes, seconds.
  3. Place the toasted buns on each plate. Spread the heated barbecue sauce on the top and bottom of the buns. Place the turkey with the melted cheese on the bottom bun. Pour a little barbecue sauce over. Then top with the creamy slaw and the pickles. Place the top bun on and pass the napkins! You will need lots!! Enjoy! So delicious!
  • Click to share on Pinterest (Opens in new window) Pinterest
  • Click to share on Facebook (Opens in new window) Facebook
  • Click to email a link to a friend (Opens in new window) Email
  • Click to print (Opens in new window) Print
  • Click to share on X (Opens in new window) X
  • Click to share on Tumblr (Opens in new window) Tumblr
  • More
  • Click to share on Reddit (Opens in new window) Reddit

Filed Under: Poultry Tagged With: big green egg smoked turkey, sandwiches, smoked turkey, turkey breast

So Good! The Best Leftover Thanksgiving Turkey Pot Pie!

December 2, 2019 by Becky Spoon

Leftover Thanksgiving Turkey Pot PieJump to Recipe
Leftover Thanksgiving Turkey Pot Pie
This Leftover Thanksgiving Turkey Pot Pie is really good! And, who doesn't love a Pot Pie? Pot pies bring back memories of childhood eating those little pot pies from Swanson that you had to patiently wait for them to finish cooking because we didn't have microwaves.  When you have left over turkey from the holidays or just a rotisserie chicken, this is perfect  any time of the year.
Leftover Thanksgiving Turkey Pot Pie

This Leftover Thanksgiving Turkey Pot Pie is really good! And, who doesn’t love a Pot Pie? Pot pies bring back memories of childhood eating those little pot pies from Swanson that you had to patiently wait for them to finish cooking because we didn’t have microwaves. When you have left over turkey from the holidays or just a rotisserie chicken, this is perfect any time of the year.

Leftover Thanksgiving Turkey Pot Pie

This pie is loaded with vegetables and turkey in a creamy sauce, then baked in a pastry crust until golden brown. It is absolutely flaky and delicious. There is no reason rally to serve anything else with this dish. If you do a nice green salad would be perfect.

I used Pillsbury pie dough that you find in the refrigerated section of your grocery store, usually by the butter because I wanted to make this recipe even easier than it already was. And let’s face it, these pie crust are hard to beat! Here’s a link for the crust:https://www.pillsbury.com/products/pie-crust.

Image result for pillsbury pie crust

Here’s another recipe for you to make using the leftover turkey: https://the2spoons.com/chicken-and-wild-rice-soup/. This recipe is with chicken, but yoou can easily substitute the chicken ofr turkey. It’s a delicious soup!

So Good! The Best Leftover Thanksgiving Turkey Pot Pie!

Hope you enjoy this recipe!

Leftover Thanksgiving Turkey Pot Pie

Print Recipe
Servings: 6 servings
Course: dinner, Lunch, Main Course
Cuisine: American
Ingredients Method

Ingredients
  

  • 2 tbsp butter
  • 1 tbsp oil
  • 1/2 large onion chopped or one small
  • 1 cup celery, chopped
  • 2 cups carrots, thinly sliced or diced
  • 3 cups potatoes, diced
  • 4 tbsp flour
  • 4 cups chicken or turkey broth
  • 1 tsp salt
  • 1/2 tsp black pepper
  • 1/2 tsp fresh thyme
  • 1/2 tsp ground savory
  • zest of one lemon
  • 3 cups chicken, diced
  • 2 cups frozen green peas
  • 1 package Pillsbury pie crust

Method
 

  1. Preheat the oven to 350. In a large saucepan, heat the butter and oil over medium heat. Add the onions, celery, and carrots and cook until the onions are translucent. Add the flour, stir to combine, and cook for about 2 minutes,
  2. Add the chicken broth, whisking or stirring constantly to prevent lumping. Add the potatoes and cook, stirring occasionally until the sauce has thickened and the potatoes and carrots are tender. Gently fold in the chicken and the green peas and remove from the heat.
  3. Add the bottom crust to your cassserole dish, no need to add butter or oil. You may need to roll out a little to enlarge for your dish! Pour your pot pie mixture in. Place your remaining rolled out pie crust on the top and seal the edges. Add a few slits on the top to release the steam. Bake until golden brown! Serve hot. Leftovers are great the next day. You can also make individual pot pies and freeze before cooking. I do this a lot for my Mom.
  • Click to share on Pinterest (Opens in new window) Pinterest
  • Click to share on Facebook (Opens in new window) Facebook
  • Click to email a link to a friend (Opens in new window) Email
  • Click to print (Opens in new window) Print
  • Click to share on X (Opens in new window) X
  • Click to share on Tumblr (Opens in new window) Tumblr
  • More
  • Click to share on Reddit (Opens in new window) Reddit

Filed Under: Poultry Tagged With: pot pue, thanksgiving leftovers, turkey pot pie

Beautiful Roast Chicken with Sauce Chasseur

November 9, 2019 by Becky Spoon

Roast Chicken with Sauce ChasseurJump to Recipe
Roast Chicken with Sauce Chasseur

This Roast Chicken with Sauce Chasseur recipe was in the October, 2019 issue of Food and Wine and I just had to make it. As with all recipes, mine isn’t exactly the same. I feel a recipe is a guide and you make your version as close to the recipe with what you have on hand or what you have available locally, like the Airline Chicken Breast the recipe calls for. What’s an Airline Chicken Breast?

Roast Chicken with Sauce Chasseur

Airline chicken is a food dish comprising a boneless chicken breast with the drumette attached. Skin on breast with 1st wing joint and tenderloin attached, otherwise boneless. The cut is also known as a frenched breast. https://en.m.wikipedia.org/wiki/Airline_chicken. If you don’t have a butcher that can cut an airline chicken breast, if you don’t want to cut it yourself, or you can find from a specialty store like Central Market, a bone-in, skin on chicken breast works just as well. That is what I used. You don’t quite have the dramatic presentation, but the taste is the same!

Roast Chicken with Sauce Chasseur

Beautiful Roast Chicken with Sauce Chasseur

Another Roast chicken recipe I think you will love is my Lemon and Garlic Roast Chicken. Here’s the link! https://the2spoons.com/lemon-and-garlic-roast-chicken/. This recipe is on my blog and it is a delicious recipe also!

Beautiful Roast Chicken with Sauce Chasseur

Here you go with the Roasst Chick with Sauce Chasseur recipe. Hope you Enjoy! I served it with a Basmati Rice that I steamed and just added a little salt, pepper and butter. The rice was the perfect accompaniment.

Beautiful Roast Chicken with Sauce Chasseur

5 from 1 vote
Print Recipe
Course: dinner, Lunch, Main Course
Cuisine: American
Ingredients Method

Ingredients
  

  • 1 tbsp neutral oil
  • 4 skin-on airline chicken breasts or skin-on, bone in chicken breast
  • 11/2 tsp salt, plus more to taste
  • 1/2 tsp black pepper
  • 4 large shallots, halved lengthwise, root ends trimmed
  • 8 thyme sprigs
  • 1/2 cup dry white wine
  • 2 cups low-sodium chicken broth
  • 2 tbsp unsalted butter
  • 8 oz fresh wild mushrooms, cleaned and cut into bite size pieces (about 3 cups)
  • 1/2 cup heavy cream
  • 1 large plum tomato, chopped
  • 1 tbsp finely chopped fresh chives
  • 1 tbsp finely chopped fresh tarragon (I used dried because I wasn't able to find fresh)

Method
 

  1. Preheat oven to 350°F. Heat oil in a 12-inch stainless steel ovenproof skillet over medium-high. Season chicken with salt and pepper. Sear chicken in skillet, skin side down, until skin is crisp and golden brown, about 4 minutes. Flip chicken; add shallots, cut sides down, and press into skillet. Cook chicken and shallots until shallots are browned, about 4 minutes. Add thyme and wine to skillet. Bring to a simmer over medium-high; add broth, and return to a simmer. Carefully transfer skillet (so skin of chicken stays dry) to preheated oven, and roast until thermometer inserted into thickest part of breast registers 155°F, about 20 minutes.
  2. Remove skillet from oven. Using tongs, place chicken breasts and shallots on a plate; tent with aluminum foil to keep warm while making sauce. Pour broth mixture through a fine wire-mesh strainer into a heatproof bowl or measuring cup, and set aside. Wipe skillet clean, and return to high heat.
  3. Melt butter in skillet, and add mushrooms in a single layer. Cook, without stirring, until browned on one side, about 2 minutes. Shake skillet to loosen mushrooms; cook, without stirring, until mushrooms just begin to release their juices, about 2 minutes. Add strained broth mixture and cream to skillet, and bring to a boil over high. Reduce heat to medium-low, and simmer, stirring occasionally, until mushrooms are tender and sauce is thick enough to coat the back of a spoon, 10 to 15 minutes. Remove from heat, and stir in tomato, chives, and tarragon; season with salt to taste.
  4. Slice chicken breasts crosswise into 1-inch-thick pieces. Divide chicken among plates, and serve with sauce chasseur.
  • Click to share on Pinterest (Opens in new window) Pinterest
  • Click to share on Facebook (Opens in new window) Facebook
  • Click to email a link to a friend (Opens in new window) Email
  • Click to print (Opens in new window) Print
  • Click to share on X (Opens in new window) X
  • Click to share on Tumblr (Opens in new window) Tumblr
  • More
  • Click to share on Reddit (Opens in new window) Reddit

Filed Under: Poultry Tagged With: beautiful roast chicken, dinner, main course, roast chicken, roast chicken with sauce chasseur

Super Easy Chicken Milanese

October 26, 2019 by Becky Spoon

Chicken MilaneseJump to Recipe
Chicken Milanese
Chicken Milanese

This Chicken Milanese is super easy, and so delicious. Boneless and skinless chicken breast are pounded out thin, then breaded in a mixture of bread crumbs and parmesan cheese. The chicken is pan fried in a little butter combined with olive oil and then finished with lemon juice and topped with a simple salad. This is a great main course dish!

Chicken Milanese
Chicken Milanese

Super Easy Chicken Milanese

The name “milanesa” comes from the traditional Milanese dish known as cotoletta alla milanese, which is a veal cutlet that is breaded and fried lightly in butter. Immigrants from Europe brought this dish, and similar dishes such as Wiener schnitzel, to South and Central America. Here’s a link about the history: https://www.wisegeek.com/what-is-milanesa.htm. Typically, you will see a Veal Milanese, but I really like it with a boneless, skinless chicken breast.

If you wanted to add a side my sautéed green beans with lemon would be perfect. Here’s the link for those: https://the2spoons.com/perfect-browned-butter-and-garlic-green-beans/.

Hope you try this easy recipe soon!

Chicken Milanese

Print Recipe
Servings: 4 servings
Course: dinner, Lunch, Main Course
Cuisine: American, Italian
Ingredients Method

Ingredients
  

  • 4 boneless, skinless chicken breast
  • 2 cups all purpose flour
  • 3 eggs, beaten
  • 2 cups Italian Breadcrumbs
  • kosher salt and fresh ground black pepper
  • 1/2 cup grated parmesan cheese
  • 1/4 cup chopped fresh parsley leaves
  • 1/2 cup blended oil (canola oil and olive oil)
  • 4 tbsp unsalted butter
  • Juice of 2 lemons
For the Salad
  • 4 Cups Arugula or a spring mix salad greens
  • 1 lemon
  • 1/2 Cup Kalamata olives
  • 1/2 Cup Thinly sliced radishes
  • 1/2 medium onion, thinly sliced
  • 2 plum tomatoes, diced
  • Extra virgin olive oil
  • Salt and pepper
  • Shaved Parmesan cheese

Method
 

  1. Preheat the oven to 375 degrees F.
  2. For the chicken breastl: To pound the chicken breast, line a cutting board with plastic wrap and place a breast portion on top. Place another piece of plastic wrap over the chop making sure it's completely covered. Use a meat mallet to pound the chicken evenly, making sure the middle and the edges are the same size, about 1/2 inch in thickness. Remove plastic from the top and set the pounded chicken aside; repeat with the rest of the chicken breast.
  3. Set up 3 shallow baking dishes, one with the flour, one with the beaten eggs, and the third with the breadcrumbs. Season the flour and breadcrumbs with salt and pepper. Mix the Parmesan and parsley into the breadcrumbs. Season each breast with salt and pepper on both sides. Dredge a breast in the flour. Shake off any excess flour and then dip it into the egg mixture and then into the breadcrumbs. Once the breast is in the breadcrumbs, use your hand to scoop the crumbs up and over the meat and press to make sure it adheres and evenly coats the breast. Repeat the breading procedure with the remaining pieces.


  4. Heat a 12-inch skillet over medium-high heat and add 1/4 cup blended oil. When the oil is hot, add two of the breaded pieces to the pan. Cook for 3 minutes or until golden brown, then turn the breast gently with tongs and cook for another 3 to 5 minutes on the other side. Add 2 tablespoons of butter, and when the butter is almost brown, drizzle the juice of 1 lemon into the pan and over the crisp chicken. Remove the pieces and place them on a sheet pan. Drizzle the pan drippings over the breast. Repeat with the remaining 1/4 cup oil, remaining chicken breast, remaining 2 tablespoons butter and remaining lemon juice.
  5. For the salad: In a medium bowl, combine the arugula or spring mix, radishes, olives, onion slices and tomatoes. Squeeze the lemon over the salad, add salt and pepper and toss. Drizzle with extra virgin olive oil and toss again.
  6. To serve: Place a chicken breast on a serving plate and add some salad on top. Finish with some Parmesan shavings. Repeat with remaining chicken breast, salad and Parmesan and serve.
  • Click to share on Pinterest (Opens in new window) Pinterest
  • Click to share on Facebook (Opens in new window) Facebook
  • Click to email a link to a friend (Opens in new window) Email
  • Click to print (Opens in new window) Print
  • Click to share on X (Opens in new window) X
  • Click to share on Tumblr (Opens in new window) Tumblr
  • More
  • Click to share on Reddit (Opens in new window) Reddit

Filed Under: Poultry Tagged With: chicken milanese, milanese

Excellent Baked Chicken Meatballs with Broccoli Pesto Pasta

October 18, 2019 by Becky Spoon

Baked Chicken Meatballs with Broccoli Pesto Pasta

These recipe for Baked Chicken Meatballs with Broccoli Pesto Pasta is so, so good! Sometimes it seems ground chicken recipes aren’t flavorful, but I tell you, these meatballs are loaded with flavors like the Italian seasoning I used and the parmesan cheese! They are moist, a little salty from the parmesan and they have a great texture.

Baked Chicken Meatballs with Broccoli Pesto Pasta

I saw this dish on Instagram by The Modern Proper blog. My dish is a little different because I substituted the fennel seeds she used in her meatballs with Italian Seasonings. I couldn’t find my fennel seeds she used in her recipe so the Italian Seasonings worked perfectly. That’s what cooking is about! Taking a recipe and substituting what you have.

Baked Chicken Meatballs with Broccoli Pesto Pasta

The Modern Proper’s recipe calls for a roasted broccoli pesto with fresh basil. I didn’t have fresh basil and I didn’t want to drive 30 miles to get fresh basil, but I did have broccoli and a jar of basil pesto. I roasted my broccoli, put it in my food processor, pulsed it, then added my jar of pesto. I added a little more parmesan cheese, pulsed a couple of times and it’s a perfect broccoli pesto! I used a jar of pesto from my favorite HEB store in my area. Here’s the link for the brand I used Mezzetta Pesto Basil: https://www.heb.com/product-detail/mezzetta-basil-pesto/1491629 however, there are many great brands of pesto.

Baked Chicken Meatballs with Broccoli Pesto Pasta

Want another meatball recipe? Try my Bucatini and Meatballs. Here’s the link for the recipe: https://the2spoons.com/bucatini-and-meatballs/.

I can’t wait for you to try this recipe!

Baked Chicken Meatballs with Broccoli Pesto Pasta

Print Recipe
Course: dinner, Lunch, Main Course
Cuisine: Italian
Ingredients Method

Ingredients
  

For the Meatballs
  • 2 lbs ground chicken
  • 1 cup fresh soft breadcrumbs
  • 2 large eggs, beaten
  • 1 tbsp Italian Seasoning
  • 1 cup finely grated parmesan cheese
  • 4 cloves garlic, minced or grated on a box grater
  • 1 tsp salt
For the Broccoli Pesto Pasta
  • 1 large head of broccoli, roughly chopped
  • extra virgin olive oil for coating the broccoli
  • 1 8 oz jar pesto of your choice (I used Mezzetta Branc)
  • 1/4 cup parmesan cheese
  • extra virgin olive oil
  • 1 lb spaghetti or similar pasta

Method
 

For the Broccoli Pesto
  1. Preheat the oven to 400 degrees. Place on a sheet pan and toss with olive oil. Roast until the edges begin to crisp and the inside of the broccoli is tender, about 30 minutes.
  2. Place a pot of water with salt on the burner and bring to a boil. Add the pasta and cook until your desired doneness. In a food processor, pulse the roasted broccoli until roughly ground. Add the jar of pesto and the parmesan cheese. Pulse several times to combine and add a little extra virgin olive oil adding more if you want a thinner consistency.
For the Meatballs
  1. Preheat the oven to 450 degrees F. In the same bowl, use your hands to combine the ground chicken, salt, eggs, Italian seasoning, grated parmesan cheese, garlic and bread crumbs. Form into uniform meatballs, about 2 tablespoons each and arrange on a baking sheet.
  2. Roast the meatballs for 15 minutes on center rack. Turn the heat to 500 degrees F and brush the meatballs with olive oil. Cook for another 5 minutes.
  3. In a skillet or separate pan, remove the pasta from the water reserving the pasta water. Add a little pesto at a time, along with some pasta water, continuing adding pesto until the desired amount is reached. Serve topped with the Meatballs and more parmesan cheese. Bon Appetit!
  • Click to share on Pinterest (Opens in new window) Pinterest
  • Click to share on Facebook (Opens in new window) Facebook
  • Click to email a link to a friend (Opens in new window) Email
  • Click to print (Opens in new window) Print
  • Click to share on X (Opens in new window) X
  • Click to share on Tumblr (Opens in new window) Tumblr
  • More
  • Click to share on Reddit (Opens in new window) Reddit

Filed Under: Pasta, Poultry Tagged With: baked chicken meatballs, broccoli, broccoli pesto, italian, Spaghetti

  • « Go to Previous Page
  • Page 1
  • Page 2
  • Page 3
  • Page 4
  • Page 5
  • Page 6
  • Page 7
  • Go to Next Page »

Primary Sidebar

Categories

  • Appetizer
  • Beans, Lentils, Grains, Rice
  • Beef
  • Bread
  • Breakfast/Brunch
  • Cocktails
  • Dessert
  • Dishes of Mexico, Tex Mex and New Mexico Red and Green Chile
  • Fish/Seafood
  • Ice Cream
  • Pasta
  • Pizza
  • Pork
  • Poultry
  • Salad Dressings
  • Salads
  • Salsas
  • Sandwiches/Burgers/Hot Dogs
  • Sauces, Compound Butters, Condiments
  • Side dish
  • Soups/Stews/Gumbo//Chili
  • Stocks, Broths, Gravies
  • Vegetables

Copyright © 2025 The 2 Spoons on the Foodie Pro Theme

Manage Cookie Consent
We use cookies to optimize our website and our service.
Functional Always active
The technical storage or access is strictly necessary for the legitimate purpose of enabling the use of a specific service explicitly requested by the subscriber or user, or for the sole purpose of carrying out the transmission of a communication over an electronic communications network.
Preferences
The technical storage or access is necessary for the legitimate purpose of storing preferences that are not requested by the subscriber or user.
Statistics
The technical storage or access that is used exclusively for statistical purposes. The technical storage or access that is used exclusively for anonymous statistical purposes. Without a subpoena, voluntary compliance on the part of your Internet Service Provider, or additional records from a third party, information stored or retrieved for this purpose alone cannot usually be used to identify you.
Marketing
The technical storage or access is required to create user profiles to send advertising, or to track the user on a website or across several websites for similar marketing purposes.
Manage options Manage services Manage {vendor_count} vendors Read more about these purposes
Preferences
{title} {title} {title}