• Skip to primary navigation
  • Skip to main content
  • Skip to primary sidebar

A cook named Rebecca

  • Home
  • Favorite Cookbooks
  • Recipes
  • Travel
You are here: Home / Home

love this chocolate peanut butter pie.

November 7, 2021 by Becky Spoon

Chocolate Peanut Butter Pie
Please follow and like us:
onpost_follow
fb-share-icon
Tweet
Jump to Recipe
Chocolate Peanut Butter Pie

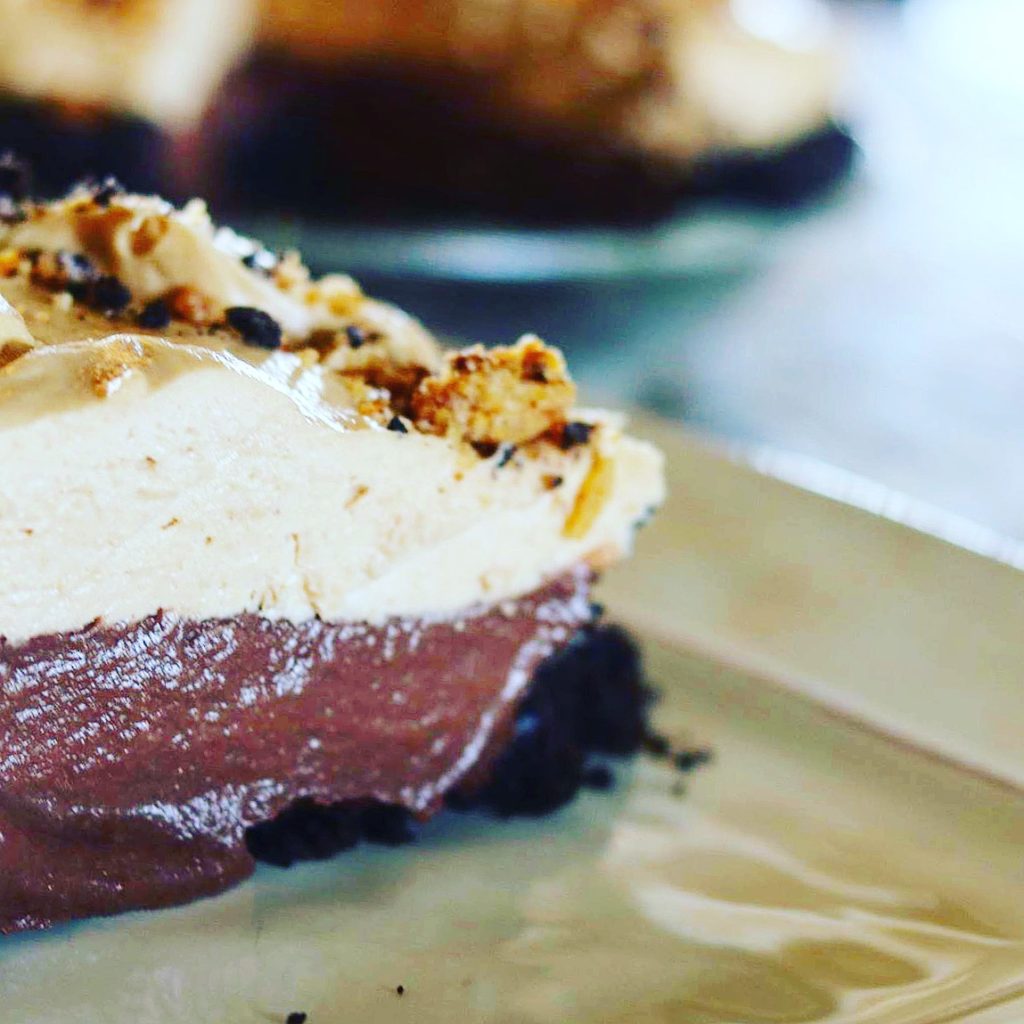
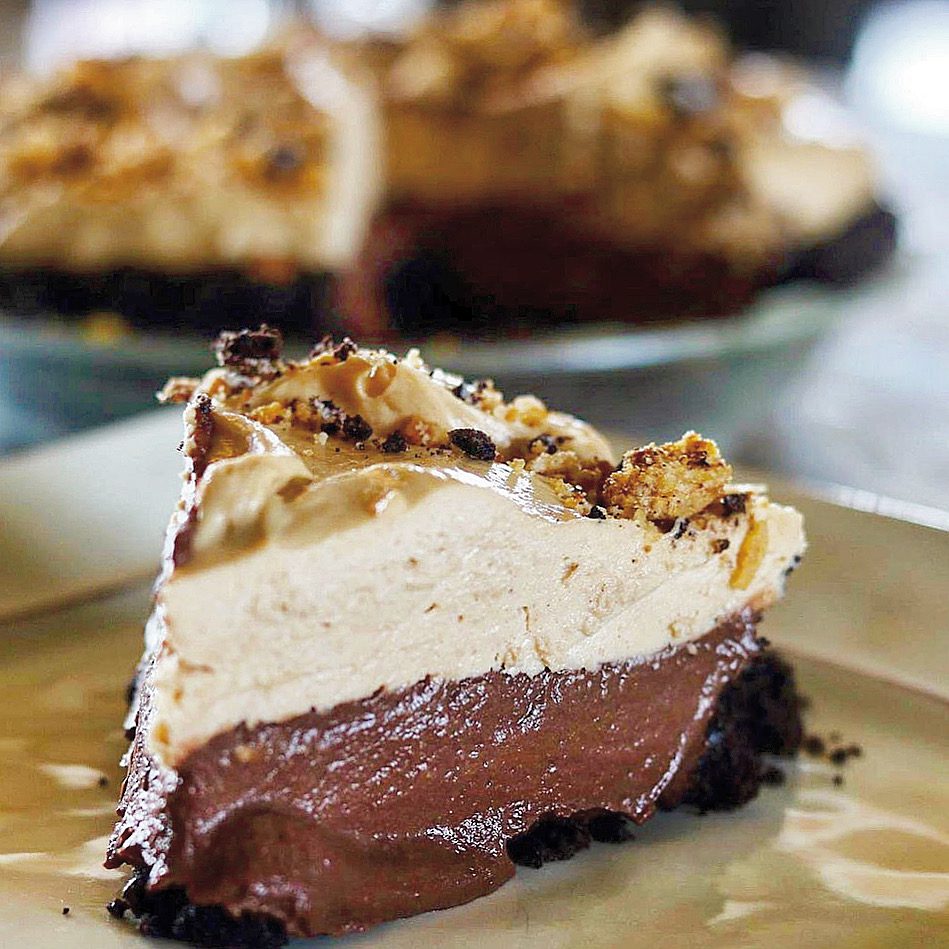
Chocolate? Peanut Butter? Potato Chips! Heavy Cream? Yes, potato chips! What more could you want? This Chocolate Peanut Butter Pie is that perfect pie for the chocolate and peanut butter lover. Especially chocolate because other than the pudding, there is an Oreo cookie crust.. more chocolate!

Chocolate Peanut Butter Pie

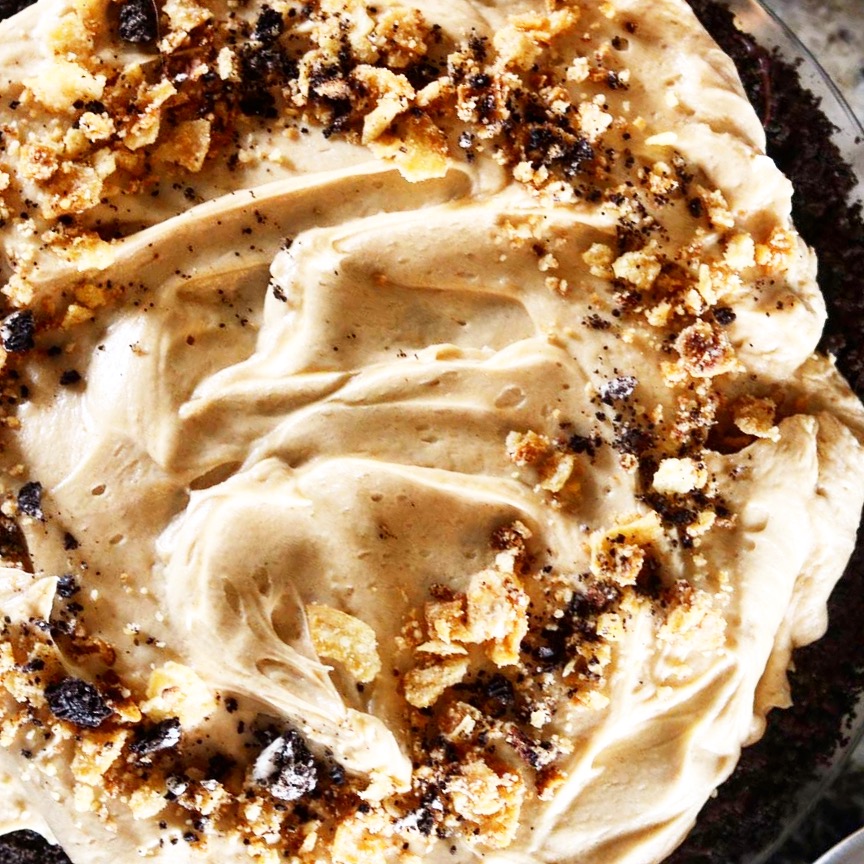
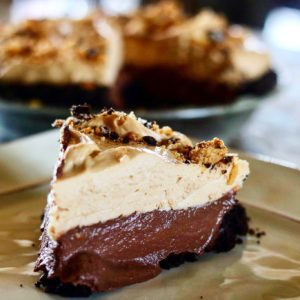
This pie is salty and sweet from the kettle chips on top! There is an Oreo and butter crust that has a chocolate seal on it, then loaded with a velvety chocolate pudding, then a peanut butter mousse! Yes!

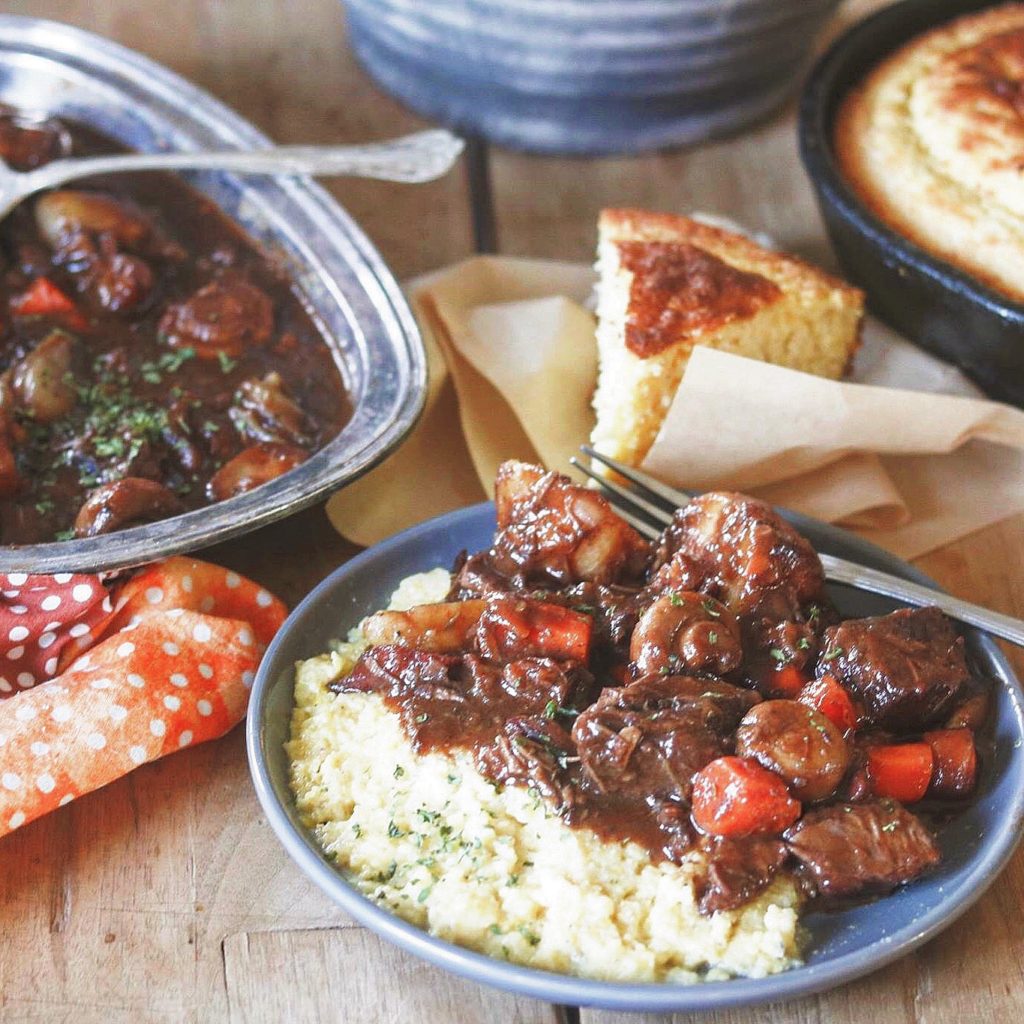
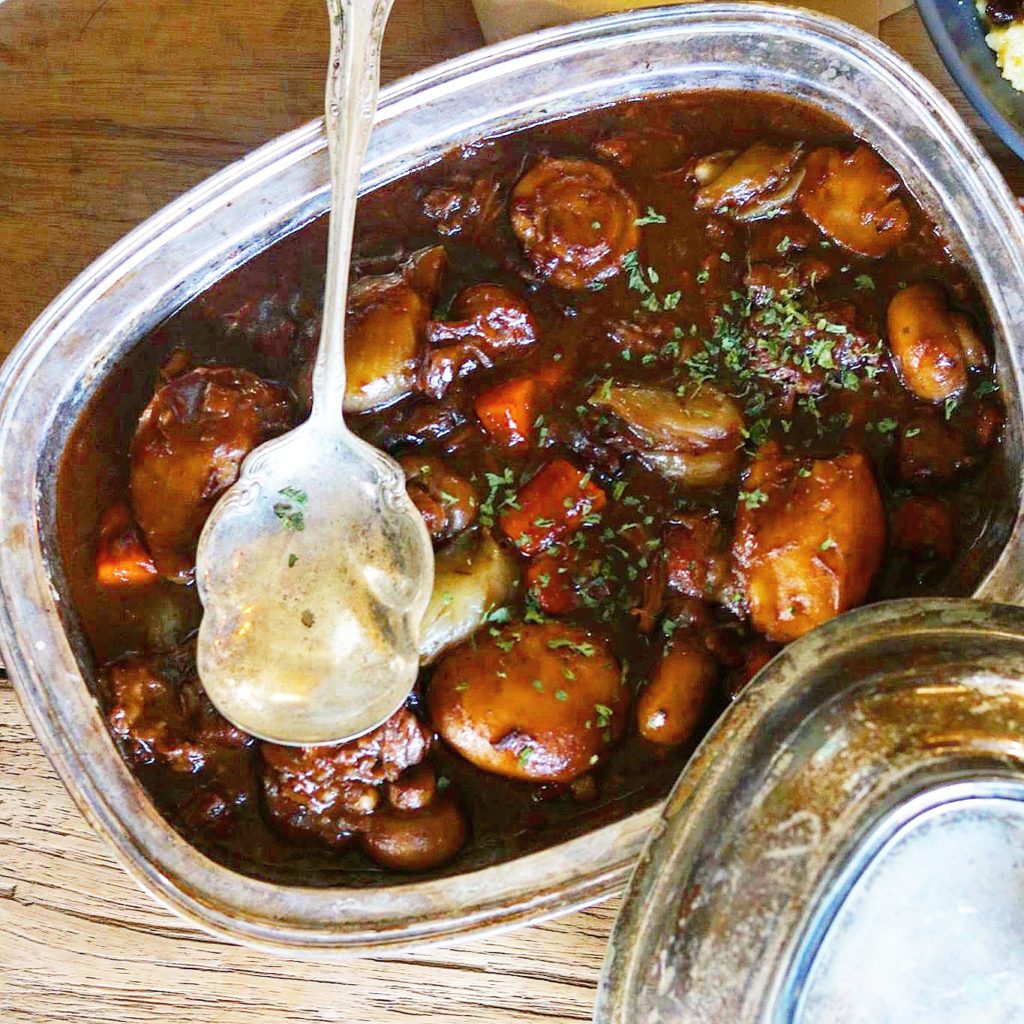
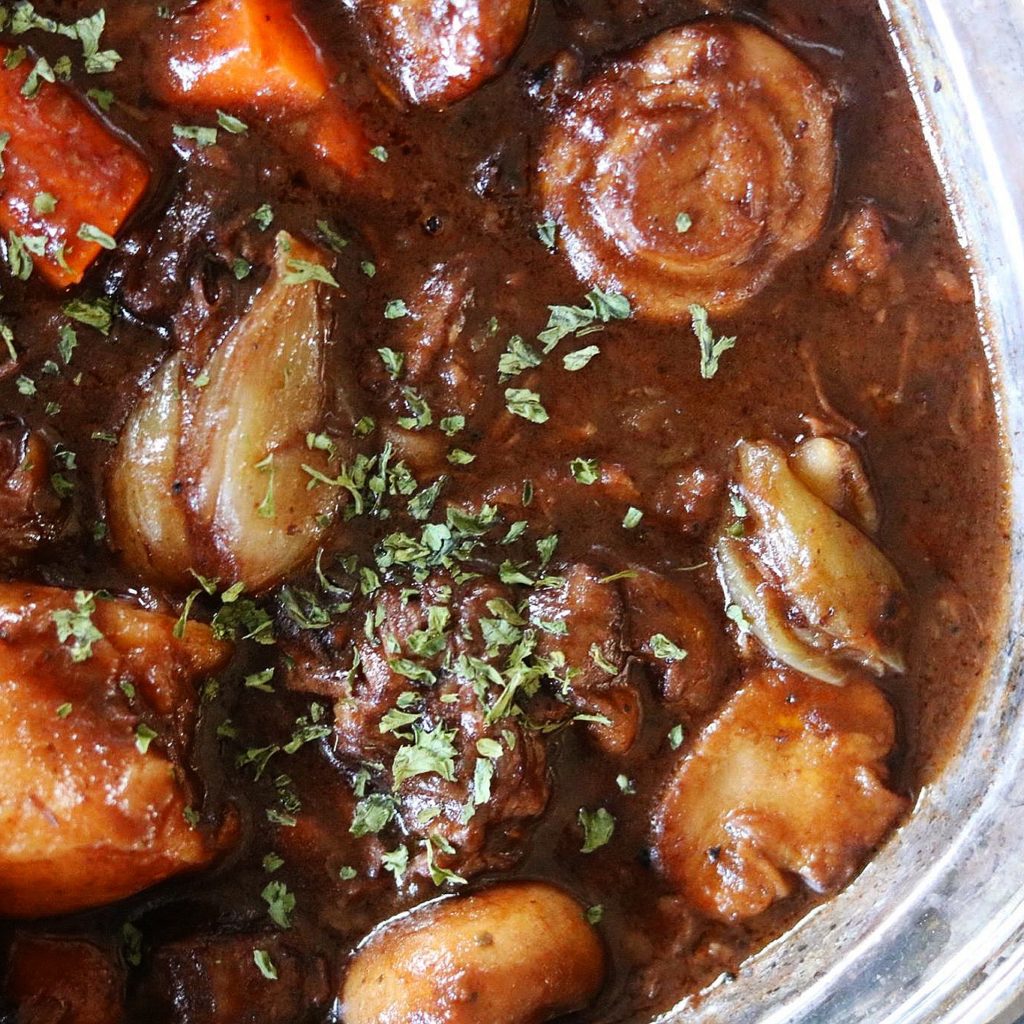
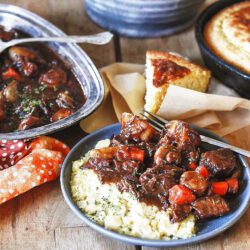
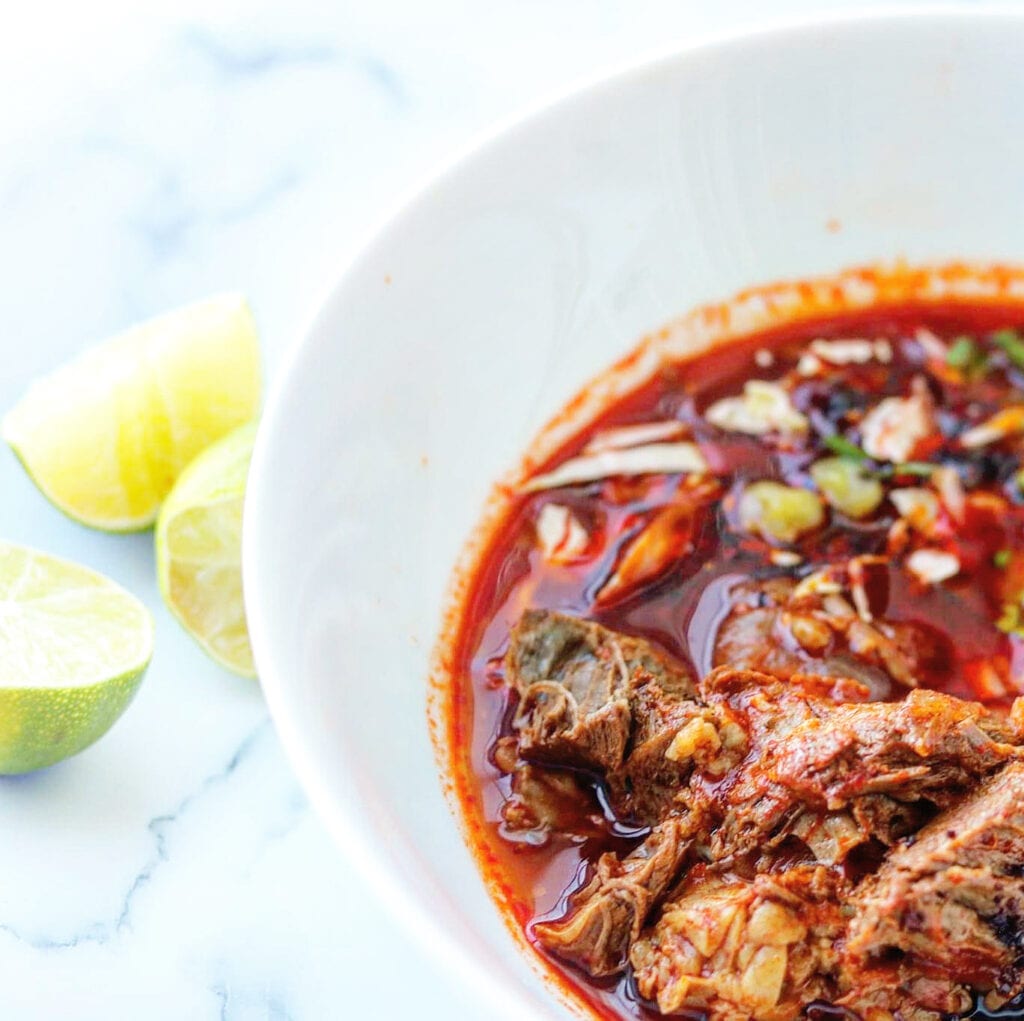
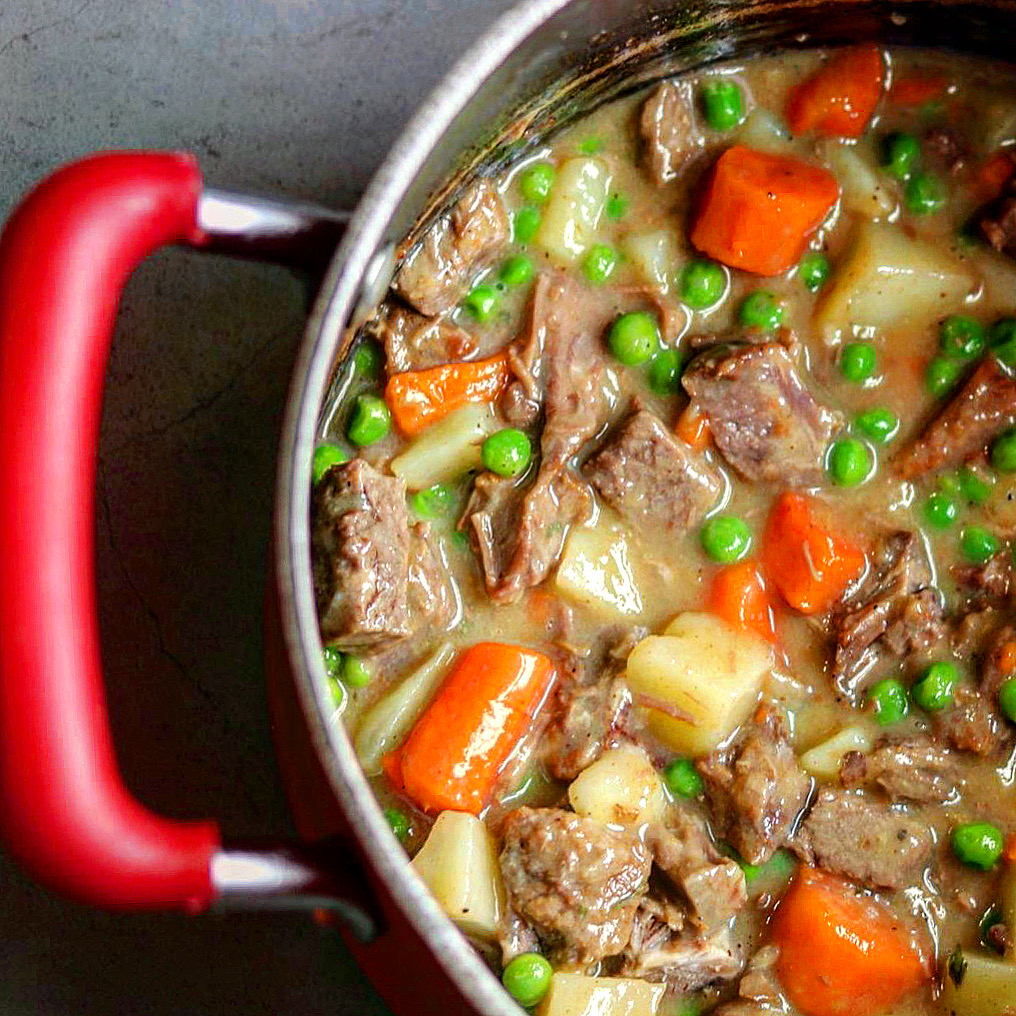
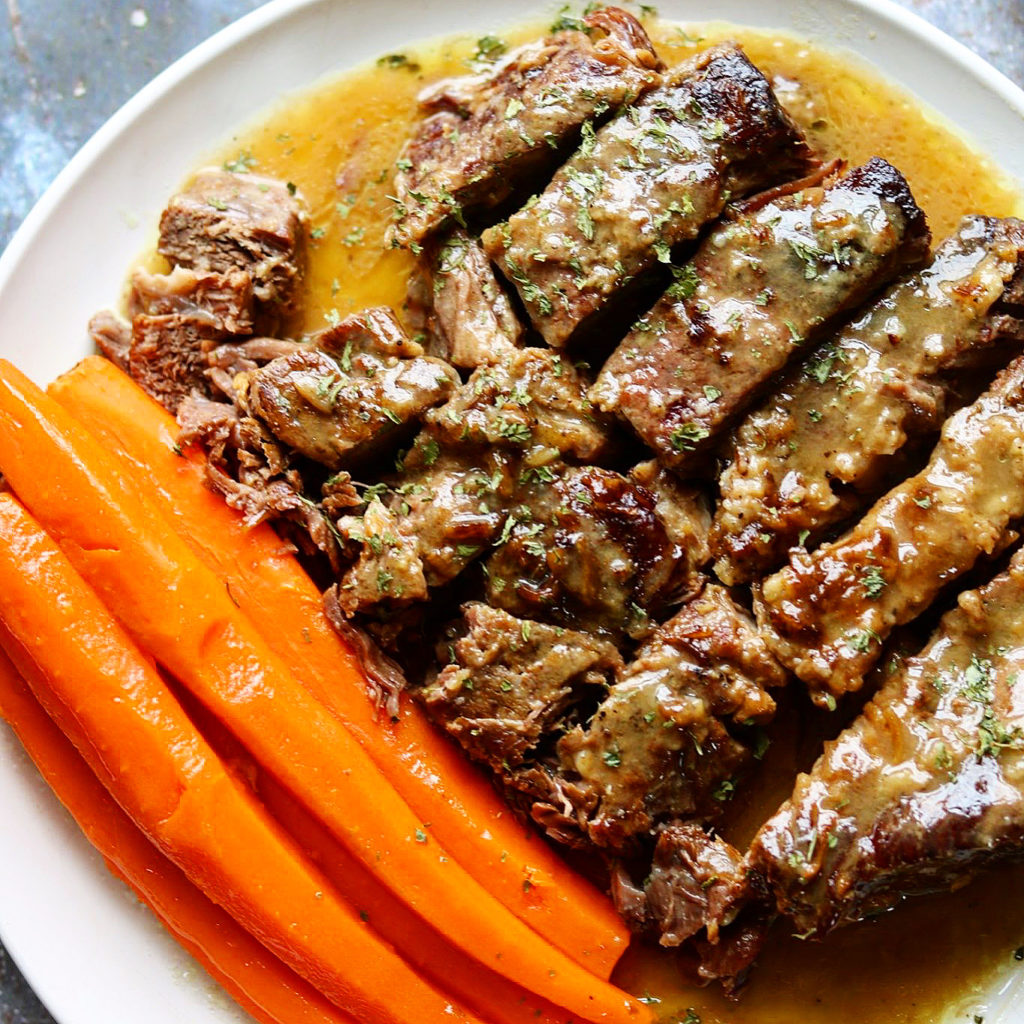
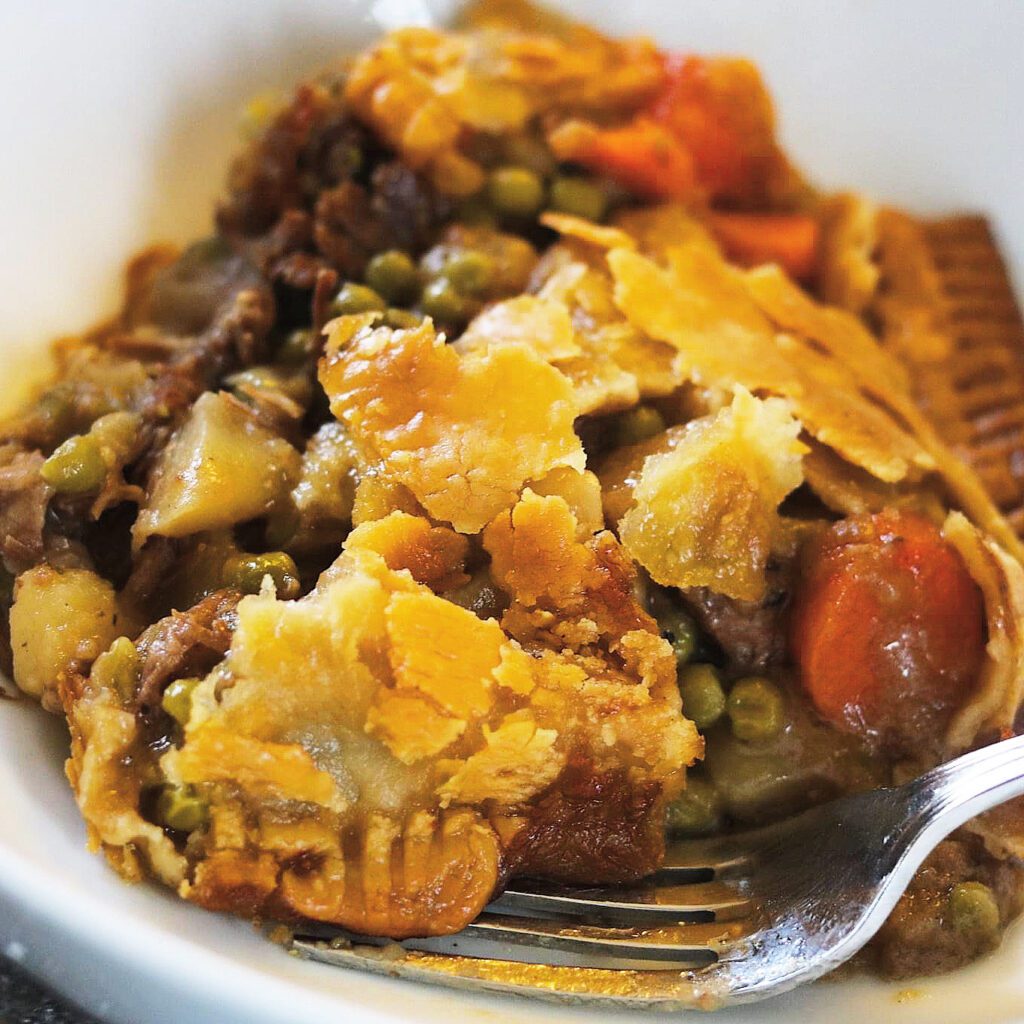
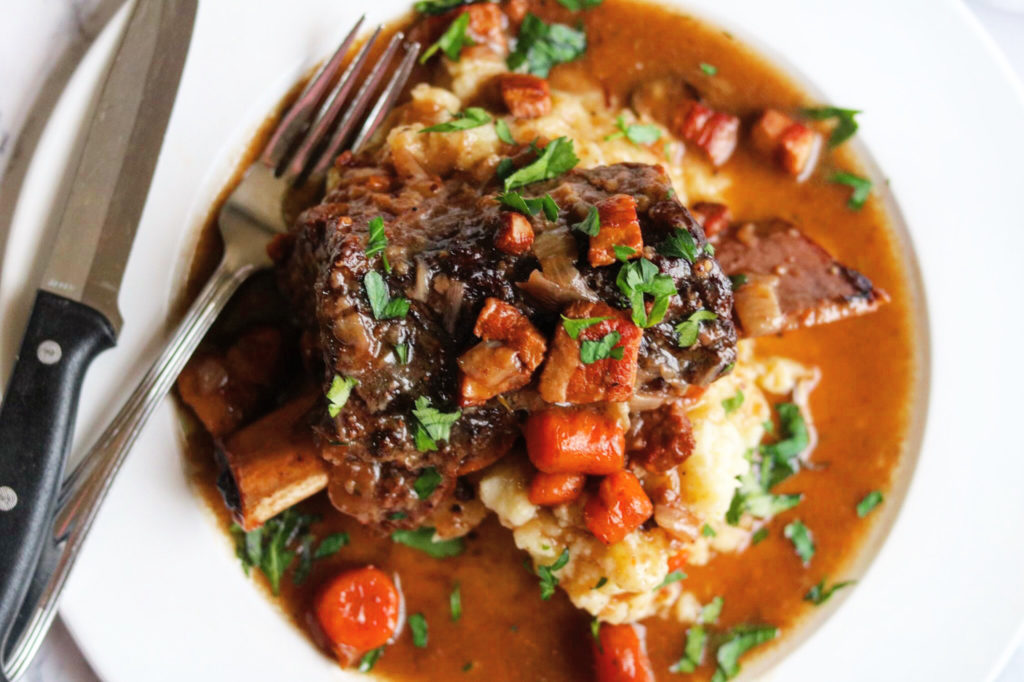
This dessert will be perfect with my Slow braised short ribs recipe!https://the2spoons.com/amazing-slow-braised-beef-short-ribs/

Braised Beef Short Ribs

love this chocolate peanut butter pie.

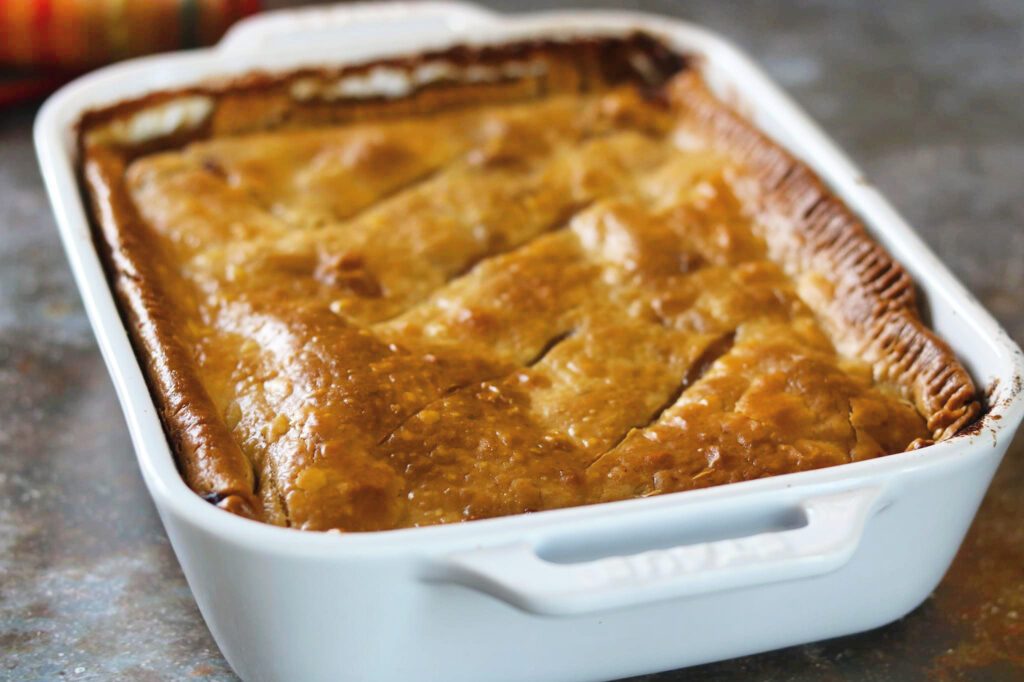
I love these clear pie plates that are perfect to bake this pie in. https://amzn.to/3hTzYev

I’ve had similar forever and use them for all pies savory and sweet.

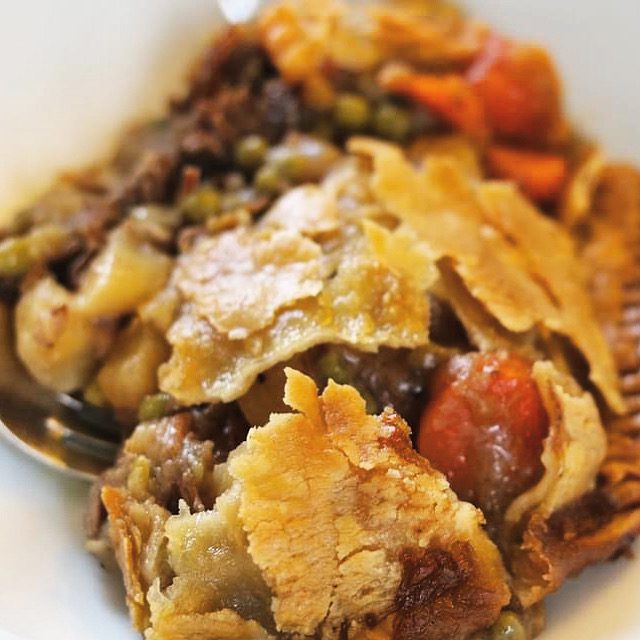
The pie has a few steps but it is definitely worth it! Enjoy!

Chocolate Peanut Butter Pie

Chocolate Peanut Butter Pie

5 from 1 vote
Print Recipe Pin Recipe
Course Dessert
Cuisine American

Ingredients
  

For the Oreo Crust

  • 2 Cups Finely ground Oreo cookies (about25)
  • 4 Tbsp Butter, melted
  • 1/4 Cup Semi sweet chocolate, melted

For the Potato Chip Topping

  • 1/3 Heaping cup kettle potato chips, crushed
  • 3 Tbsp Flour
  • 2 1/2 Tsp Granulated sugar
  • Pinch of salt
  • 2 Tbsp Butter, melted

Chocolate Pudding

  • 1/2 Cup Sugar
  • 1/4 Cup Corn starch
  • 1/4 Tsp Salt
  • 1/4 Cup Unsweetened cocoa powder
  • 3 Egg yolks
  • 2 1/2 Cups Whole milk
  • 4 Oz Bittersweet chocolate, chopped
  • 2 Tbsp Butter
  • 1/2 Cup Powdered sugar
  • 1 Tsp Vanilla

Peanut Butter Mousse

  • 1 Cup Heavy Whipping Cream
  • 8 Oz Cream cheese, room temperature
  • 1 Cup Creamy Peanut Butter
  • 1/2 Cup Powdered Sugar
  • 1 Tsp Vanilla

Instructions
 

For the Oreo Crust

  • Run your Oreos through a food process until finely ground. Mix it in a bowl with the melted butter until completely moistened.
    Pour it into a 9 inch pie dish and press it into the bottom and up the sides. Place your pie crust in the fridge for at least 1 hour to set.
    Once set, take your melted chocolate and spread it in an even and thin layer on the bottom of your crust. This creates a barrier between the pudding and the crust so it doesn’t get soggy. Place it back in the fridge for 30 minutes for the chocolate to set.

For the Potato Chip Topping

  • Preheat the oven to 325F and line a baking sheet with parchment paper. Crush up your potato chips in a ziplock bag. You want it to be mostly small pieces about the size of old fashioned oats.
    Mix together all the ingredients in a bowl and spread it even on your baking sheet. Bake for 10 minutes. It will still look pretty pale when it’s done so just take a fork to it to make sure it crumbles. That’s when you know it’s ready.
    Let it sit out at room temperature to cool then transfer to an air tight container until you’re ready to top your pie. Do not put it in a closed container when it’s hot because it will get soggy and don’t put it in the fridge.

Chocolate Pudding

  • In a medium saucepan, whisk together the dry ingredients (sugar, cornstarch, salt, and cocoa powder).
    In a separate bowl, whisk together the milk and egg yolks.
    Mix this into the dry ingredients and bring to a boil over medium high heat, stir constantly. It will be liquid up until it reaches a boil. At that point it should get pretty thick but cook for about one or two minutes longer then take it off the heat.
    Whisk in the chocolate and then the butter and vanilla.
    Pour into your cooled crust and spread it even. Let it sit out for 45 minutes then move it to the fridge. Cover in plastic wrap and press it to the surface of the pudding so you don’t get a skin. Refrigerate for at least 2 hours or until the pudding is somewhat firm to the touch.

Peanut Butter Mousse

  • When your pudding is ready, make the peanut butter mousse. Start by creaming together your room temperature cream cheese and peanut butter. Once combined, mix in the powdered sugar and vanilla.
    In a separate bowl, whisk your heavy cream on high until it forms soft peaks (3-5 minutes).
    Scoop about ⅓ of the whipped cream into the peanut butter mixture and fold it in. Once it’s almost combined, add in the rest of the whipped cream and continue to fold until it’s fully combined.
    Spread this over top the pudding layer of your pie. You can also make little swirls with the back of a spoon. Pop the pie in the fridge for another hour to set.
    Before serving, crumble the potato chips all over the top with as much or as little as you like. I recommend being a little heavy handed because the salty crunch helps to balance out the sweetness of the pie. You can also add more crushed Oreos.
    Serve chilled or at room temperature but store it in the fridge. Enjoy!
Keyword chocolate, chocolate peanut butter

Chocolate Peanut Butter Pie

Chocolate Peanut Butter Pie
Jump to Recipe
  • Click to share on Pinterest (Opens in new window) Pinterest
  • Click to share on Facebook (Opens in new window) Facebook
  • Click to email a link to a friend (Opens in new window) Email
  • Click to print (Opens in new window) Print
  • Click to share on X (Opens in new window) X
  • Click to share on Tumblr (Opens in new window) Tumblr
  • More
  • Click to share on Reddit (Opens in new window) Reddit

Filed Under: Dessert Tagged With: Chocolate, chocolate peanut butter pie, chocolate pudding, dessert

Boeuf Bourguignon – Beef Stew in Red Wine with Bacon, Onions, and Mushrooms

November 6, 2021 by Becky Spoon

Please follow and like us:
onpost_follow
fb-share-icon
Tweet

I love a good beef stew, especially when it’s cold outside! This is from Julia Child’s Beef Stew with my tweeks. This stew is rich from the red wine and cooking it in the oven that Intensifies the flavors.

I like my stew with polenta especially when it’s thick like this stew, or with a slice of my buttermilk cornbread.

This is a must make during cold days to come! Leftovers are even better!! Bon Appétit!

Beef Stew in Red Wine with Bacon, Onions and Mushrooms

Print Recipe Pin Recipe
Course dinner, Main Course
Cuisine American
Servings 6 servings

Ingredients
  

  • 6 Oz Bacon with rind or Salt pork
  • 1 Tbsp Olive oil or cooking oil
  • 3 Lbs Stewing beef (I used chuck roast)
  • 1 Onion, sliced
  • 1 Carrot, sliced
  • Salt and pepper
  • 2 Tbsp Flour
  • 3 Cups Red wine
  • 3 Cups Beef stock (more as needed)
  • 1 Tbsp Tomato paste
  • 2 Garlic cloves, mashed
  • 1/2 Tsp Thyme
  • Bay leaf, crumbled
  • The blanched pork rind
  • 18-24 Small white onions
  • 6-8 Small to medium red potatoes

Instructions
 

  • Cut the rind off the bacon or salt pork and cut into strips 1/4 x 1 1/2 inch long. Do the same with the pork itself. 
  • Simmer the rind and salt pork in water for 10 minutes. Drain and pat dry. 
  • Preheat the oven to 450 degrees. Sauté the bacon in the oil over medium heat for 2 or 3 minutes to brown lightly. Remove and set aside. 
  • Heat the same oil and bacon fat still in the pan until hot and add the beef that you have patted dry a few pieces at a time until nicely browned on all sides. Remove to the dish with the bacon . 
  • In the same fat brown the onion and carrot. 
  • Return the beef and bacon to the pan and add the flour with salt and pepper. 
  • Set the casserole uncovered in the oven for 4 minutes. Toss the meat and return for 4 minutes. (This browns the flour and makes a light crust). Remove the casserole and turn the oven to 325. 
  • Stir in the wine, and stock to barely cover the meat. Add tomato paste, garlic, and herbs. Bring to a simmer on top of the stove, then cover and set back in the oven. Cook for 2 1/2 to 3 hours until fork tender. 
  • While the beef is cooking prepare the onions and mushrooms. 
  • When the meat is tender, add the onions, potatoes  and mushrooms and lightly combine. Sprinkle with chopped parsley and serve over polenta or just with a piece of cornbread. 

For the onions

  • Melt a couple of tablespoons of butter along with 1-2 tablespoons oil in a skillet and add the trimmed onions. Sauté for about 10 minutes. Add about 1/2 cup beef stock or broth, a pinch of salt and pepper and a little thyme. Cover and simmer for 30-40 minutes until tender. 

For the mushrooms

  • Place a skillet over high heat with 2 tablespoons butter and 1 tablespoon oil. Toss and shake the pan for 4-5 minutes. When the moisture is released the oil will appear again and the mushrooms will begun to brown. Remove from heat when they’ve lightly browned: 

For the potatoes

  • Peel a small strip around each potato. Place in a saucepan covered with water and a little salt. Bring to a boil and cook until fork tender. 
Keyword beef, stew,
  • Click to share on Pinterest (Opens in new window) Pinterest
  • Click to share on Facebook (Opens in new window) Facebook
  • Click to email a link to a friend (Opens in new window) Email
  • Click to print (Opens in new window) Print
  • Click to share on X (Opens in new window) X
  • Click to share on Tumblr (Opens in new window) Tumblr
  • More
  • Click to share on Reddit (Opens in new window) Reddit

Filed Under: Soups/Stews/Gumbo//Chili Tagged With: beef stew, boeuf bourguignon, Stew

delicious grilled redfish with shrimp lemon butter sauce

October 31, 2021 by Becky Spoon

grilled redfish with shrimp lemon butter sauce
Please follow and like us:
onpost_follow
fb-share-icon
Tweet
Jump to Recipe
grilled redfish with shrimp lemon butter sauce

This dish of grilled Redfish with shrimp lemon butter sauce is delicious! Gulf Coast Redfish is a favorite of mine. The first time I had it was in New Orleans at the restaurant, Redfish Grill on Bourbon Street! I had the Wood Grilled Redfish & Louisiana Lump Crabmeat! It was spectacular. Ever since then I try to recreate that dish!

Not being on the coast, redfish are not always available, but the other day I was at my local HEB and they had a whole Redfish. I certainly am not expert in fileting a fish so I may not buy a whole fish again, but I was not going to pass up the opportunity to have redfish. I also bought head on shrimp that I used to make Shrimp and Grits, so this was the perfect dish for the shrimp that I had left over. No crab meat, but the shrimp worked perfectly.

grilled redfish with shrimp lemon butter sauce

Here’s the link for the Shrimp and Grits! https://the2spoons.com/awesome-shrimp-and-grits/.

delicious grilled redfish with shrimp lemon butter sauce

grilled redfish with shrimp lemon butter sauce

The fish is brushed with canola or vegetable oil and sprinkled with creole seasonings. I make my own and keep it with my other spices. I found these little plastic jars that are perfect for spices. https://amzn.to/3ekqMxi

If you don’t want to make the seasoning mix, you can use a store bought creole seasoning. There’s many out there. I keep both of these on hand:

https://amzn.to/2WirvsC.

Same with the shrimp stock. Knorr has a shrimphttps://amzn.to/30clVZN bullion that you can use for your fish stock or a bottle of clam juice would work beautifully! This is the Knorr shrimp bullion: https://amzn.to/30clVZN

Here is a link for a good clam juice you can find at most stores: https://amzn.to/2Wk9yKi

You can grill this outside on your charcoal grill, or gas grill. I was kind of in a hurry and I used my Lodge Grill to cook it. It’s great for those grill marks. Here’s a link: https://amzn.to/3eq48DC.

This is great for so many things! Pancakes, burgers, vegetables, just to mention a few. Just be sure to oil it before you place fish on because the fish will stick. I usually just put oil on a paper towel and brush on a hot grill before adding my fish.

Here’s the recipe for this delicious redfish! Enjoy!

grilled redfish with shrimp lemon butter sauce

grilled redfish with shrimp lemon butter sauce

Print Recipe Pin Recipe
Course dinner, Lunch, Main Course
Cuisine American
Servings 2 servings

Ingredients
  

Basic Creole Spices (Makes 1/2 cup)

  • 2 tbsp celery salt
  • 1 tbsp sweet paprika
  • 1 tbsp coarse sea salt
  • 1 tbsp freshly ground black pepper
  • 1 tbsp garlic powder
  • 1 tbsp onion powder
  • 2 tsp cayenne pepper
  • 1/2 tsp ground allspice

For the Basic Shrimp Stock

  • 1/4 cup canola oil
  • 1 onion, coarsely chopped
  • 1 stalk celery, coarsely chopped
  • 4 cloves garlic, crushed
  • 1 lb shrimp shells and heads
  • 1 bay leaf
  • 1 sprig fresh thyme

For the Shrimp Lemon Butter Sauce

  • 1 tbsp red onion
  • 4 tbsp butter, divided
  • juice of 1 lemon
  • 1/2 cup shrimp stock or other seafood stock
  • 6 shrimp
  • 1/2 tsp creole seasoning
  • pinch of cayenne pepper

For the Redfish

  • 2 Redfish filets
  • oil for brushing on each side and the grill
  • creole spices to sprinkle on each side
  • Shrimp Lemon Butter Sauce

Instructions
 

Basic Shrimp Stock

  • Heat canola oil in a large pot over moderate heat. Cook the onions, celery, carrots, leeks, and garlic, stirring often, until they are soft but not brown, about 3 minutes. Add the shrimp shells , the bay leaf, thyme, peppercorns, and 3 quarts of water. Increase the heat to high and bring to a boil. Immediately reduce the heat to low and gently simmer, skimming any foam that rises to the surface, until the stock has reduced by half, about 2 hours. Strain through a fine sieve into a container with a cover. Allow the stock to cool. Cover and refrigerate, then skim off the fat. Freeze the stock in small batches to use later. 

Creole Spices

  • Combine all ingredients and store in an airtight container.

For the Shrimp Lemon Butter Sauce

  • Make sure you have cleaned your shrimp by deveining. Pat the 6 shrimp dry and sprinkle with the creole spices. Heat 2 tablespoons butter in a saucepan. Add the shrimp and let them cook for about 2 minutes on each side and remove, They won't necessarily be done, but you will add them back in later. Remove and set aside.
  • Add the onion to the same pan and sauté until translucent. Add the juice of one lemon, the 1/2 cup shrimp sauce or seafood stock. Simmer for a couple of minutes to cook down. Add the other 2 teaspoons butter, season with salt and cayenne pepper. When done, add the shrimp back in and cook for about another minute.

For the Redfish

  • Prepare your grill of choice. Pat the filets dry. Add a little vegetable oil or canola oil to each side of the fish and season with the creole spices. When the grill is ready, brush with a little oil that is on a paper towel. You want to oil the grill so that your fish won't stick.
  • Grill the fish about 3 minutes on the first side. Carefully turn over and cook an additional 3 minutes.
  • Place each filet on a plate, top with 3 shrimp each, and spoon the sauce around and over the fish! Serve with additional lemon.
Keyword Basic Shrimp Stock, buttermilk, grilled fish, grilled redfish with shrimp lemon butter sauce, gulf coast redfish, lemon, lemon butter sauce, redfish
  • Click to share on Pinterest (Opens in new window) Pinterest
  • Click to share on Facebook (Opens in new window) Facebook
  • Click to email a link to a friend (Opens in new window) Email
  • Click to print (Opens in new window) Print
  • Click to share on X (Opens in new window) X
  • Click to share on Tumblr (Opens in new window) Tumblr
  • More
  • Click to share on Reddit (Opens in new window) Reddit

Filed Under: Fish/Seafood Tagged With: butter, grilled redfish, gulf coast redfish, lemon, redfish

So Yummy – Simple Beer Can Cornish Hens

October 28, 2021 by Becky Spoon

Beer Can Cornish Hen
Please follow and like us:
onpost_follow
fb-share-icon
Tweet
Beer Can Cornish Hen

These Beer Can Cornish Hen recipe is so YUMMY and simple! I marinated the hens overnight in the spicy rub, then finished then baked them in the oven! No need to light the grill if you don’t want to, because they work so well in the oven!

I was kind of watching either the Cooking Channel or Food Network the other day and happened to pay attention when I saw this recipe on Burgers, Brew and Que and it happened to be a restaurant in Dallas, the Rustic. Thought this looked so good, so I wrote the recipe down and the rest is history!

The spice rub has brown sugar, salt, ancho chile powder, smoked paprika, cumin, garlic powder and onion powder. After rubbing the hens on both sides, every nook and cranny, I stored them in the refrigerator overnight to allow those flavors to penetrante them. Then I poured about half of each beer and placed a hen on each can. Then baked them in a 350 degree oven until internal temperature reached 165!

Beer Can Cornish Hen

If you aren’t familiar with Cornish Hens, they are usually in the freezer section of your grocery store unless you are shopping at a store like Whole Foods or Central Market that have a fresh meat market where they are readily available. I bought mine from HEB and the brand was Tyson. Here’s a link for the hens I purchased: https://www.heb.com/product-detail/tyson-premium-twin-pack-rock-cornish-game-hen/87724.

Cornish game hen is the USDA-approved name for variety of broiler chicken, produced from a cross between the Cornish and White Plymouth Rock chicken breeds, that is served young and immature, weighing no more than two pounds ready to cook.

Beer Can Cornish Hen

I used a Texas Pilsner from Independence Brewing Company. You know, I live in Texas, I wanted to use a Texas made beer! But you can use any beer.

I served this with my Gruyere Au Gratin Potatoes. That was an excellent side dish for this recipe because they are so cheesy and the potatoes just soaked up the juices from the sauce on this chicken. Here’s the link for the potatoes if you want to serve them too: https://the2spoons.com/best-cheesy-au-gratin-potatoes/.

So Yummy – Simple Beer Can Cornish Hens

Here’s the easy recipe! Hope you make these.

Beer Can Cornish Hen

Beer Can Cornish Hen

Print Recipe Pin Recipe
Course dinner, Lunch, Main Course, mexican
Cuisine American, Mexican
Servings 2 servings

Ingredients
  

For the Cornish Hen and Dry Rub

  • 2 Cornish Hens
  • 2 tbsp light brown sugar
  • 2 tbsp salt
  • 1 1/2 tbsp ancho chile powder
  • 1 tbsp hot smoked paprika
  • 1 tsp ground cumin
  • 1 tsp garlic powder
  • 1 tsp onion powder
  • 2 8 oz or 12 oz beer of your choice, I used a Texas Pilsner

For the Sauce

  • The remainder of the beer after cooking the hens
  • 1/2 stick butter at room temperature
  • 1 tsp ancho chile powder
  • 1 tbsp minced cilantro
  • 2 tsp fresh squeezed lime juice
  • salt and pepper to taste

Instructions
 

  • Add all dry ingredients in a mixing bowl and stir with a wire whisk to evenly combine.  Coat each game hen evenly with the dry rub inside and out, making sure to push rub into any crevices and openings in the hens. Allow the game hens to brine in the refrigerator for 24 hours before cooking.
    Pop the top of each beer can, pour out about half of the beer and place the game hens aboard.  Cook in a 350 degree oven for 40 – 50 minutes, until the hens reach an internal temperature of 165 degrees.  Allow to rest for 10 minutes before serving.
  • You can make the sauce two ways. If you are using a mild beer you can add the butter and lime juice through the beer can opening shaking a little to combine, then pour over the hens and serve topped with cilantro. I used a pretty strong pilsner and it was a little bitter to my liking for a sauce, so I poured the remaining beer content into a skillet, reduced it by about half to get rid of the bitterness, added the butter and lime juice then poured that over each hen before serving.
Keyword beef, tacos, texmex, mexican,, beer can, beer can cornish hen, cornish hen, dinner, lunch, main course, poultry
Cheesy Au Gratin Potatoes
Beer Can Cornish Hen
  • Click to share on Pinterest (Opens in new window) Pinterest
  • Click to share on Facebook (Opens in new window) Facebook
  • Click to email a link to a friend (Opens in new window) Email
  • Click to print (Opens in new window) Print
  • Click to share on X (Opens in new window) X
  • Click to share on Tumblr (Opens in new window) Tumblr
  • More
  • Click to share on Reddit (Opens in new window) Reddit

Filed Under: Poultry Tagged With: yummy beer can cornish hens

this. authentic mexican tortilla soup.

October 22, 2021 by Becky Spoon

Mexican Tortilla Soup
Please follow and like us:
onpost_follow
fb-share-icon
Tweet
Jump to Recipe
Authentic Tortilla soup

Authentic Mexican Tortilla Soup is all about the broth. You cannot create these flavors unless you start with dried chile that you soak in hot water and puree with tomatoes, garlic and onions. Creating authentic dishes from Mexico are so simple and easy after you learn about the dried chile. This soup has ancho and pasilla chile. This is a pasilla chile:

Pasilla Chile
Pasilla Chile

and, this is the Ancho Chile:

Ancho Chile
Ancho Chile

I can find them in my local grocery stores, but if you can’t you can order them online. https://amzn.to/3bvSPdc

and the Pasilla chile https://amzn.to/3lSM7mq

These chiles are part of the “Holy Trinity” for making authentic Mexican food. Here’s an article you may find interesting: http://benitosmexican.com/news/mexican-chili-peppers-holy-trinity/

this. authentic mexican tortilla soup.

Authentic Tortilla Soup

I start this wonderful broth by seeding and removing the stems form the chile. Then I place them in hot water to soften for about 20 minutes. While they are soaking I fry a bunch of tortilla strips that I’ll use to garnish the soup, but I’ll add a handful to the puree . After the chiles have softened I add them to my Nutribullet along with onions, tomato, garlic, some tortilla chips along with some of the water I soaked the chile in and blend to a smooth puree.

If you don’t have a Nutribullet, use your food processor, and process until smooth. The Nutribullet is great though because the puree is so smooth you really don’t have to strain the broth to eliminate any left behind skins from the chile. https://amzn.to/32WK340

Please don’t be reluctant to try using these dried chile recipes. Another recipe I think you will love is this Birria, a Mexican stew using chuck roast and all of these delicious chiles. Here’s the link: https://the2spoons.com/amazing-birria-a-mexican-stew/.

Birria - a Mexican Stew
Birria – a Mexican Stew

this. authentic mexican tortilla soup.

I hope you make this recipe and all of my other recipes. This really is so delicious. I love authentic recipes. Maybe it’s my age. I don’t know. But I really love the flavors created by different cultures.

Just a couple of tips before you start, slice your tortillas the day before and leave on your counter to dry out so they don’t absorb so much oil and have an extra pasilla chile to fry after you fry your tortilla strips to garnish your soup with. Enjoy! This really is delicious.

Authentic Tortilla soup

authentic mexican tortilla soup.

5 from 1 vote
Print Recipe Pin Recipe
Course Main Course
Cuisine Mexican

Ingredients
  

  • 10 corn tortillas, cut into thin strips
  • 1/2 cup oil for frying the tortillas
  • 2 pasilla chiles, one thinly sliced for frying for a garnish
  • 1 ancho chile
  • 3 cloves garlic
  • 1/2 onion
  • 1 lb tomatoes
  • 3 Epazote sprigs (substitute Cilantro if not available)
  • 7 cups chicken stock
  • 3/4 tsp plus more if needed chicken bullion
  • salt to taste

Garnishes

  • 1 avocado, sliced
  • queso fresco, crumbled
  • mexican crema or sour cream
  • 2 chicken breast, shredded or torn in pieces (optional)

Instructions
 

  • Thinly slice your tortilla strips the day before and allow to sit at room temperature to dry out a little.
  • Remove the seeds and stems from the chiles. Bring a small saucepan of water to a boil and remove from the heat. Add the chiles, reserving one to cut into pieces to fry, and allow to soften about 20 minutes.
  • While the chile is softening, add about 1/2 inch of oil to a pan or skillet and in batches quickly fry your tortilla strips until they have browned being careful not to burn. Remove from the oil and drain on paper towels. Add the chile that you sliced into small pieces and quickly fry and remove to prevent overcooking, as it will burn fast. Drain and set aside.
  • Add the tomato, onion, garlic, the chiles, a handful of the fried tortilla strips and some of the water that you soaked the chile in to a blender or to a Nutribullet if using. If you use a blender you will need to strain the sauce. Add the sauce to the oil you fried the tortilla strips and add 3/4 teaspoon chicken bullion. Simmer in the oil for about 20 minutes. Add the chicken stock and the epazote and simmer an additional 20 minutes. Check for seasoning and add more chicken bullion if needed. Cook an additional 10 minutes.
  • To serve: If using chicken breast add a little to the bottom of each bowl, then top with a handful of the tortilla strips. Ladle the broth over the chicken and tortilla strips. Garnish with Queso Fresco, the fried chile, avocado slices or chunks, Mexican Crema or Crème Fraiche and a little cilantro if you like. Enjoy!
Keyword ancho chile, authentic mexican food, corn tortillas, mexican food, pasilla chile, soup, tortilla soup, tortillas
  • Click to share on Pinterest (Opens in new window) Pinterest
  • Click to share on Facebook (Opens in new window) Facebook
  • Click to email a link to a friend (Opens in new window) Email
  • Click to print (Opens in new window) Print
  • Click to share on X (Opens in new window) X
  • Click to share on Tumblr (Opens in new window) Tumblr
  • More
  • Click to share on Reddit (Opens in new window) Reddit

Filed Under: Soups/Stews/Gumbo//Chili Tagged With: authentic mexican food, mexican food, soup, tortilla soup

love this easy beef pot pie.

October 5, 2021 by Becky Spoon

Beef Pot Pie
Please follow and like us:
onpost_follow
fb-share-icon
Tweet
Jump to Recipe
Beef Pot Pie
Beef Pot Pie
Beef Pot Pie
Beef Pot Pie

As promised, another recipe from leftover pot roast! This Beef Pot Pie is the easiest thing ever! I used the leftover chuck roast, the gravy and the carrots to make this pie and it was delicious! I cut the leftover pot roast into small cubes, sliced the large carrots leftover, used the leftover gravy and added some frozen peas and potatoes. Delicious and probably took 10 minutes or so to throw together.

Beef Pot Pie
Beef Pot Pie

So what I did was saute some onions and celery, then added my leftover gravy. If you think you need more gravy you can make some with the brown gravy packages you get in the store or you can add 2 tablespoons flour to two tablespoons oil and make a roux. Then add 2 to 3 cups beef broth. To the gravy mixture, I added my diced potatoes and cooked until they were tender. Then I added some frozen peas, the leftover carrots that I sliced, then the diced pot roast.

easy beef pot pie.

For the crust, I used Pillsbury prepared crust. https://amzn.to/3bfaYL7

There are other choices in the freezer section that may be easier to find. Or, make a homemade crust.

Here’s my beef pot roast recipe that you will need to make this! Remember, this is from the leftover pot roast so you’re getting another meal! https://the2spoons.com/the-best-instant-pot-pot-roast/

Beef Pot Roast
Beef Pot Roast

easy beef pot pie.

Beef Pot Pie
Beef Pot Pie

Here’s the easy recipe for this beef pot pie! You can just adjust for the amount that you have left. Enjoy!

Beef Pot Pie

beef pot pie

Print Recipe Pin Recipe
Course dinner, Lunch, Main Course
Cuisine American
Servings 2 servings

Ingredients
  

  • 1 pie crust
  • 2 cups leftover pot roast, cubed
  • 1/2 cup onion, diced
  • 1 stalk celery, diced
  • 2 tbsp butter
  • 1 1/2 cups diced potatoes
  • leftover roast gravy
  • leftover carrots (If you don't have leftover carrots, add 1-2 carrots thinly sliced with the potatoes and cook until tender)
  • 1 cup frozen peas
  • salt and pepper to taste
  • 1 egg for brushing the top

Instructions
 

  • Preheat oven to 425 degrees. I was making a small pot pie for 2 so I used only one of the pie crust. I rolled it out and measured the bottom of my dish and placed the crust into the bottom to bake. I par baked it until starting to brown.
  • Heat the butter in a saucepan and add the onions and celery and cook until the onions are translucent. Add your leftover gravy, adding a little beef broth or water if it is too thick, then add your potatoes (raw carrots if you don't have any carrots leftover from your roast) and cook until your potatoes are tender. Remove from the heat and add the leftover carrots if you are using them, the peas and the beef. Stir just to combine. Adjust the salt and pepper.
  • Pour the mixture into the dish that you baked the bottom crust. Gather the remaining dough and roll out again on a floured surface. Top the dish and crimp the edges and cut slits in the top to vent. Brush with the beaten egg. Cook in the 425 degree oven until golden brown.
  • Note: If you have a larger amount of roast left over, then just adjust your ingredients to the amount you have left and use 2 pie crust, one for the bottom and one for the top if needed.
    Note: Additionally, if you don't have enough gravy leftover, you can make the gravy with 2 tablespoons oil that you have heated and whisk in two tablespoons flour. Add two to three cups beef stock, whisking together and cook until thickened. An alternative is the brown gravy package you can get from the store!
Keyword beef, beef pot pie, leftovers, Pot Pie, pot roast
  • Click to share on Pinterest (Opens in new window) Pinterest
  • Click to share on Facebook (Opens in new window) Facebook
  • Click to email a link to a friend (Opens in new window) Email
  • Click to print (Opens in new window) Print
  • Click to share on X (Opens in new window) X
  • Click to share on Tumblr (Opens in new window) Tumblr
  • More
  • Click to share on Reddit (Opens in new window) Reddit

Filed Under: Beef Tagged With: beef, beef pot pie, Instant Pot, leftovers, pot roast

  • « Go to Previous Page
  • Page 1
  • Interim pages omitted …
  • Page 10
  • Page 11
  • Page 12
  • Page 13
  • Page 14
  • Interim pages omitted …
  • Page 67
  • Go to Next Page »

Primary Sidebar

Categories

  • Appetizer
  • Beans, Lentils, Grains, Rice
  • Beef
  • Bread
  • Breakfast/Brunch
  • Cocktails
  • Dessert
  • Dishes of Mexico, Tex Mex and New Mexico Red and Green Chile
  • Fish/Seafood
  • Ice Cream
  • Pasta
  • Pizza
  • Pork
  • Poultry
  • Salad Dressings
  • Salads
  • Salsas
  • Sandwiches/Burgers/Hot Dogs
  • Sauces, Compound Butters, Condiments
  • Side dish
  • Soups/Stews/Gumbo//Chili
  • Stocks, Broths, Gravies
  • Vegetables

Copyright © 2025 The 2 Spoons on the Foodie Pro Theme

Manage Cookie Consent
We use cookies to optimize our website and our service.
Functional Always active
The technical storage or access is strictly necessary for the legitimate purpose of enabling the use of a specific service explicitly requested by the subscriber or user, or for the sole purpose of carrying out the transmission of a communication over an electronic communications network.
Preferences
The technical storage or access is necessary for the legitimate purpose of storing preferences that are not requested by the subscriber or user.
Statistics
The technical storage or access that is used exclusively for statistical purposes. The technical storage or access that is used exclusively for anonymous statistical purposes. Without a subpoena, voluntary compliance on the part of your Internet Service Provider, or additional records from a third party, information stored or retrieved for this purpose alone cannot usually be used to identify you.
Marketing
The technical storage or access is required to create user profiles to send advertising, or to track the user on a website or across several websites for similar marketing purposes.
Manage options Manage services Manage {vendor_count} vendors Read more about these purposes
Preferences
{title} {title} {title}