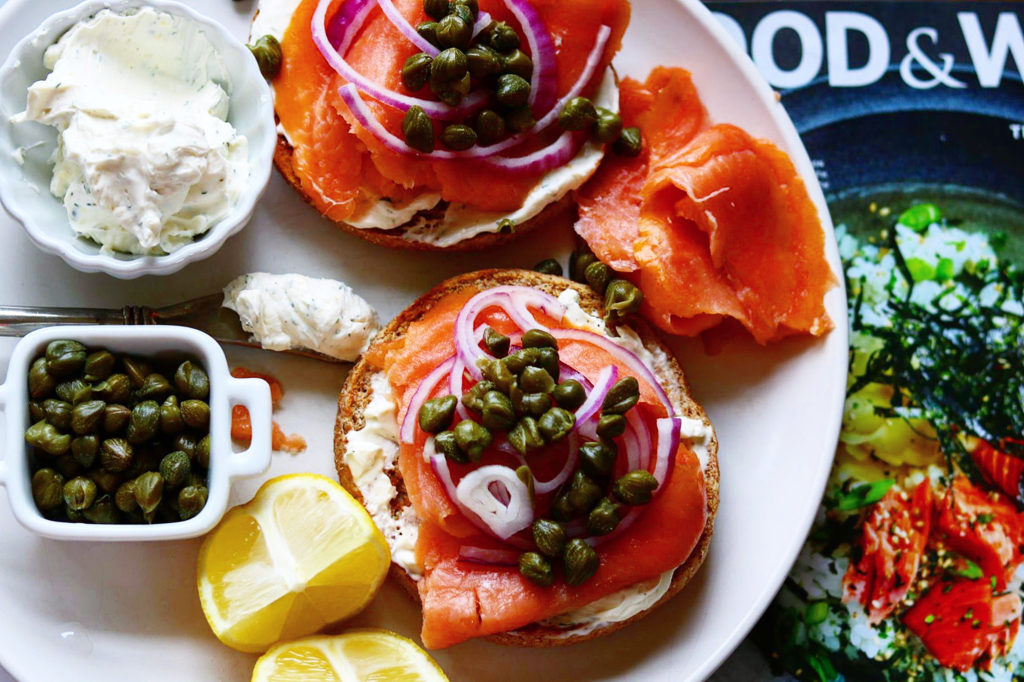
My morning started with this Whole Wheat Bagel with Smoked Salmon, Whipped Cream Cheese and Capers and my most recent Food and Wine Magazine which also has a Salmon/Rice Bowl on it that I have to make this week because it just looks so healthy and fresh, just like this bagel this morning.
I whipped room temperature cream cheese with lemon zest, the juice of one lemon, fresh dill and salt and pepper. Not only did this help it spread much easier, the added ingredients added so much flavor to the cream cheese and the lemon and dill go perfectly with the smoke salmon.
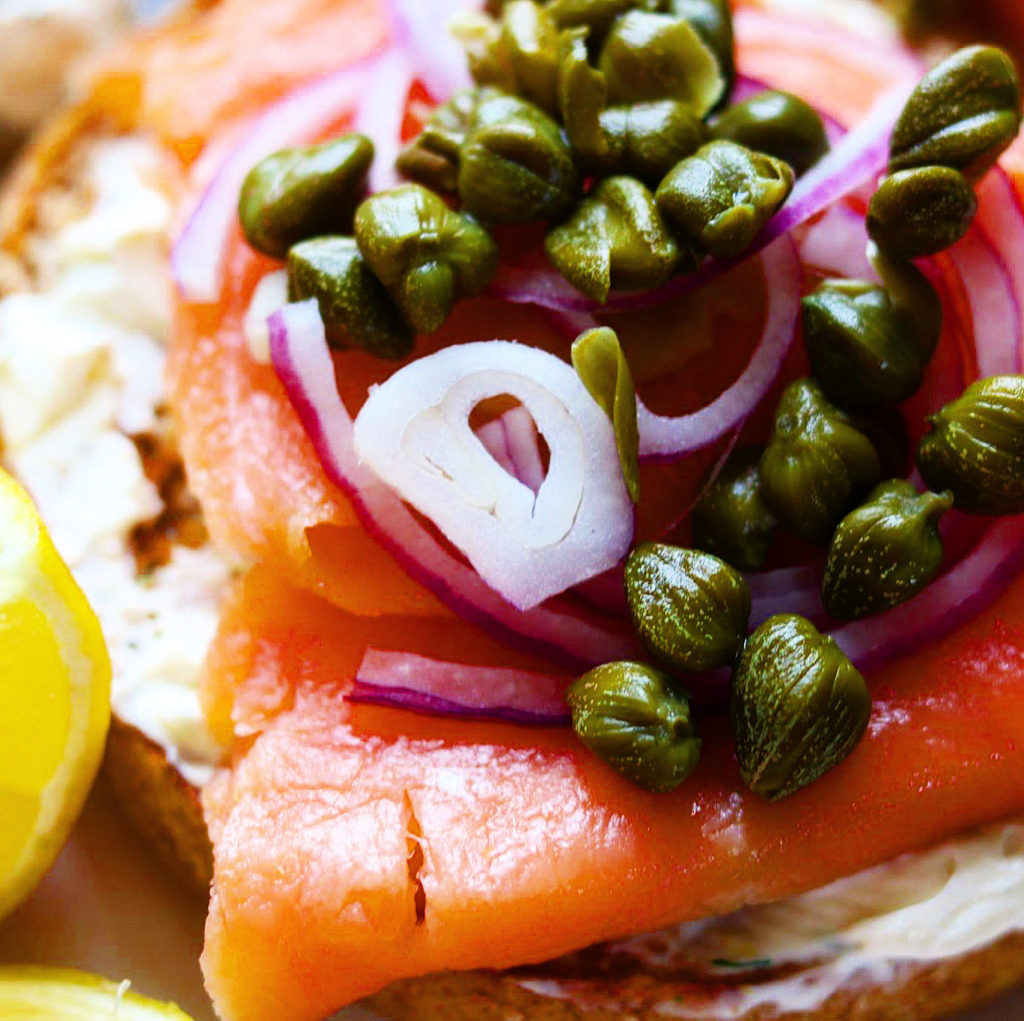
Whole Wheat Bagel with Smoked Salmon, Whipped Cream Cheese and Capers

I used wild Alaska smoked salmon from my local HEB, but you can use your preferred choice. You may even want to smoke your own salmon. Here’s a link for what I used: https://www.heb.com/product-detail/h-e-b-select-ingredients-alaskan-wild-smoked-sockeye-salmon/2234573. I used Capote Capers and they are the really large capers. Here’s a link for those: https://amzn.to/2tMtTN0.

This Avocado Toast with Poached Salmon may be another recipe you’d like with Salmon for breakfast: https://the2spoons.com/avocado-toast-with-poached-salmon/.

Whole Wheat Bagel with Smoked Salmon, Whipped Cream Cheese and Capers
Ingredients
- 4 bagels, toasted (I used whole wheat)
- 1-2 4 oz package of smoked salmon
- 8 oz cream cheese, room temperature
- zest of one lemon
- juice of one lemon
- 1-2 tbsp fresh dill, chopped
- salt and pepper
- capers
- red onion, thinly sliced
Instructions
- Combine the cream cheese, lemon zest, lemon juice, fresh dill and a pinch of salt and pepper to the bowl of your food processer and pulse until combined and smooth. Adjust salt and pepper if needed.
- Toast your bagel. Top each bagel with a generous amount of the whipped cream cheese, slices of smoked salmon, thinly sliced red onion and finally lots of capers. Serve with more lemon slices if you like. Enjoy!