• Skip to primary navigation
  • Skip to main content
  • Skip to primary sidebar

A cook named Rebecca

  • Home
  • Favorite Cookbooks
  • Recipes
  • Travel
You are here: Home / Home

Easy Spaghetti and Meatballs

November 11, 2019 by Becky Spoon

Easy Spaghetti and MeatballsJump to Recipe
Easy Spaghetti and Meatballs

I call this recipe Easy Spaghetti and Meatballs because I’m using a jar of one of my favorite marinara sauces rather than the homemade I usually make!! After realizing I didn’t have fresh basil, I had already planned on the meatballs, I was happy to find I had jars of marinara in my pantry. I didn’t want to run to the store so it worked out great! And easy! I used Rao’s Homemade Marinara Sauce. Here’s the link if your not familiar: https://www.amazon.com/Raos-Homemade-Marinara-Sauce-24-Ounce/dp/B004TQPJAM. Use your favorite sauce, you don’t have to use my choice, I just happened to have this on hand and like it.

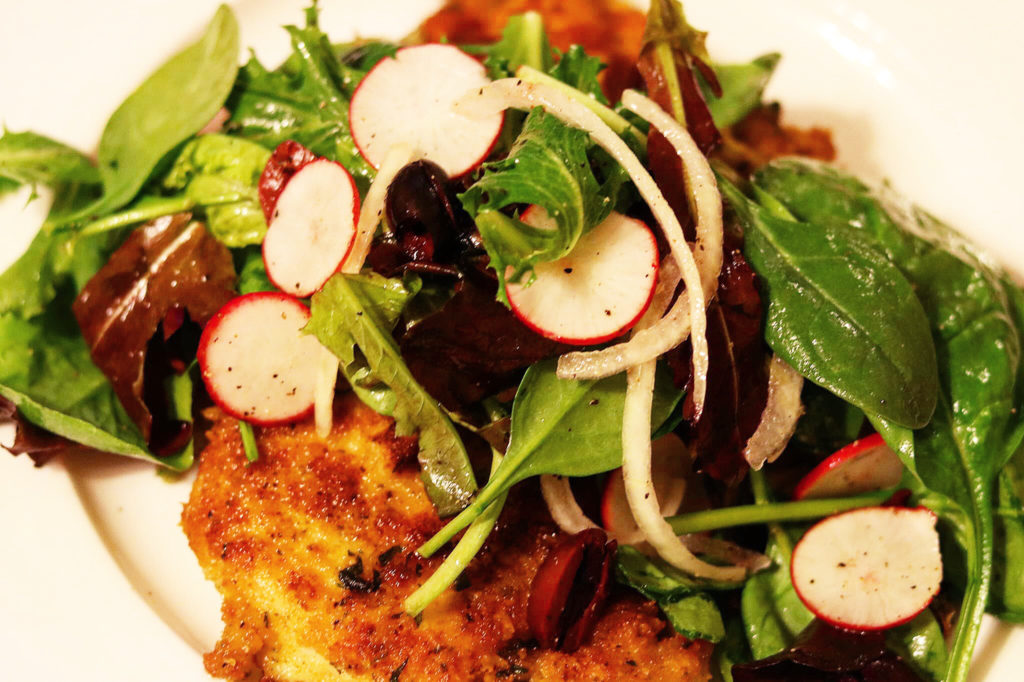
I think Spaghetti and Meatballs is a great dish when it’s cold and the weather is bad. It’s just one of those cozy comfort foods. Make your favorite garlic bread, add a green salad with a good vinaigrette and your meal is complete. This is a meal you can make ahead, either the day before or the morning of your dinner. Additionally, he meatballs and sauce freeze well.

Easy Spaghetti and Meatballs

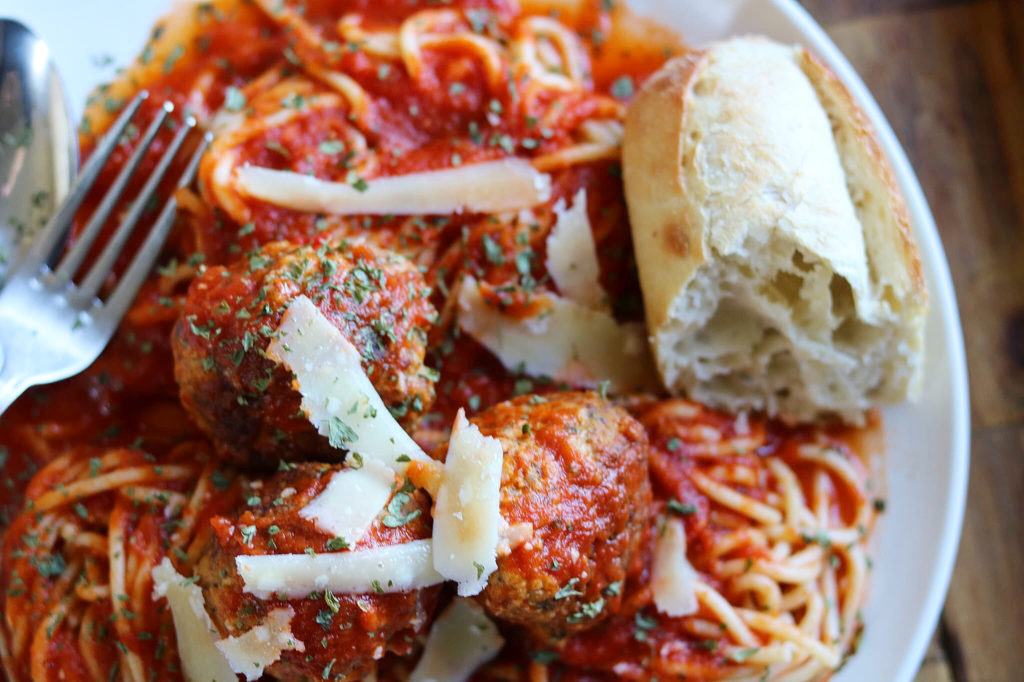
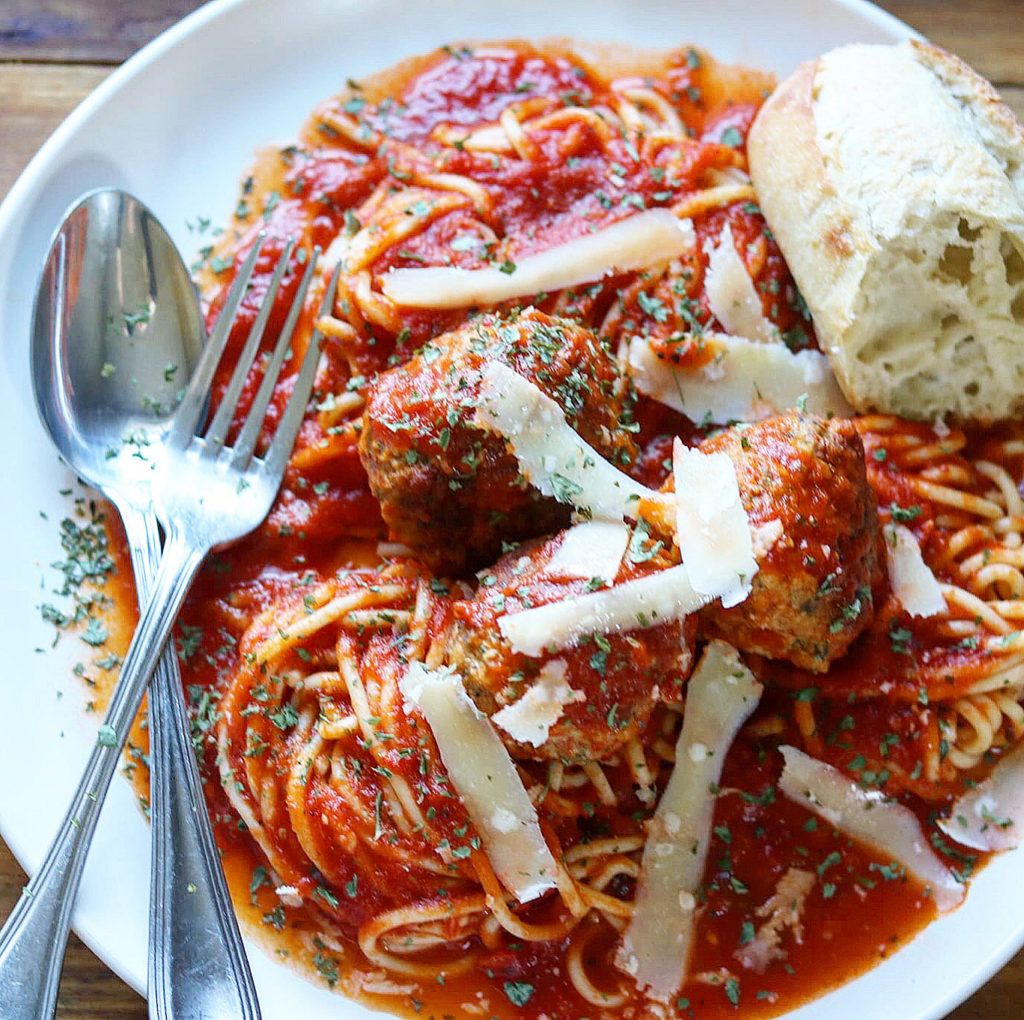
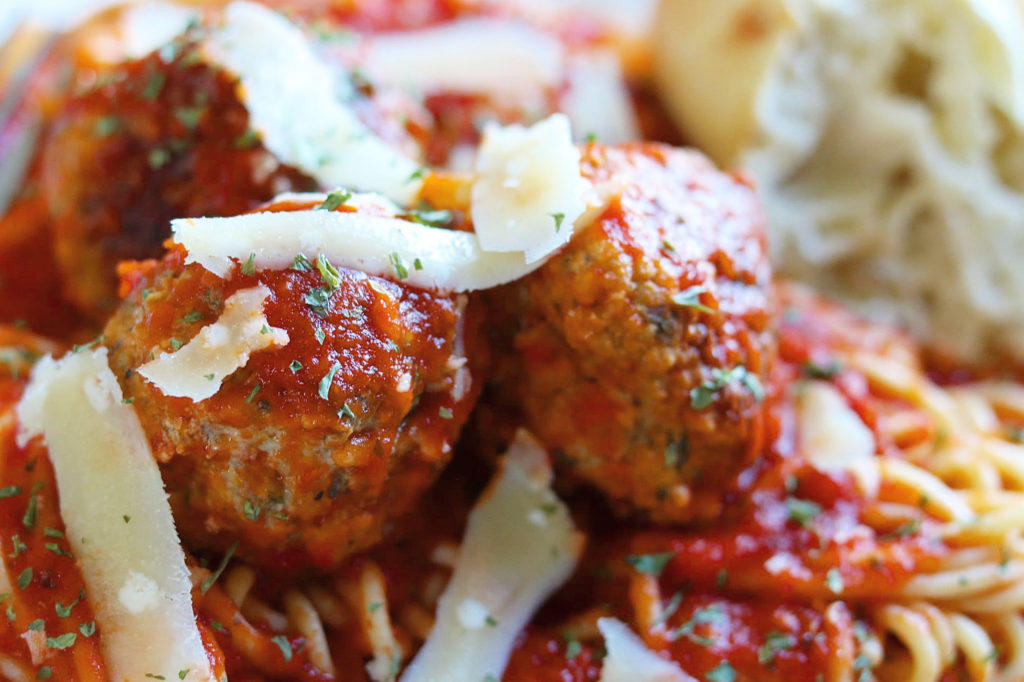
The meatballs are homemade and delicious! They are loaded with spices, lots of parmesan cheese along with 3 meats, ground beef, ground pork and Italian sausage. I used hot Italian Sausage but use mild if you prefer. I simmer the meatballs in the jarred sauce for about an hour to allow the flavors to come together.

Easy Spaghetti and Meatballs

Easy Spaghetti and Meatballs

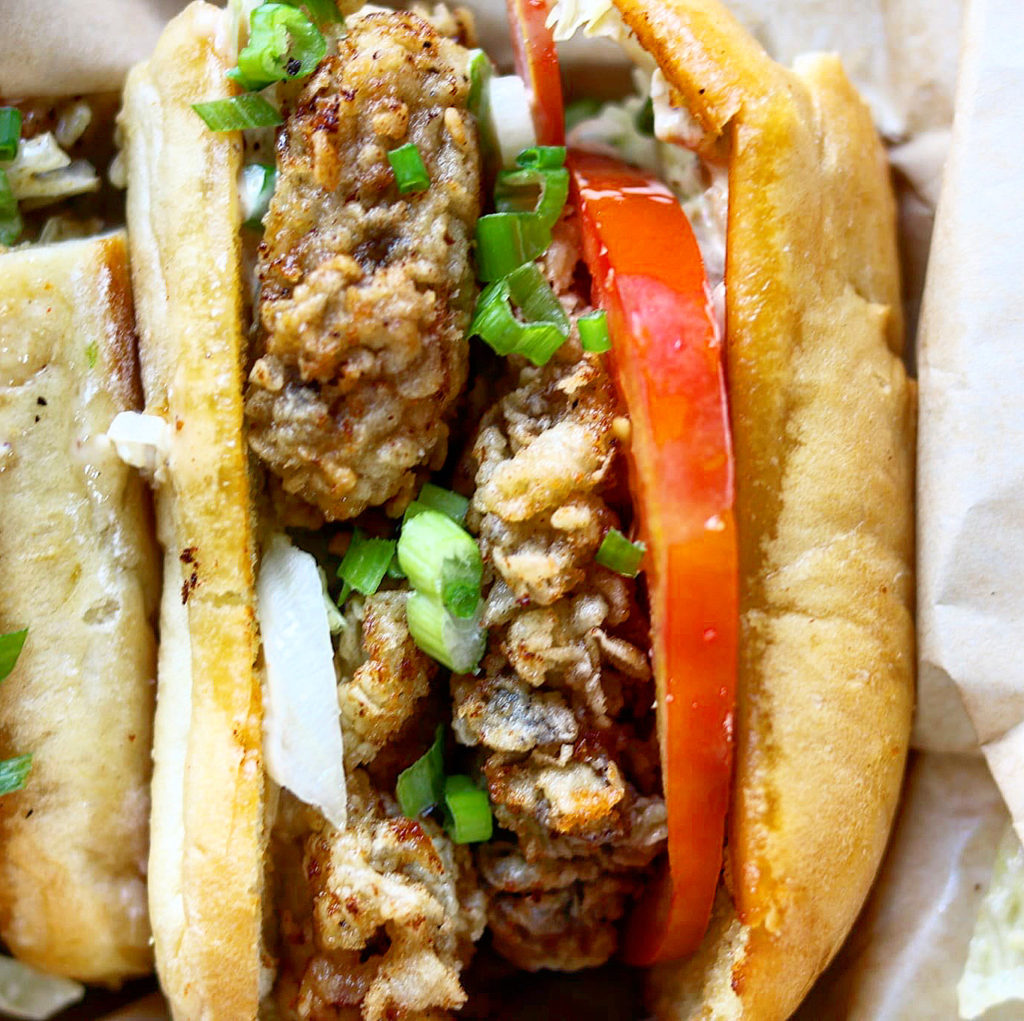
After your initial recipe, these meatballs make the perfect meatball sub. I make them all the time with my leftover meatballs. Just get a good French bread, toast it on both sides with a little butter (just the insides) heat your leftover meatballs, then add mozzarella. Place them under the broiler until your cheese has melted! A delicious sub!

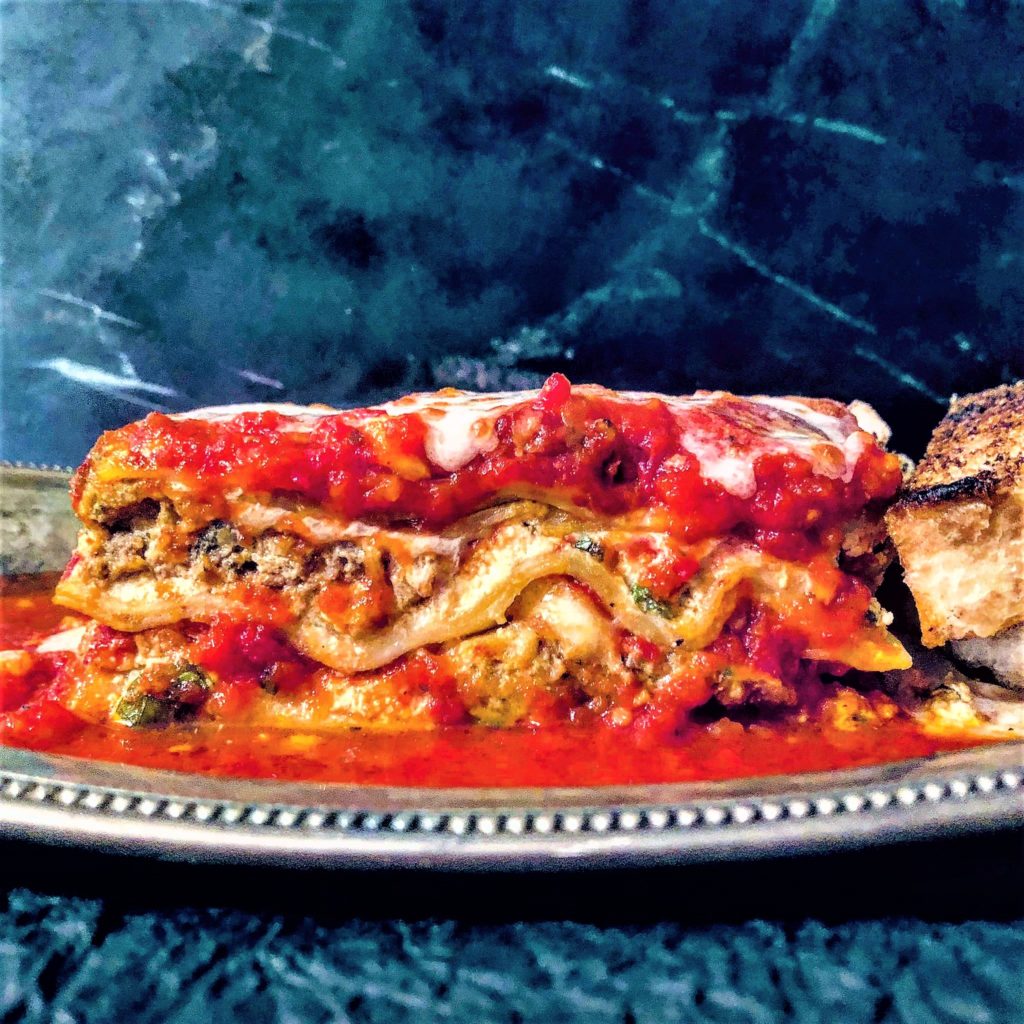
Another use for the leftover meatballs and marinara is a delicious Leftover Meatballs Lasagna. Here’s the recipe: https://the2spoons.com/leftover-meatballs-lasagna/.

Leftover Meatball Lasagna

Easy Spaghetti and Meatballs

Don’t forget to finish your dish with shaved parmesan or Parmigiano Reggiano as I did in this case. Parmigiano Reggiano is a little expensive but I think it’s well worth it. A small portion last a while. The rind left is perfect for adding to soups or pasta sauces too.

Easy Spaghetti and Meatballs

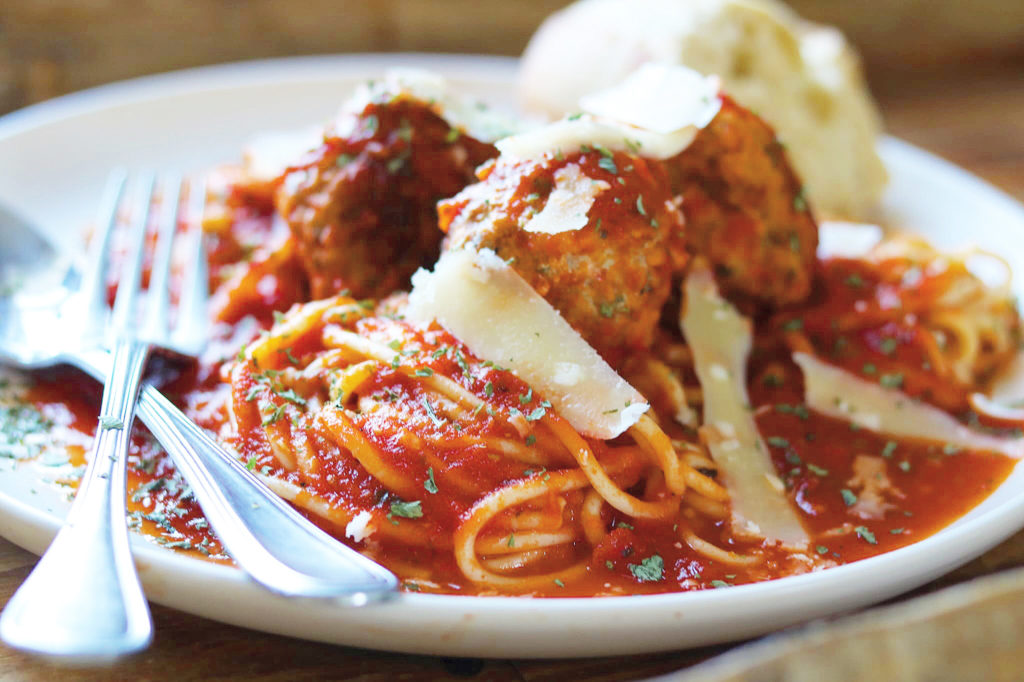
A couple of tips before you start your recipe. Always save a little pasta water when to help with your sauce. Never rinse your pasta. And, always dress your pasta with some of the sauce first, then complete your final dish.

Here’s the recipe!! Enjoy

Easy Spaghetti and Meatballs

Print Recipe
Coursedinner, Lunch, Main Course
CuisineItalian
KeywordItalian Food, meatballs, spaghetti, spaghetti and meatballs
Servings4 servings

Ingredients

For the Meatballs

  • 1 lb ground beef
  • 1 lb ground pork
  • 2 links Italian Sausage or 1/2 pound ground (I used hot)
  • 1 cup Italian Bread Crumps (I used Progresso)
  • 1 1/2 tsp salt
  • 1 1/2 tsp black pepper
  • 2 tbsp fresh Italian Parsley (Use dried if you don't have fresh)
  • 1 1/2 tsp oregano
  • 1 tsp garlic powder
  • 1/2 tsp onion powder
  • 5 small eggs or 3 large or extra large
  • 1 1/2 cup finely grated parmesan cheese
  • 3 tbsp olive oil for frying the meatballs

For the Final Spaghetti and Meatballs

  • 1 recipe Meatballs
  • 2 jars of your favorite marinara sauce or other sauce-
  • 1/2 jar water
  • 1 lb spaghetti
  • Parmesan or Parmigiano Reggiano for serving

Instructions

  • Combine all of the ingredients for the meatballs (except he olive oil) and using your hands, thourly combine. Form each meatball in a unifor 1/2 cup portion.
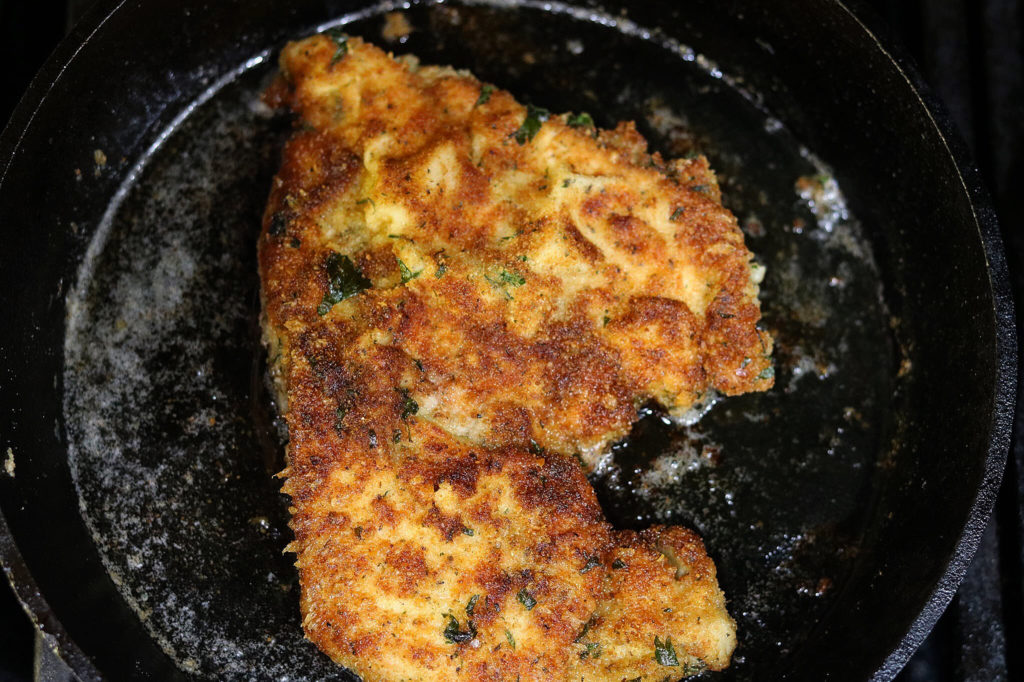
  • Heat the oil in a large skillet. When medium hot add the meatballs. Cook on one side, then turn to all other sides to brown each side.
  • Meanwhile, empty the jars of marinara into a large saucepan. Add 1/2 jar of water to the sauce. Heat the sauce. As the meatballs are browned, add them to the sauce. When all the meatballs have been removed and added to the sauce, I ladle some of the sauce into the skillet and deglaze the pan, then pour that into the sauce with the meatballs.
  • Simmer the meatballs in the sauce for about an hour. you could lessen the time, but I really like the meatballs to absorb the sauce.
  • Bring a large pot of water heavily salted to boil. Add the spaghetti and cook for about 20 minutes. I like my pasta fairly sauce, more than al dente but cook the spaghetti to your desired doneness.
  • When the spaghetti is done, using tongs, remove the spaghetti to a large serving bowl, reserving some of the pasta water. You can drain the pasta, do not rinse, but reserve some of the water. Ladle some of the sauce over the spaghetti adding a little of the pasta water and toss until well coated. Plate the pasta into 4 serving plates. Top with some of the meatballs, more of the sauce and the parmesan cheese. Bon Appetite.

Filed Under: Pasta Tagged With: meatballs, pasta, Spaghetti, spaghetti and meatballs

Beautiful Roast Chicken with Sauce Chasseur

November 9, 2019 by Becky Spoon

Roast Chicken with Sauce ChasseurJump to Recipe
Roast Chicken with Sauce Chasseur

This Roast Chicken with Sauce Chasseur recipe was in the October, 2019 issue of Food and Wine and I just had to make it. As with all recipes, mine isn’t exactly the same. I feel a recipe is a guide and you make your version as close to the recipe with what you have on hand or what you have available locally, like the Airline Chicken Breast the recipe calls for. What’s an Airline Chicken Breast?

Roast Chicken with Sauce Chasseur

Airline chicken is a food dish comprising a boneless chicken breast with the drumette attached. Skin on breast with 1st wing joint and tenderloin attached, otherwise boneless. The cut is also known as a frenched breast. https://en.m.wikipedia.org/wiki/Airline_chicken. If you don’t have a butcher that can cut an airline chicken breast, if you don’t want to cut it yourself, or you can find from a specialty store like Central Market, a bone-in, skin on chicken breast works just as well. That is what I used. You don’t quite have the dramatic presentation, but the taste is the same!

Roast Chicken with Sauce Chasseur

Beautiful Roast Chicken with Sauce Chasseur

Another Roast chicken recipe I think you will love is my Lemon and Garlic Roast Chicken. Here’s the link! https://the2spoons.com/lemon-and-garlic-roast-chicken/. This recipe is on my blog and it is a delicious recipe also!

Beautiful Roast Chicken with Sauce Chasseur

Here you go with the Roasst Chick with Sauce Chasseur recipe. Hope you Enjoy! I served it with a Basmati Rice that I steamed and just added a little salt, pepper and butter. The rice was the perfect accompaniment.

Beautiful Roast Chicken with Sauce Chasseur

Print Recipe
Coursedinner, Lunch, Main Course
CuisineAmerican
Keywordchicken, roast chicken, roast chicken with sauce chasseur, sauce chasseur

Ingredients

  • 1 tbsp neutral oil
  • 4 skin-on airline chicken breasts or skin-on, bone in chicken breast
  • 11/2 tsp salt, plus more to taste
  • 1/2 tsp black pepper
  • 4 large shallots, halved lengthwise, root ends trimmed
  • 8 thyme sprigs
  • 1/2 cup dry white wine
  • 2 cups low-sodium chicken broth
  • 2 tbsp unsalted butter
  • 8 oz fresh wild mushrooms, cleaned and cut into bite size pieces (about 3 cups)
  • 1/2 cup heavy cream
  • 1 large plum tomato, chopped
  • 1 tbsp finely chopped fresh chives
  • 1 tbsp finely chopped fresh tarragon (I used dried because I wasn't able to find fresh)

Instructions

  • Preheat oven to 350°F. Heat oil in a 12-inch stainless steel ovenproof skillet over medium-high. Season chicken with salt and pepper. Sear chicken in skillet, skin side down, until skin is crisp and golden brown, about 4 minutes. Flip chicken; add shallots, cut sides down, and press into skillet. Cook chicken and shallots until shallots are browned, about 4 minutes. Add thyme and wine to skillet. Bring to a simmer over medium-high; add broth, and return to a simmer. Carefully transfer skillet (so skin of chicken stays dry) to preheated oven, and roast until thermometer inserted into thickest part of breast registers 155°F, about 20 minutes.
  • Remove skillet from oven. Using tongs, place chicken breasts and shallots on a plate; tent with aluminum foil to keep warm while making sauce. Pour broth mixture through a fine wire-mesh strainer into a heatproof bowl or measuring cup, and set aside. Wipe skillet clean, and return to high heat.
  • Melt butter in skillet, and add mushrooms in a single layer. Cook, without stirring, until browned on one side, about 2 minutes. Shake skillet to loosen mushrooms; cook, without stirring, until mushrooms just begin to release their juices, about 2 minutes. Add strained broth mixture and cream to skillet, and bring to a boil over high. Reduce heat to medium-low, and simmer, stirring occasionally, until mushrooms are tender and sauce is thick enough to coat the back of a spoon, 10 to 15 minutes. Remove from heat, and stir in tomato, chives, and tarragon; season with salt to taste.
  • Slice chicken breasts crosswise into 1-inch-thick pieces. Divide chicken among plates, and serve with sauce chasseur.

Filed Under: Poultry Tagged With: beautiful roast chicken, dinner, main course, roast chicken, roast chicken with sauce chasseur

Simple and Delicious, Ham and Mushroom Frittata

October 31, 2019 by Becky Spoon

Ham and Mushroom FrittataJump to Recipe
Ham and Mushroom Frittata

I loved this Ham and Mushroom Frittata for breakfast and it was an absolute hit! Loaded with potatoes, Black Forest ham, green onions and mushrooms, this is simple and delicious!

Ham and Mushroom Frittata

Simple and Delicious, Ham and Mushroom Frittata

What’s the difference between a Frittata and a Quiche?

The biggest differences between a frittata and a quiche are the egg-to-dairy ratio, the presence of a crust, and the vessel that they’re baked in. 

A frittata is made up primarily of eggs, with a bit of full-fat dairy (think: sour cream, yogurt, heavy cream, or crème fraîche) to prevent dryness and make it fluffy and custardy, and any combination of fully cooked add-ins for flavor. The cooking begins on the stovetop — you’ll sauté any veggies or cook any meat that’s being added in an oven-safe skillet — then pour the egg mixture (eggs, dairy, cheese, and any seasonings, spices, or herbs) overtop. You’ll continue to cook it on the stovetop just until the edges begin to set, then transfer it to the oven to finish cooking. One 10-inch frittata makes four very generous portions, or six smaller slices.

(Source: https://www.thekitchn.com/frittata-vs-quiche-22301377?amp=1.)

I made this recipe for two; however, you can double or triple easily, just make sure to increase your skillet size. I use a non stick pan because I want my eggs to easily move around in the pan, and they’ll be easy to remove when finished.

Ham and Mushroom Frittata

Here’s another Frittata recipe on the blog: https://the2spoons.com/ham-mushrooms-potato-asparagus-and-cheese-frittata/.

Ham, Mushroom and Asparagus Frittata

Hope you enjoy this easy recipe!

Ham and Mushroom Frittata

Print Recipe
CourseBreakfast, Main Course
CuisineAmerican
Keywordbreakfast, eggs, frittata, ham, mushrooms
Servings2 Servings

Ingredients

  • 1 Large potato, sliced in rounds, about 1/4 inch
  • 1/2 cup Diced Black Forest ham
  • 1 Cup Mushrooms, sliced or chopped
  • 2 Green onions sliced
  • 4 Eggs, beaten
  • 1 Cup Gruyere cheese or other swiss or similar cheese, grated
  • Tbsp Olive oil
  • 1-2 Tbsp Butter

Instructions

  • Preheat the oven to 375 F.
    Add the oil to the skillet you will be finishing your Frittata in. Heat to medium and line the bottom of the pan with the potato rounds. Cook until brown and then turn. Lower the heat, place a lid on and cook until the potatoes are tender.
  • In a separate pan, add the butter and melt. Add the mushrooms and cook until done as nd liquid has evaporate. Add the green onions and chopped ham and cook , stirring often, until the onions have softened and the ham is heated through.
  • Beat the eggs in a separate bowl. Add a little cheese to the top of the potatoes, then add the ham, mushrooms and green onions. Pour the eggs over and cook, lifting the sides periodically allowing them to run under the cooked eggs. Continue until the eggs are set and add almost done.
  • Top the Frittata with the remaining cheese and place in the oven for about 10 minutes until the top is set s and slightly puffed, the cheese has melted and the top is beginning to grown. If you want a more golden brown, place under the broiler for about a minute! Serve immediately. Enjoy!
Ham and Mushroom Frittata

Filed Under: Breakfast/Brunch Tagged With: breakfast

Best Cheesy Au Gratin Potatoes

October 29, 2019 by Becky Spoon

Cheesy Au Gratin Potatoes

I made these Cheesy Au Gratin Potatoes as a side dish for my Beer Can Cornish Hen because I though how good they’d bee to sop up all those yummy juices from the sauce on the hens and I was right. The hens had a beautiful spice rub that made an even more beautiful sauce and the gruyere cheese I used in this dish just all went together so well. Here’s the link for my Beer Can Cornish Hen that you have to try! https://the2spoons.com/so-yummy-simple-beer-can-cornish-hen/.

Beer Can Cornish Hen

I used gruyere which alway works well because it melts beautifully. You can use cheddar or another good melting cheese of your choice. These are really simple. I cook my potatoes first to the point of “almost done”. I drain them and add them to some sautéed onions, Then I butter a baking dish and stack the potatoes a few at a time. When all the potatoes are in the dish, I pour the sauce over and add just a little more cheese to the top. I then bake them until browned and bubbly.

Best Cheesy Au Gratin Potatoes

Cheesy Au Gratin Potatoes

What’s the difference between Scalloped Potatoes and Au Gratin Potatoes? Here’s a little explanation for you: “Au gratin, by definition, means “covered with breadcrumbs or cheese and then baked until brown,” while scalloped potatoes refers to tubers that have been baked in a creamy sauce and covered with seasoned bread or cracker crumbs. The big difference between the two, then, is the cheese component.” Here’s the link for this reference: http://www.leaf.tv/articles/the-difference-between-potatoes-au-gratin-and-scalloped-potatoes/.

Here’s the delicious recipe! Enjoy!

Cheesy Au Gratin Potatoes

Print Recipe
Courseeasy side dish, Side Dish, Vegetable
CuisineAmerican
Keywordau gratin, au gratin potatoes, cheesy, cheesy au gratin potatoes
Servings6 servings

Ingredients

  • 4 medium russet potatoes, medium sliced I used a mandolin and used the largest slice
  • chicken stock for cooking the potatoes
  • salt
  • 2 tbsp butter
  • 1 tbsp olive oil
  • 1 medium onion, sliced
  • 2 tbsp flour
  • 1 1/2 cup cooking broth from the potatoes
  • 1 cup heavy cream
  • 1 fresh sage leaf (optional)
  • 2-3 sprigs fresh thyme
  • salt and pepper to taste
  • 3 oz gruyere cheese

Instructions

  • Slice the potatoes in a medium sliced round. I used a mandolin set on the largest cut. Place the potatoes in a sauce pan and cover with chicken stock. Season with a little salt. Bring to a boil and cook about 6 or 7 minutes. Remove the potatoes to a bowl with a slotted spoon reserving the cooking liquid.
  • While the potatoes are cooking add the butter and olive oil to a skillet and add the sliced onions. Cook until the onions are a beginning to brown. Remove them and add them to the bowl with the potatoes reserving the oil in your skillet. Gently distribute or combine the potatoes and onions, being careful to not break up the potato slices. If you break some, no worries, but you do want to keep them whole if possible.
  • Preheat the oven to 350 F. Butter the dish and start stacking the potatoes in the dish until all have been used. Use a dish that will just hold those potatoes, not too big.
  • To make the sauce: In the butter and olive oil skillet that you cooked the onions and reserved, heat and add 2 tablespoons flour and cook for a minute or so until it starts to brown a lilttle. Add the 1 1/2 cup of the cooking broth and whisk to prevent lumps. When the sauce has thickened, add the heavy cream and all of the cheese except just a small portion that you'll add to the top before baking. Cook until heated throgh. Check for salt and pepper and adjusst. Pour the sauce over the potatoes and bake until golden brown. If you want a little extra browning, place them under the broiler for just a few minutes watching closely until your desired browness. Remove from the oven and serve immediately. They can be brought to room temperature and re-heated later.
  • Beer Can Cornish Hen
    Beer Can Cornish Hen
  • Cheesy Au Gratin Potatoes
    Cheesy Au Gratin Potatoes

Filed Under: Side dish, Vegetables Tagged With: au gratin, au gratin potatoes, cheesy, Easy Side Dish, potatoes, side dish

Super Easy Chicken Milanese

October 26, 2019 by Becky Spoon

Chicken MilaneseJump to Recipe
Chicken Milanese
Chicken Milanese

This Chicken Milanese is super easy, and so delicious. Boneless and skinless chicken breast are pounded out thin, then breaded in a mixture of bread crumbs and parmesan cheese. The chicken is pan fried in a little butter combined with olive oil and then finished with lemon juice and topped with a simple salad. This is a great main course dish!

Chicken Milanese
Chicken Milanese

Super Easy Chicken Milanese

The name “milanesa” comes from the traditional Milanese dish known as cotoletta alla milanese, which is a veal cutlet that is breaded and fried lightly in butter. Immigrants from Europe brought this dish, and similar dishes such as Wiener schnitzel, to South and Central America. Here’s a link about the history: https://www.wisegeek.com/what-is-milanesa.htm. Typically, you will see a Veal Milanese, but I really like it with a boneless, skinless chicken breast.

If you wanted to add a side my sautéed green beans with lemon would be perfect. Here’s the link for those: https://the2spoons.com/perfect-browned-butter-and-garlic-green-beans/.

Hope you try this easy recipe soon!

Chicken Milanese

Print Recipe
Coursedinner, Lunch, Main Course
CuisineAmerican, Italian
Keywordchicken, chicken milanese, dinner, lunch, main course, milanese
Servings4 servings

Ingredients

  • 4 boneless, skinless chicken breast
  • 2 cups all purpose flour
  • 3 eggs, beaten
  • 2 cups Italian Breadcrumbs
  • kosher salt and fresh ground black pepper
  • 1/2 cup grated parmesan cheese
  • 1/4 cup chopped fresh parsley leaves
  • 1/2 cup blended oil (canola oil and olive oil)
  • 4 tbsp unsalted butter
  • Juice of 2 lemons

For the Salad

  • 4 Cups Arugula or a spring mix salad greens
  • 1 lemon
  • 1/2 Cup Kalamata olives
  • 1/2 Cup Thinly sliced radishes
  • 1/2 medium onion, thinly sliced
  • 2 plum tomatoes, diced
  • Extra virgin olive oil
  • Salt and pepper
  • Shaved Parmesan cheese

Instructions

  • Preheat the oven to 375 degrees F.
  • For the chicken breastl: To pound the chicken breast, line a cutting board with plastic wrap and place a breast portion on top. Place another piece of plastic wrap over the chop making sure it's completely covered. Use a meat mallet to pound the chicken evenly, making sure the middle and the edges are the same size, about 1/2 inch in thickness. Remove plastic from the top and set the pounded chicken aside; repeat with the rest of the chicken breast.
  • Set up 3 shallow baking dishes, one with the flour, one with the beaten eggs, and the third with the breadcrumbs. Season the flour and breadcrumbs with salt and pepper. Mix the Parmesan and parsley into the breadcrumbs. Season each breast with salt and pepper on both sides. Dredge a breast in the flour. Shake off any excess flour and then dip it into the egg mixture and then into the breadcrumbs. Once the breast is in the breadcrumbs, use your hand to scoop the crumbs up and over the meat and press to make sure it adheres and evenly coats the breast. Repeat the breading procedure with the remaining pieces.


  • Heat a 12-inch skillet over medium-high heat and add 1/4 cup blended oil. When the oil is hot, add two of the breaded pieces to the pan. Cook for 3 minutes or until golden brown, then turn the breast gently with tongs and cook for another 3 to 5 minutes on the other side. Add 2 tablespoons of butter, and when the butter is almost brown, drizzle the juice of 1 lemon into the pan and over the crisp chicken. Remove the pieces and place them on a sheet pan. Drizzle the pan drippings over the breast. Repeat with the remaining 1/4 cup oil, remaining chicken breast, remaining 2 tablespoons butter and remaining lemon juice.
  • For the salad: In a medium bowl, combine the arugula or spring mix, radishes, olives, onion slices and tomatoes. Squeeze the lemon over the salad, add salt and pepper and toss. Drizzle with extra virgin olive oil and toss again.
  • To serve: Place a chicken breast on a serving plate and add some salad on top. Finish with some Parmesan shavings. Repeat with remaining chicken breast, salad and Parmesan and serve.

Filed Under: Poultry Tagged With: chicken milanese, milanese

Fun! Super Good Oyster Po’Boy

October 24, 2019 by Becky Spoon

Oyster Po’BoyJump to Recipe
Oyster Po’Boy
Oyster Po’Boy

This Oyster Po’Boy is super good and fun!! These delicious fried oysters are served on a buttered and toasted hoagie bun, slathered with homemade Remoulade! I love fried oysters!

Here’s a little history of the po’boy from this link: https://www.whereyat.com/the-history-of-the-po-boy

“No one is going to argue about how important food is to the very identity of New Orleans. The city has graced the culinary world with all kinds of savory (gumbo, crawfish etouffée, red beans and rice) and sweet (beignets, Bananas Foster, sno-balls) creations. One New Orleans food dish, however, is almost deceptive in its simplicity, and that is the humble po-boy.

For the uninitiated, a poor boy (aka po-boy, po’ boy, or po boy) is a sandwich that uses a six-inch or foot-long baguette-style bread that is more commonly known as French bread. Traditionally, po-boys are filled with either roast beef or fried seafood (oysters, shrimp, crab, what have you) and topped with pickles, lettuce, tomatoes, and mayonnaise. Nowadays, however, you can fill a po-boy with basically anything you want (burger patties, hot sausage, french fries, alligator meat, caprese salad, etc.). But for a sandwich with such a modest look, it has a pretty unique history behind it.

The sandwich itself has been present in New Orleans since around the late 1800s, when it was then called an oyster loaf (literally, fried oysters on French loaves). The origins of when it started being called a “po-boy” are actually not too certain, because a lot of different legends have attached themselves to the sandwich over the years. The most common consensus to explain the “po-boy” term, at least locally, comes from the story of the Martin brothers.

In the mid-1910s, Bennie and Clovis Martin moved to New Orleans from their home in Raceland, Louisiana, to work as streetcar conductors. In 1922, the brothers then decided to open up their own restaurant, Martin Brothers’ Coffee Stand and Restaurant, specializing in French loaf sandwiches with anything you wanted on them. These sandwiches wouldn’t be called po-boys until 1929, when members of the Amalgamated Association of Street and Electric Railway Employees of America, Division No. 194, went on a four-month- long strike, thereby leaving over a thousand union streetcar workers without a source of income.

The Martin brothers, to show their support for the workers affected by this strike, wrote a letter to one of the local newspapers, stating that they would give a free meal to any members of Division 194. Legend has it that when the brothers saw one of the union workers walk into their restaurant, one of them would yell, “Here comes another poor boy!” Since the free meal given to these workers often included the customary sandwich, the name “poor boy” gradually became associated with the sandwich itself.” Click on the link to read further.

Oyster Po’Boy
Oyster Po’Boy
Fried Oysters
Fried Oysters

Fun! Super Good Oyster Po’Boy

The oysters are very simple. I’ve seen a lot of recipes use cornmeal, some of the recipes use cornmeal and flour, some of the recipes use lots of spices, but I have found the best breading is a simple all purpose flour seasoned with salt and pepper.

Want another po’boy or sub type sandwich? Check out this recipe on the blog: https://the2spoons.com/perfect-roast-beef-and-provolone-sandwich/.

Here’s the simple recipe for this delicious oyster po’boy. You can substitute the oysters for shrimp if you don’t like oysters. Enjoy!

Fun! Super Good Oyster Po’Boy

Print Recipe
Coursedinner, Lunch, Main Course
Cuisinecajun, creole
Keywordappetizer, louisuana, oyster, oyster po’boy, po’boy
Servings2 servings

Ingredients

For the RÉMOULADE

  • 1 Cup Mayonnaise
  • 1/2 Cup Creole mustard (like Zatarains)
  • 2 Tbsp Louisiana hot sauce
  • 1 Tbsp Honey
  • 1 Tsp Finely chopped garlic
  • 1/8 Tsp Cayenne pepper
  • 1/2 Tsp file powder
  • 1/4 Cup Minced green onions

For the Oysters

  • 2 Pints Oysters
  • 2 1/2 All purpose flour
  • 1/2 Tsp Each Salt and pepper

To build the po’boy

  • rémoulade
  • Shredded lettuce
  • Sliced tomatoes
  • 2-4 Hoagie Buns
  • Butter for roasting the buns

Instructions

For the RÉMOULADE

  • Place ingredients in mixing bowl and whisk until well combined. Transfer to storage container, cover, and refrigerate for up to one week.

For the Oysters

  • In a mixing bowl, combine the flour with salt and pepper .
  • Remove oysters from liquor, draining excess so oysters are still wet but not dripping. 
  • One at a time, toss the oysters to coat all sides in the breading (gently press the breading onto the oyster to help it adhere). Transfer to waxed-paper-lined plate or cookie sheet until oysters are all breaded.
  • In a heavy stockpot with high sides fitted with a deep-frying (or candy) thermometer, bring at least two inches of peanut oil to 375ºF.
  • Keeping the heat at a steady 375ºF and working in batches of six, fry the oysters until they are golden brown and just cooked through, about 90 seconds. (The oysters will curl slightly when they are done.) Using a slotted spoon, remove oysters and drain on brown-paper-bag-lined plate. 

to build the po’boy

  • Heat a large skillet or griddle. Slit the hoagie buns and butter the insides. Place on a griddle and toast until golden and browning on the side. Flip and cook just a few seconds just to warm.
  • Slather both sides with the rémoulade.
  • Pile some shredded lettuce on the bottom bun, then pile with the fried oysters. Top with the sliced tomatoes that have been lightly salt and peppered. Slice in half and enjoy!

Filed Under: Fish/Seafood Tagged With: oysters

  • « Go to Previous Page
  • Page 1
  • Interim pages omitted …
  • Page 32
  • Page 33
  • Page 34
  • Page 35
  • Page 36
  • Interim pages omitted …
  • Page 65
  • Go to Next Page »

Primary Sidebar

Categories

  • Appetizer
  • Beans, Lentils, Grains, Rice
  • Beef
  • Bread
  • Breakfast/Brunch
  • Cocktails
  • Dessert
  • Dishes of Mexico, Tex Mex and New Mexico Red and Green Chile
  • Fish/Seafood
  • Ice Cream
  • Pasta
  • Pizza
  • Pork
  • Poultry
  • Salad Dressings
  • Salads
  • Salsas
  • Sandwiches/Burgers/Hot Dogs
  • Sauces, Compound Butters, Condiments
  • Side dish
  • Soups/Stews/Gumbo//Chili
  • Stocks, Broths, Gravies
  • Vegetables

Copyright © 2026 The 2 Spoons on the Foodie Pro Theme

Rate This Recipe

Your vote:


A rating is required
A name is required
An email is required